Quite often in the Apollo hoax world the Soviets get mentioned, notably that if they had found anything untoward in the Apollo missions they would have gladly taken the opportunity to expose their American counterparts as frauds. They never did. Instead, they ploughed on with their own unmanned exploration of the lunar surface with a pair of remote controlled rovers: the Lunokhods.
There were two in all -
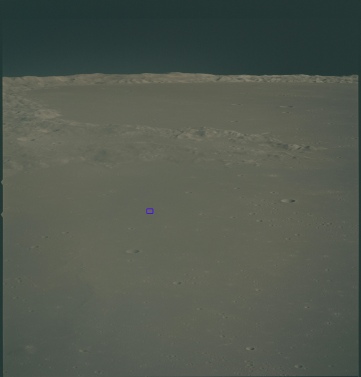
While Apollo 15 did pass close by to the landing area, it was much too distant to capture it in any of the photographs it took. The image below left, for example, is AS15-
Sadly then, we can’t use Lunokhod-
High resolution coverage of the area explored by Lunokhod-
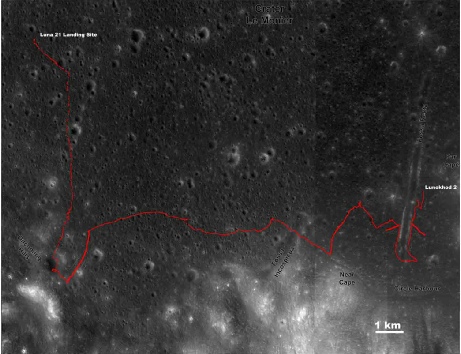
Let’s have a look at the area under discussion, firstly as seen in the best image available of the crater before Apollo or Luna, high resolution frame 3 of image 78 taken by Lunar Orbiter IV. Luna 21’s landing point is marked in red, and Lunokhod-
Let’s see how that compares with LRO and Apollo versions of the same area.
Hopefully it’s fairly obvious from this that both the Apollo and LRO versions contain considerably more detail than is present in the Lunar Orbiter image of the site, which means that no-
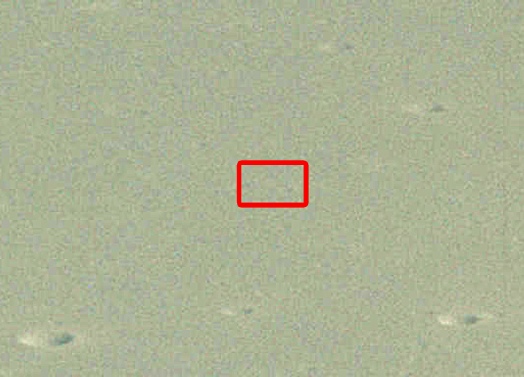
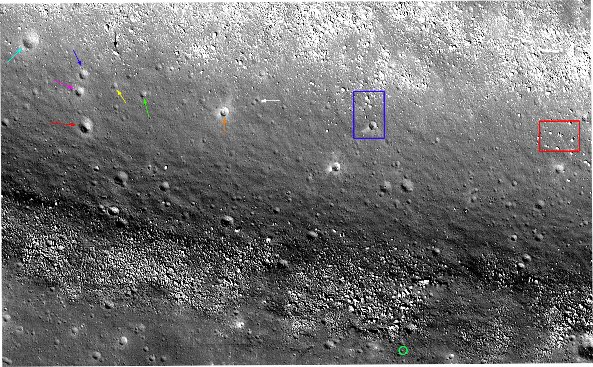
So, let’s move in a little closer and have a look at the starting point for the Lunokhod journey -
Granted Apollo’s view of the site is not as clear as the LRO, but it is still clear enough to show that there is no Luna 21 and there are no tracks visible from Lunokhod. As a little aside, there is also enough detail to show that the Apollo image contains the same craters as those in the LRO view.
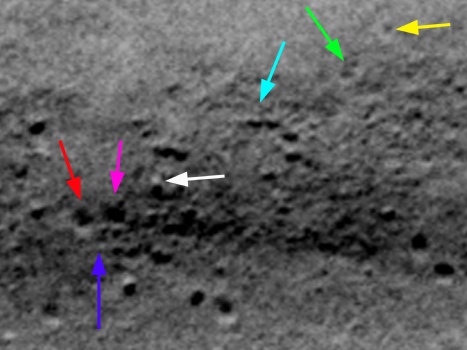
OK, so what? Well, the important bit now is to look at what Lunokhod could see from its cameras as I looked back its parent craft. Here’s the view (all panoramas are from this site).
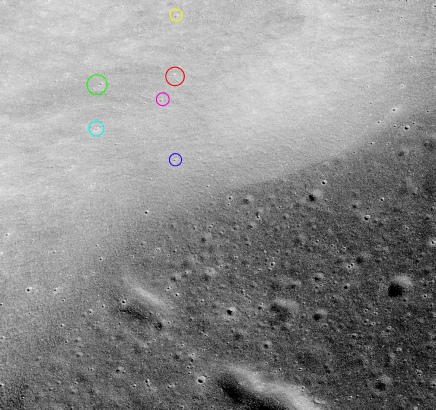
Now let’s see if we can identify those features on LRO (top) and Apollo (bottom) versions:

The two craters centre left at the top of the image help demonstrate that the view is looking south-
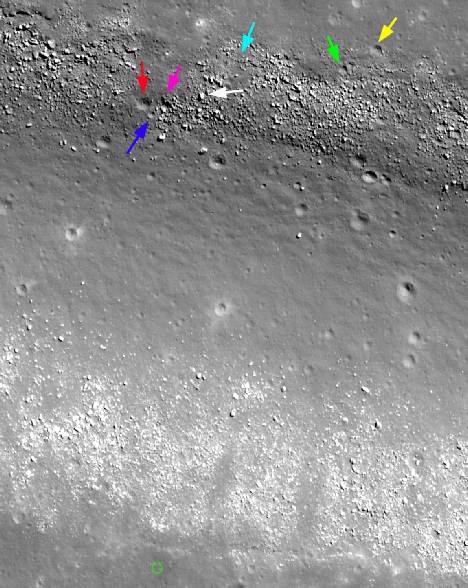
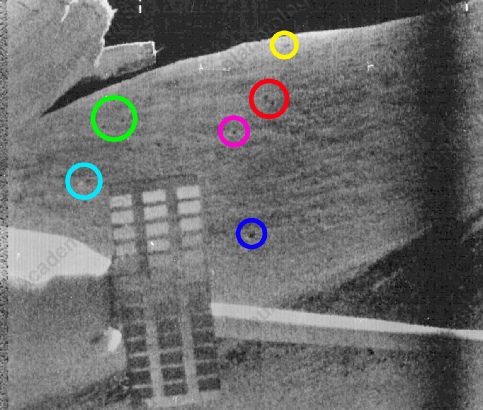
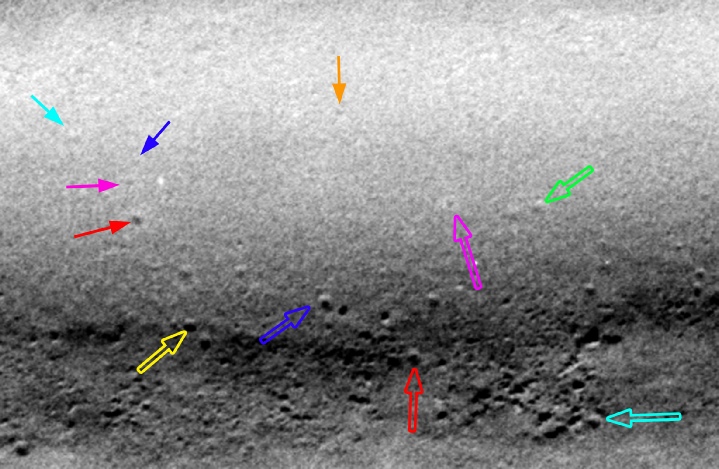
Let’s zoom into those hills a little and add some arrows on some prominent features.
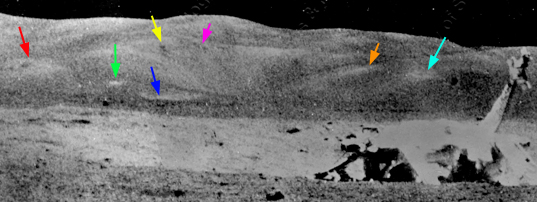
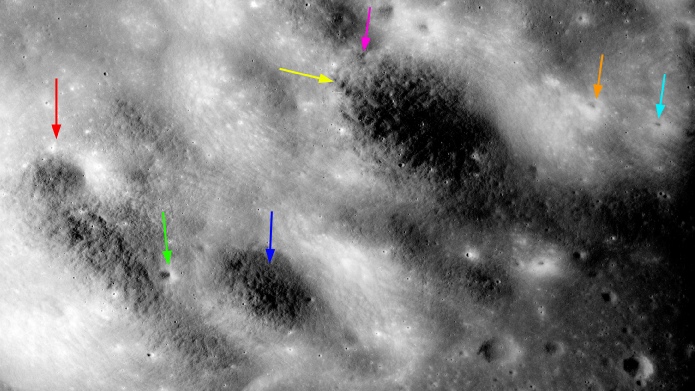
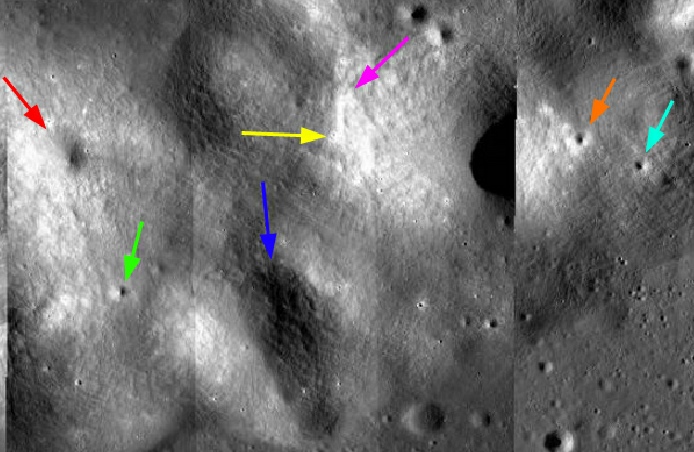
The first thing to point out is that, entirely as expected and despite the LRO image being a screendump of the map available on the internet, the view of the area completely vindicates the Apollo image. All of the small details are there, and none of these small details was visible in pre-
Of all the features highlighted I will confess I am less sure of the two picked out by the yellow and blue arrow, but I am absolutely happy that I have got the area in question correct. It is possible that the magenta arrow actually points to the two large craters at the top and centre of the vertical shots, but the appear to over a ridge line and therefore may not have been visible from Lunokhod. Just for fun, here’s an additional Apollo 11 image taken by the Metric Mapping Camera (AS15-
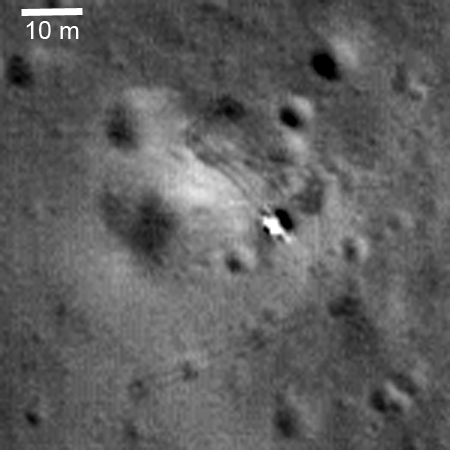
Lunokhod trundled its way across the floor of Le Monnier over the course of several lunar days, finally ending up at Fossa Recta -
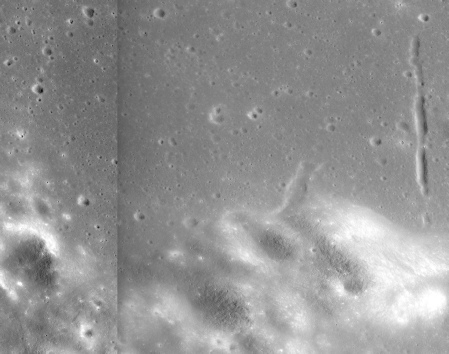
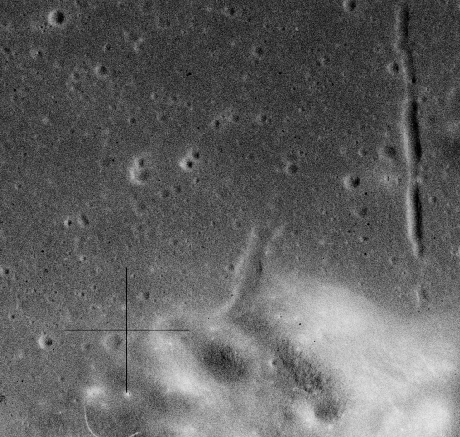
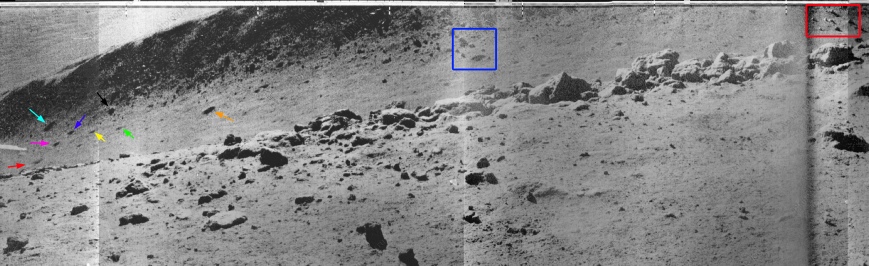
As we will see, however, there are some details in Fossa Recta that can be seen in Apollo and LRO views of the site. Before we show that, however, we need to show what we are looking at in the Lunokhod panoramas. The first stop with any kind of decent view of the fossa is this one:

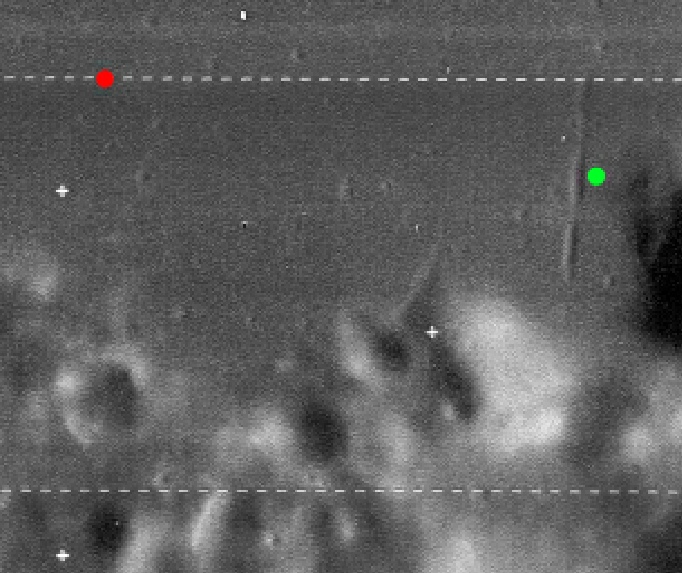
There are some quite distinctive tread marks, so we ought to be able to figure out where we are and identify the craters in the opposite wall. The images below show a crop of the Lunokhod image (top left) compared with an LRO view (right) and an Apollo Panoramic Camera view (bottom left). East is at the top.
The green circle in the LRO image indicates the approximate location of the Lunokhod photograph, based on the tracks it left behind.
Interestingly, this photograph makes it into the ‘International Atlas of Lunar Exploration’, a weighty and expensive academic tome. In this section available on line, the book inverts the image and states that it was taken looking towards Near Cape (which is to the south-
There is a similar confusion for the next image we look at here:

Again the image in the Atlas is inverted (and is placed incorrectly in the image sequence) with it stating that the image shows hills between near and far cape. This would put this image as running north-
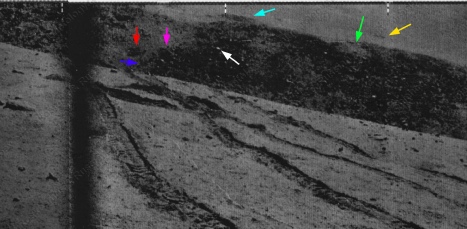
In reality, south is on the left of the image, and the hill in the distance are Near Cape, as we will see below. The top image is the LRO view rotated to match that of the photograph. West is at the bottom of the photograph. The arrows and square boxes identify the same features in each photograph. The yellow circle identifies the approximate location of the rover when it took the photograph.
And here is Apollo’s view. Although they are more difficult to make out, the solid arrows are a match for those in Lunokhod and the LRO photographs. The hollow arrows point to features that are visible in the LRO image and should help confirm the location of the solid arrows.
At the southern end of the image we can get a glimpse of the Near Cape, and once you identify a couple of craters you can begin to spot other ones as well. Here they are (below left) compared with the Apollo image (below right).
The Atlas is currently undergoing preparations for a revised edition, and that author tells me that the images will be correct in the next one.
This LRO website on Lunokhod-
So -
Firstly, we’ve managed to identify features in Lunokhod-
Secondly, we’ve managed to see that identifying lunar locations is a tricky business, with a couple of errors in some prestigious websites and publications by showing where the Lunokhod images were taken.
Thirdly, we’ve been able to identify features in Lunokhod images that also appear in photographs taken in Lunar orbit by Apollo spacecraft, showing that Russian photographic evidence does indeed support the Apollo programme.
Tovarisch, Kamerad.