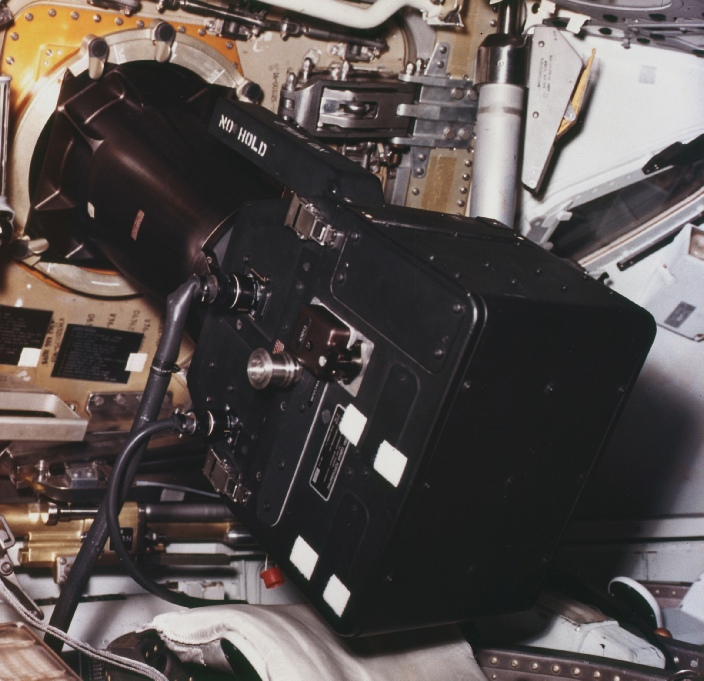
Hycon camera in place in the Apollo 13 CSM (supplied by Ed Hengeveld)
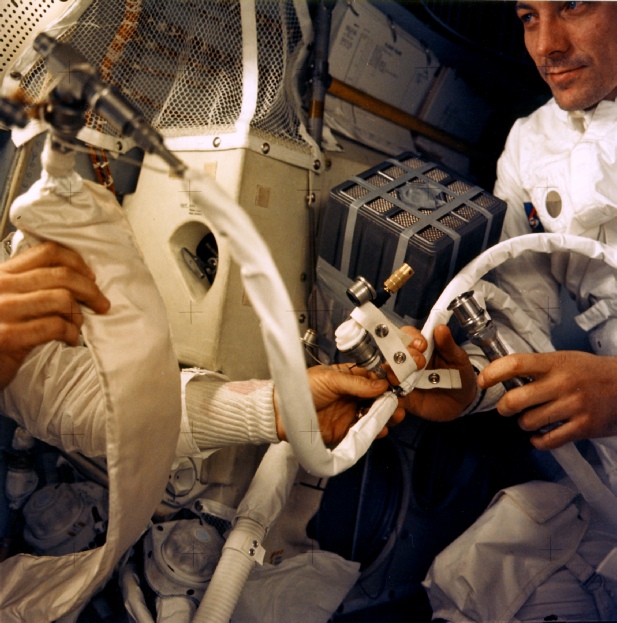
Obviously the camera didn’t get used in Apollo 13 in the way it was intended, but the Apollo Lunar Surface Journal (and this National Archive record) reports that the hoses on it were cannibalised to make the ad hoc CO2 scrubber, as shown here.
The Apollo Hycon Camera
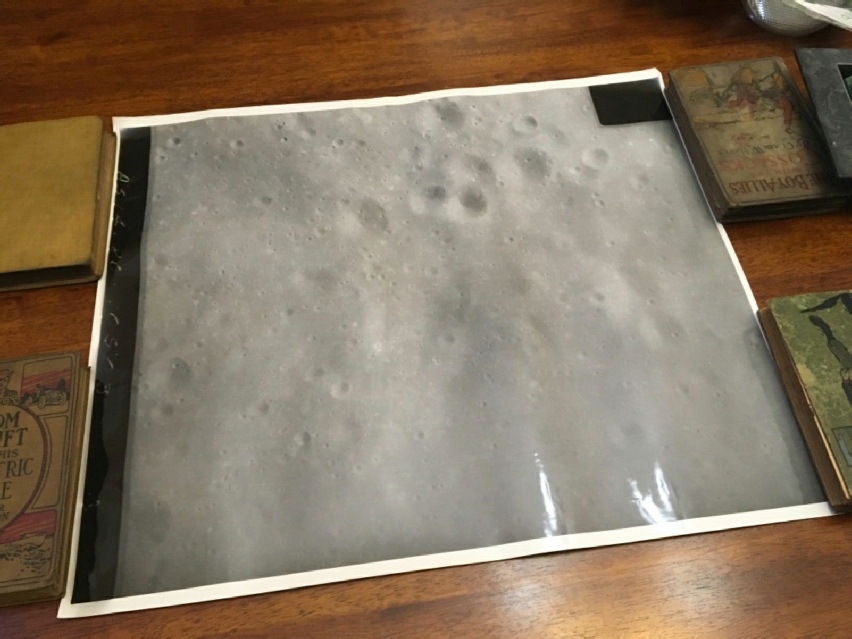
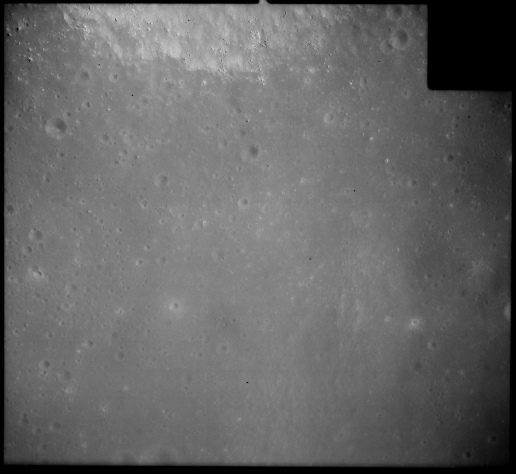
On Apollo 13 and 14, the two missions carried a very high powered camera designed to take stereoscopic images in very low orbit (as low as 10 nautical miles) with high resolution film and powerful lenses. The aim was to image landing sites and other targets of interest. The camera is described here. It was designed to be mounted in the crew hatch window of the CSM, as shown in this photograph.
AS13-
However, there is no reference in the transcripts to the Hycon camera being used in this way, and all other evidence eg here) points towards the cables in view being suit hoses..
The story of Apollo 14’s Hycon camera is an interesting one for two reasons. Firstly, there are the astonishingly clear photographs that it took. Secondly, some idiot tried to make a conspiracy out of there not being any good copies available, and that an online report had a page missing that he found in a different copy.
We’ll deal with conspiracy claim first, because it is very simple to dismiss. The originator of the claim is a conspiracy nut by the name of awe130. He likes to refer to himself in the plural in order to give the impression that he is part of some large movement, but in reality he is just one guy. I’m not going to provide links to his nonsense, I don’t see why he should get the web traffic.
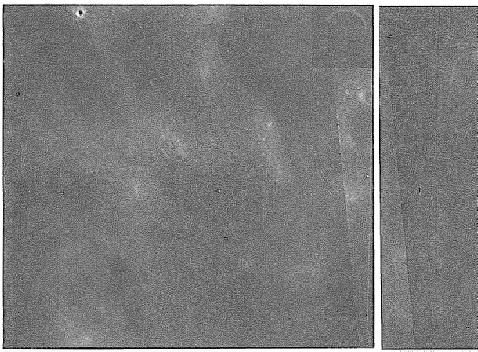
His claim is based around his uploading of what he claimed was the only complete archive of photographs taken by the Hycon camera. In reality, all he had was a what was probably a microfiche version of exactly the same report available via the ALSJ. This was pretty easily proved by comparing the front cover of the ALSJ one (below left) and his version (below right).
Notice the blanked out areas that coincide with the text on the ALSJ version of the document. Notice the bit that has been cropped from his version (you can actually see the top of some of the letters). Finally, look at the staple mark that is in exactly the same place and looks exactly the same. Make no mistake, they are the same document. All awe130 has is a version with a couple of extra pages that have somehow gone astray from the version linked to by the ALSJ.
That’s pretty much it. Two missing pages from a document = a grand proof of…erm…well, who knows what really. He isn’t exactly clear. He’s claiming they didn’t go to the moon by using photographs they took on the moon as proof. Go figure.
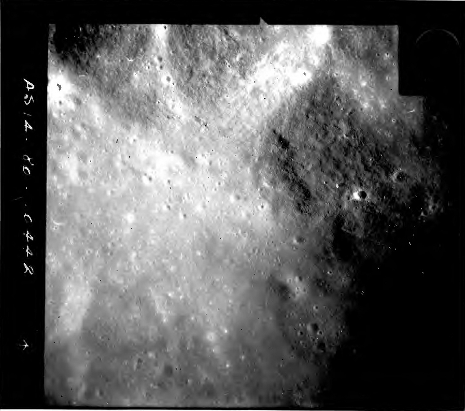
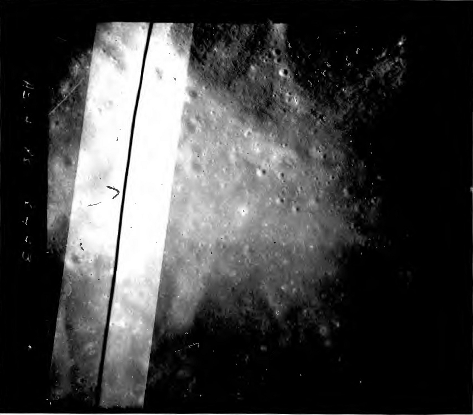
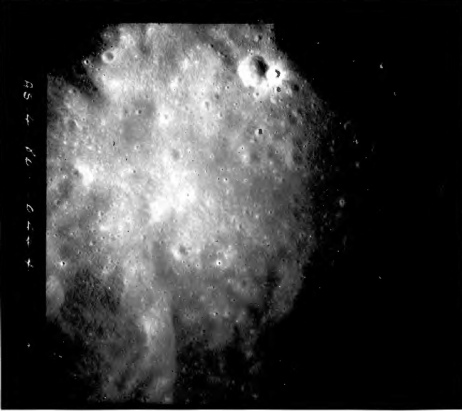
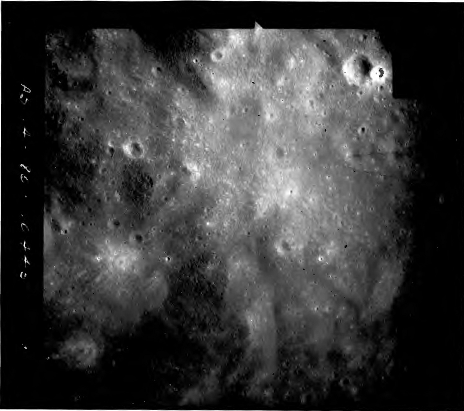
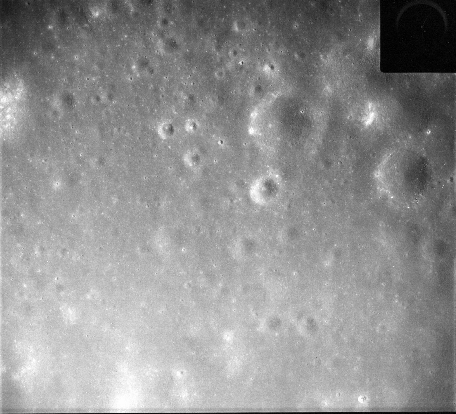
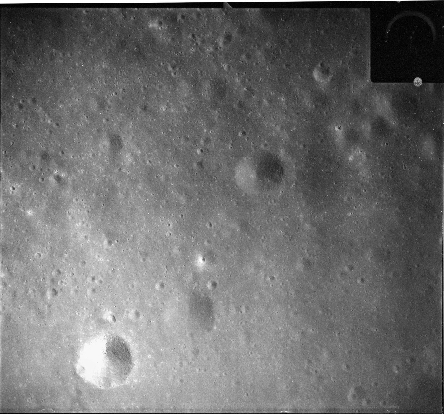
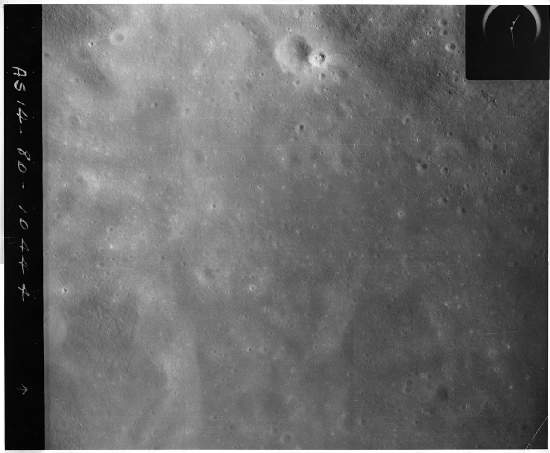
It wasn’t hard to track down the missing images either. All I needed to do was get in touch with the Pacific Regional Planetary Data Center named on the front, or at least its modern equivalent. Sadly, a couple of new laptops down the line and changes in email addresses mean the original contact was lost, but these are the 4 missing images (AS14-
Also lurking on the internet are two other magazine 80 images, oddly hiding on a UFO and lunar anomaly website. AS14-
These 6 images aside, the availability of decent quality images was poor, with the only other sources being partial images used in the Apollo 14 Preliminary Science Report, and some other technical papers published after the mission, eg this one.
So there it ended, for a while, until one internet user, apollo16uvc, began to hunt around more seriously and came up with a couple of sources. The first came from internet auctions. He acquired 10 different images and scanned them in sections at high resolution. I then assembled the images. The second source was obtained via the really complex and secretive method of “asking NASA nicely”, which resulted in a set of films being photographed. I was involved in converting those images into a usable format. We’ll deal with those images first as they allow us to identify where the photographs were taken and give a sense of scale.
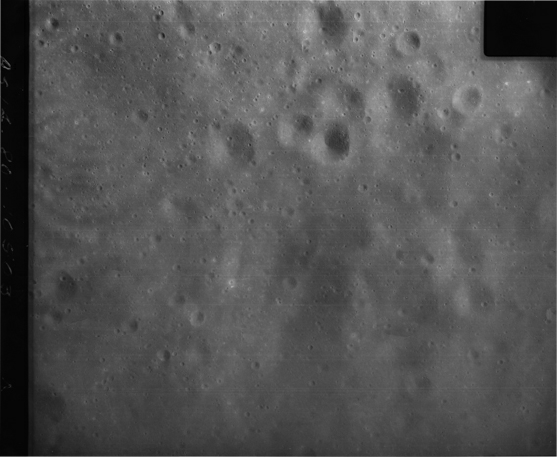
Hycon photography commenced at 88:54:44 on revolution number 4 with the CSM at its lowest altitude of 40000 feet. The aim was to image a transect running across Theophilus and over the central highlands, eventually covering the Descartes region, the intended landing site for Apollo 14. There were other targets they hoped to get later, including the landing itself.
However, about 6 minutes into the session Stuart Roosa, the Command Module Pilot in charge of the camera, reported problems with the camera relating to loud clacking noises coming from the magazine. Mission Control consulted with experts on the camera, first confirming that there had been no issues when it was checked with a different magazine in the early part of the mission. They suggested trying a different magazine, numbered V (the one used in initial testing).
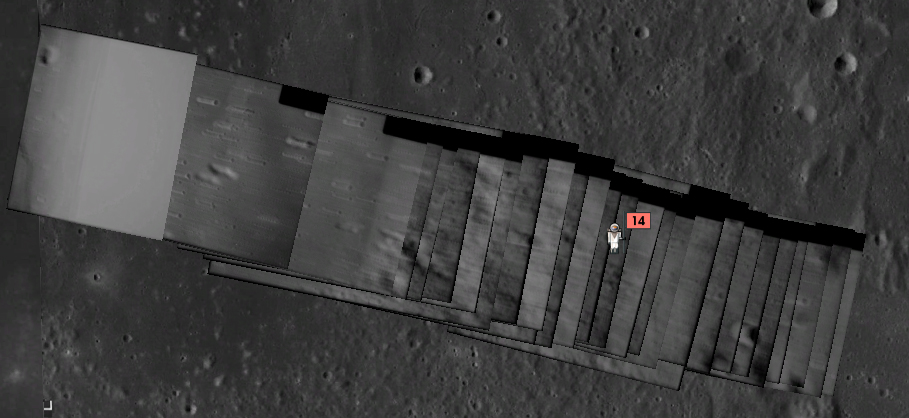
Roosa duly repeated his testing and found the same issue, and they reluctantly suspended the photography. So what did he capture? Well, here’s what the transect looked like once I located all of the images in Googe Moon.
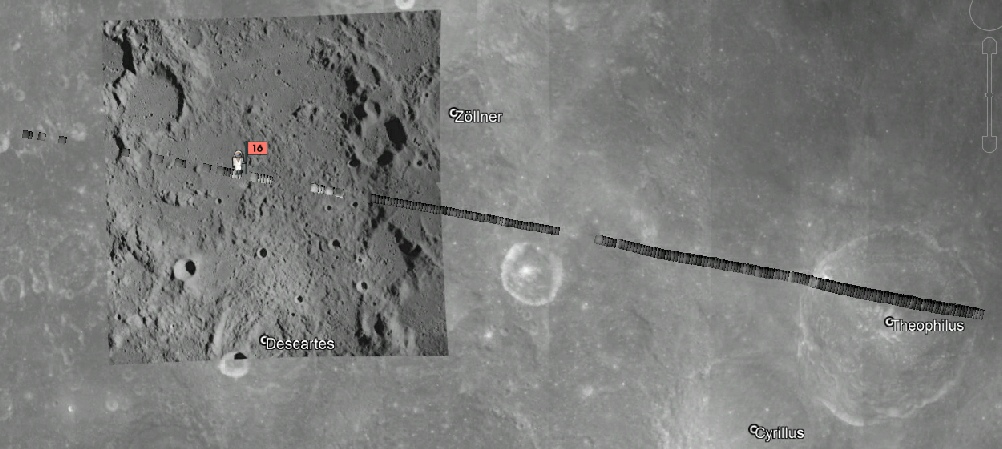
Before looking at the photographs in detail, it’s worth looking at some interesting features of the set overall.
It’s noticeable, for example, that the images cover a much smaller surface area towards the western end of the pass compared with the east. The images at the eastern rim of Theophilus are around 5.25km on each side, compared with around 4km for the western end of the central highlands. What this implies is that the CSM was much closer to the ground as it passed over the Descartes area compared with the start of the photography session. This feature is repeated within Theophilus itself, where the photographs cover an area roughly 6.2km on each side as it passes over the deepest part of the crater, some 3.2 km lower than the rim.
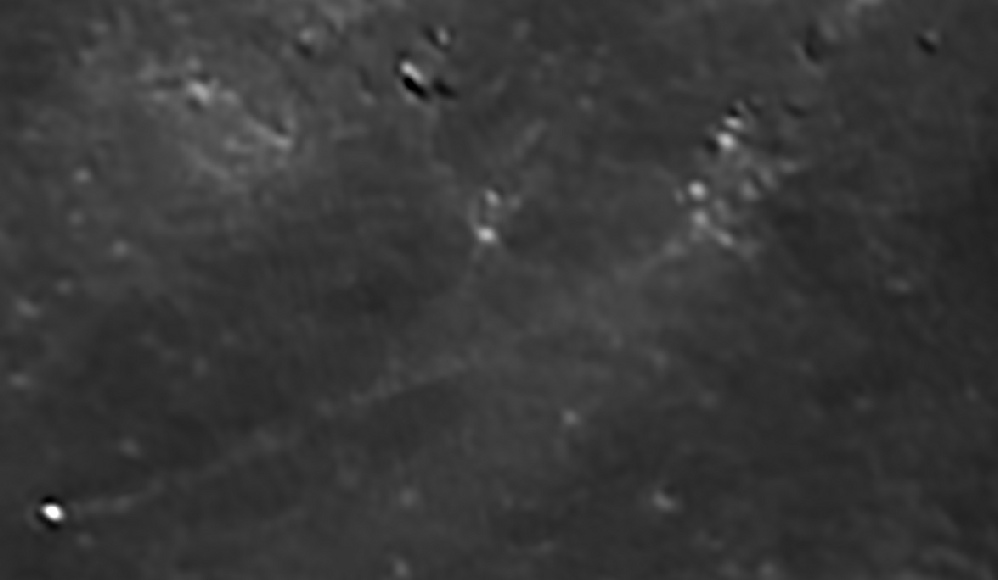
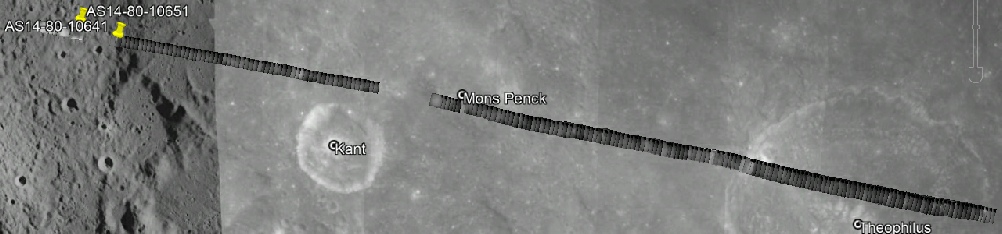
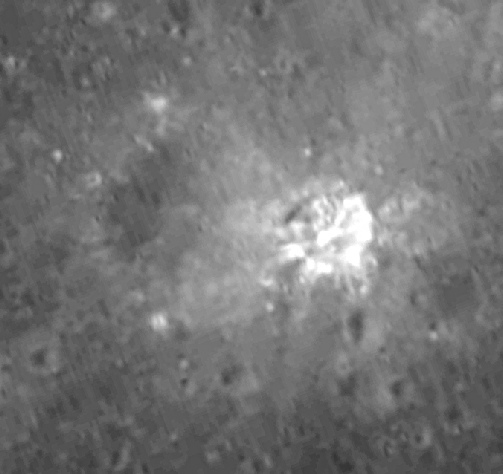
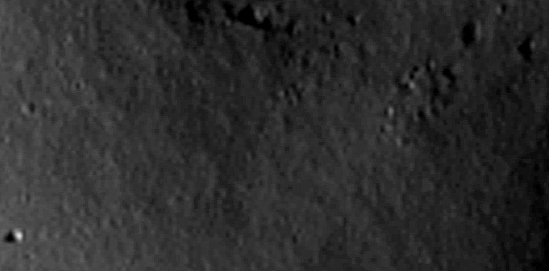
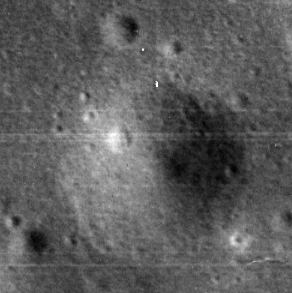
The problems experienced during the session are evident from the gaps that can be seen in coverage, but the most serious issues started on the approach to Descartes. The last image with any usable detail is AS14-
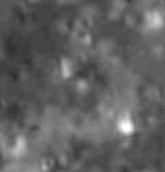
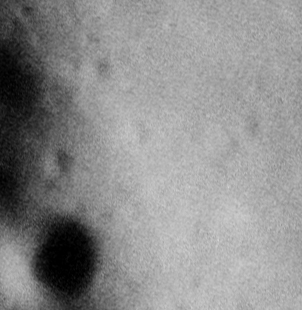
While these two show the change in quality:
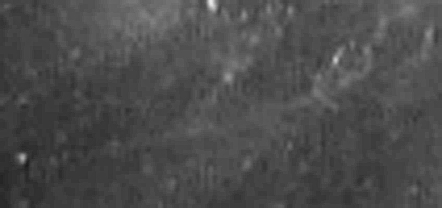
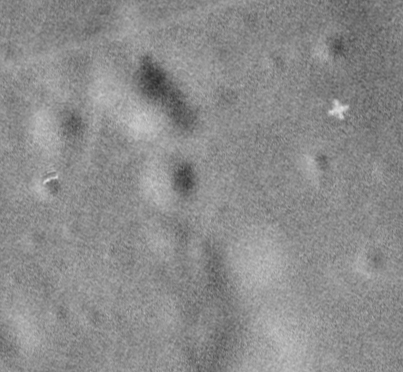
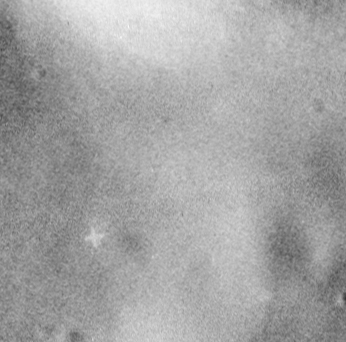
How then, I hear you ask, were you able to position these remaining blurry images? Well, each frame always had something in there that allowed the identification of its location, for example in AS14-
By using the overlap of the images to work out how far from the last image each one should be, and by adjusting the image brightness (perhaps adding some sharpening) it’s possible to work out where it goes. LRO screenshots were also used where needed to increase the level of detail available on the base image.
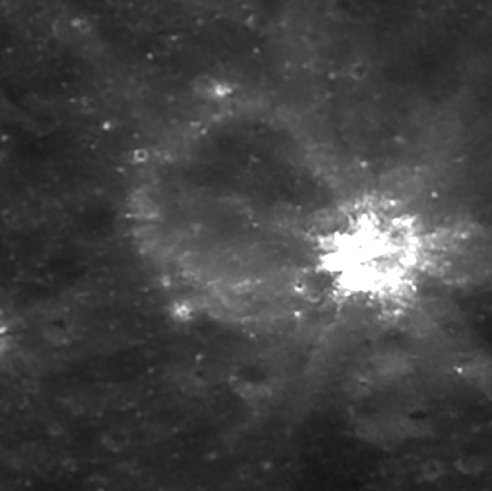
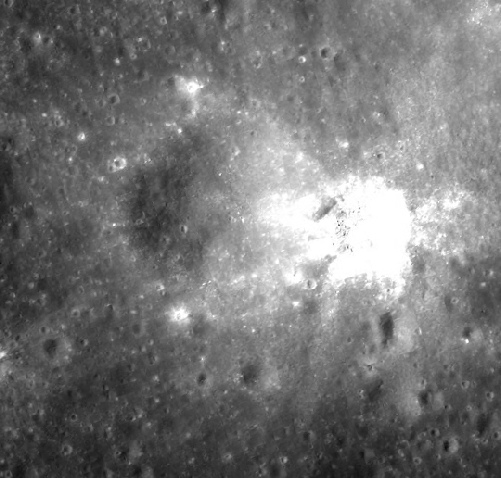
It’s also worth noting that the although these images and the ones I posted in the earlier part of the image come from different sources, they are obviously from the same original record. For example AS14-
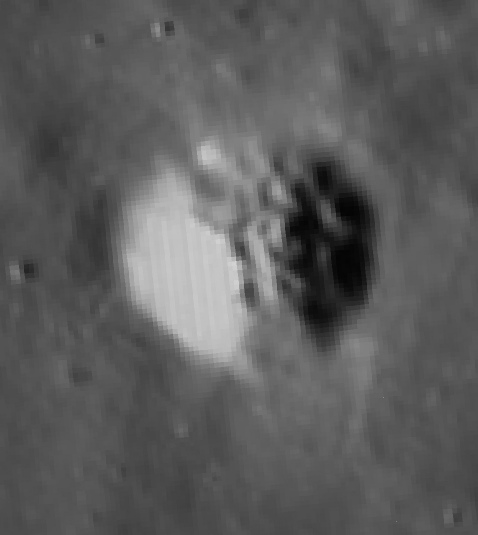
Likewise AS14-
Close inspection shows that the bright spot half way down the right hand edge of the new version is also present in the report, and evidently the same source was used to produce all the copies in existence.
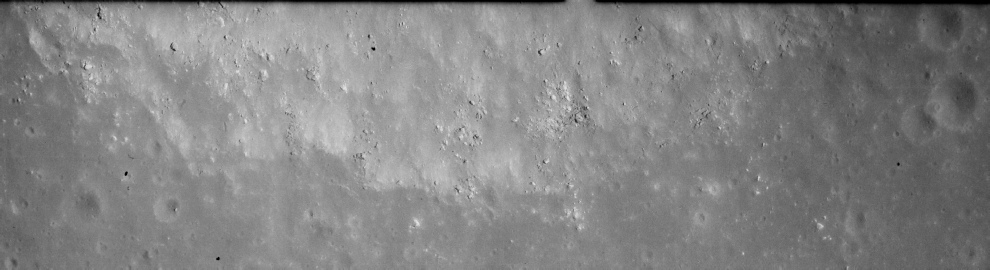
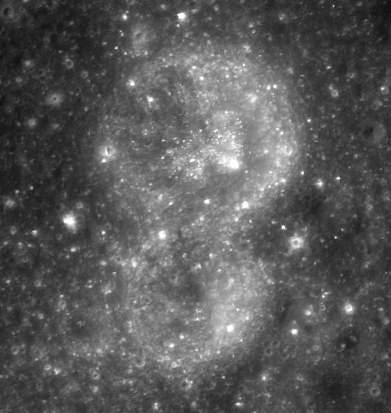
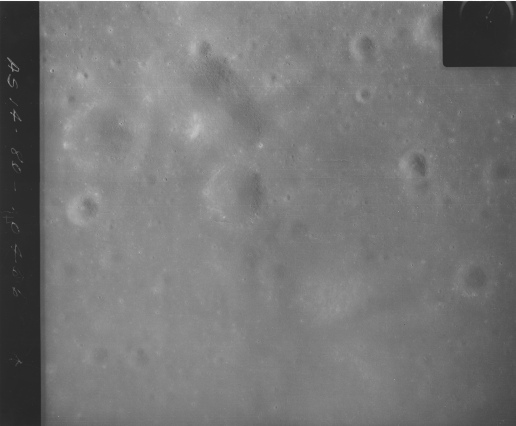
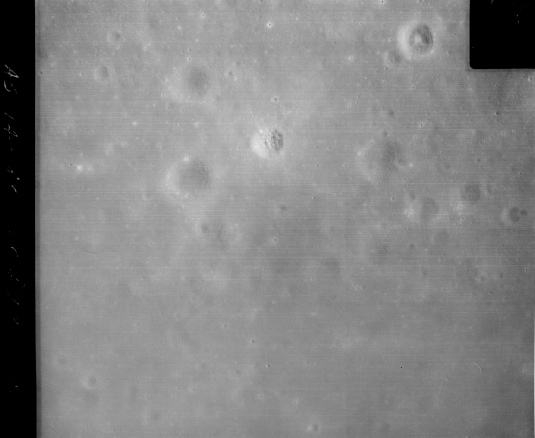
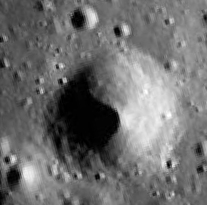
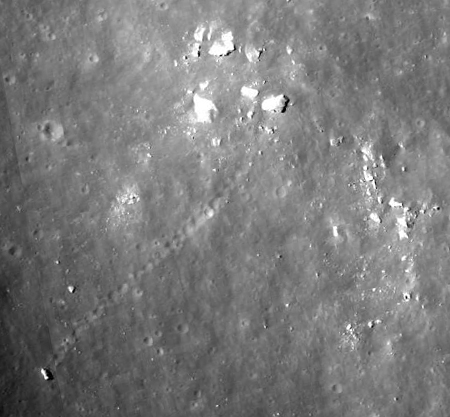
Let’s move on to see what’s in them, and see how they compare with the various other sources of imagery covering the same spots. In order to do that I’ll use the high resolution scanned images obtained by apollo16uvc. To give some idea of the size of these, here’s one of them (AS14-
We have 10 images to play with, starting on Theophilus’ eastern rim and ending east of Mons Peck.

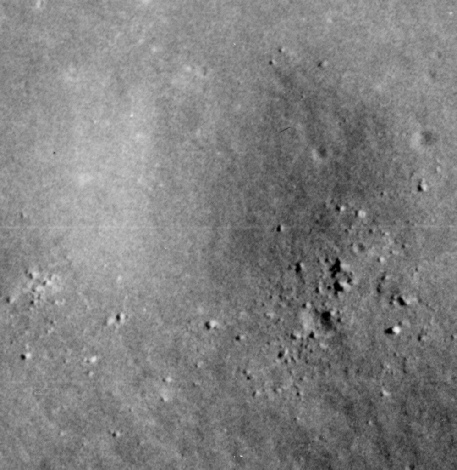
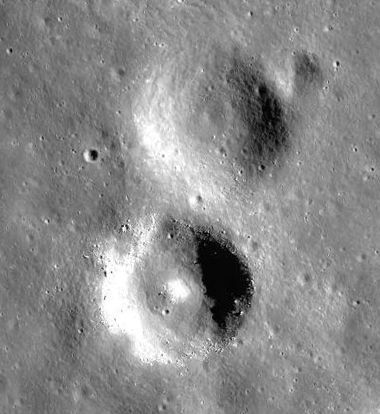
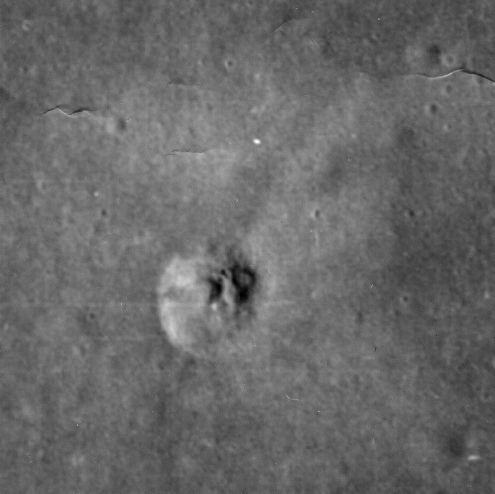
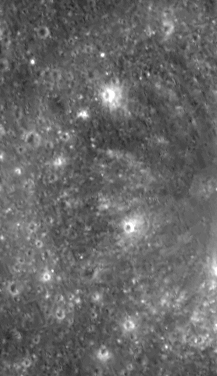
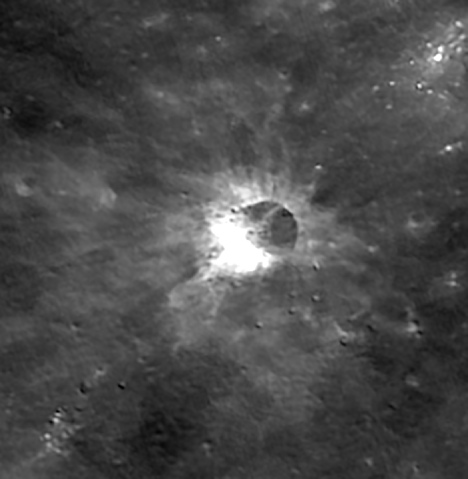
Our first example is AS14-
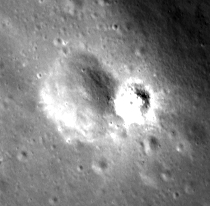
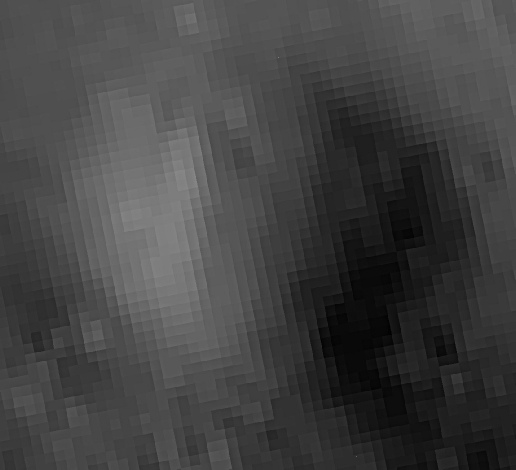
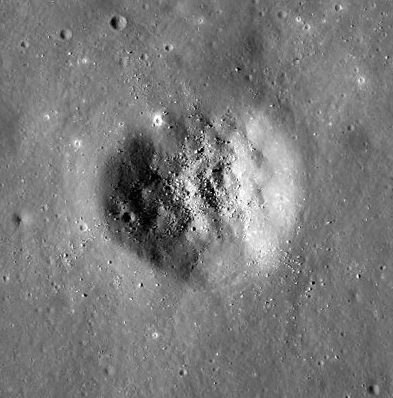
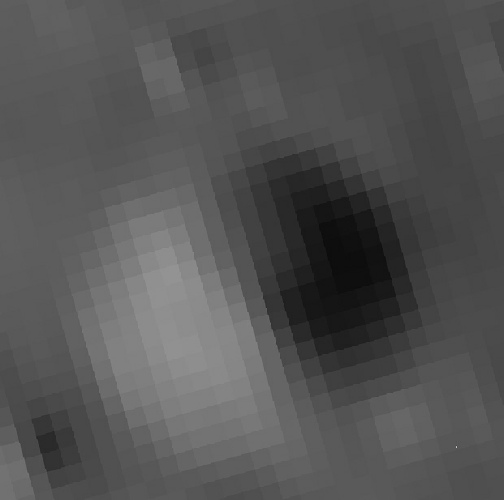
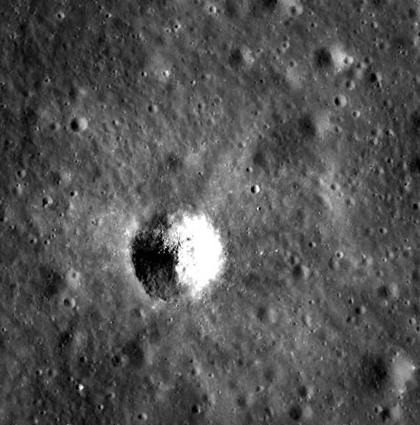
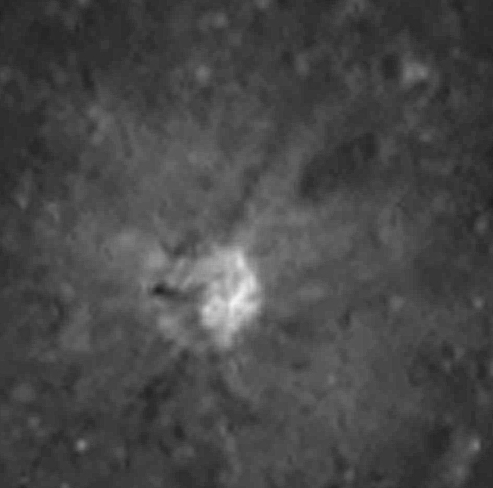
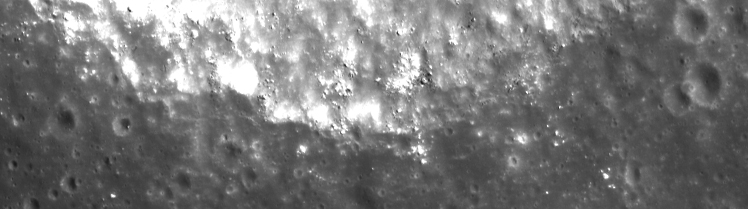
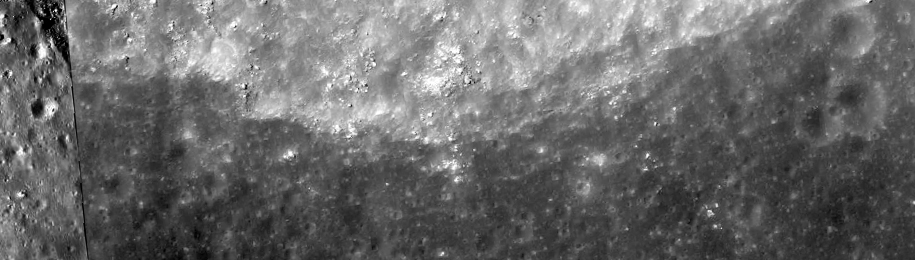
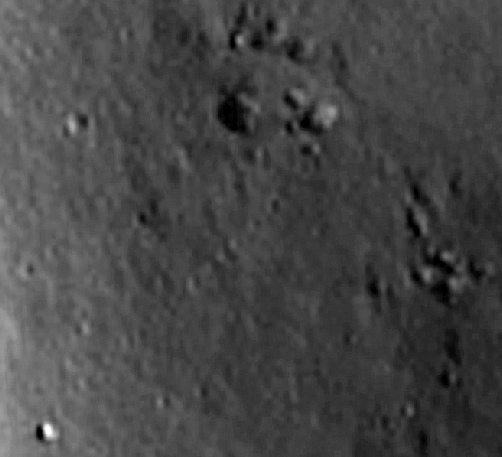
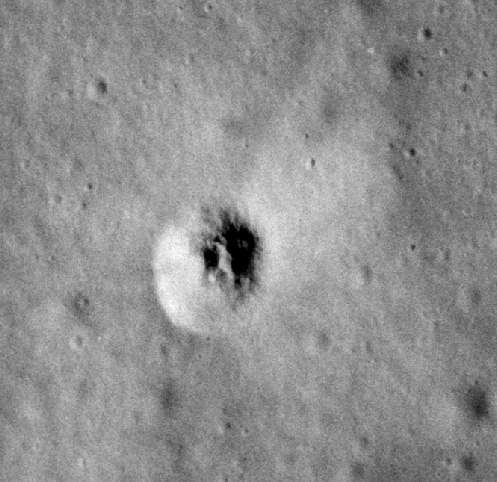
It should be pretty obvious that there is hardly any detail worth speaking about in there, so anything revealed by the Hycon is going to be more detailed. To see how detailed we can get, let’s zoom right in on that central crater. Here it is below left compared with the LRO’s view of the same area.
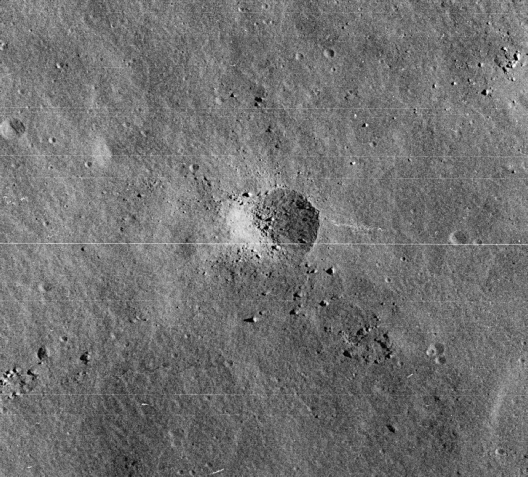
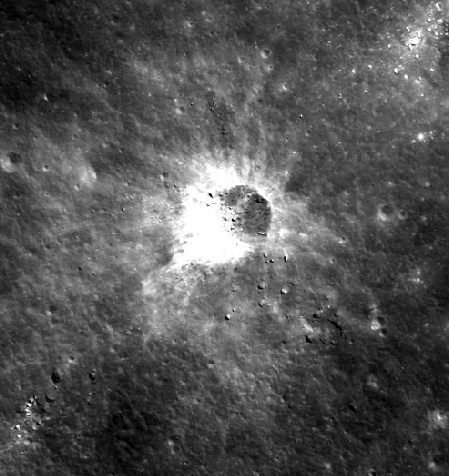
The level of detail in the Hycon image is remarkable, and exactly the same small rocks and craters can be seen in both. Some people out there aren’t keen on using NASA as a source to prove NASA images, so the next thing to do is to look at images from other probes. In this case we have ones from both China (below left) and India (below right).
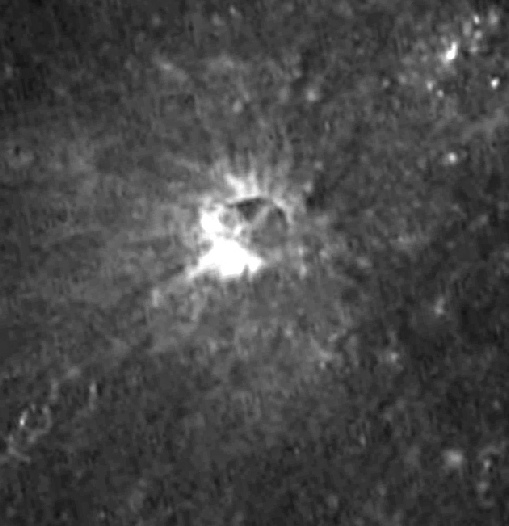
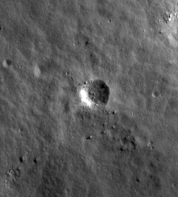

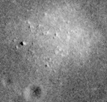
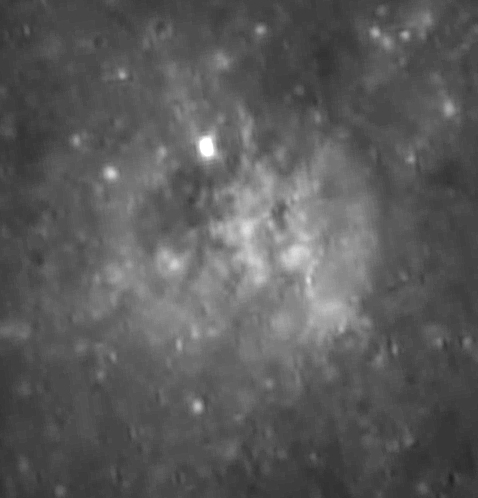
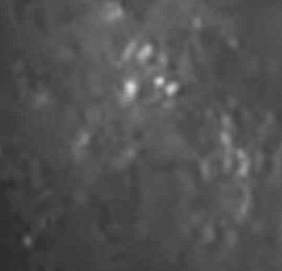
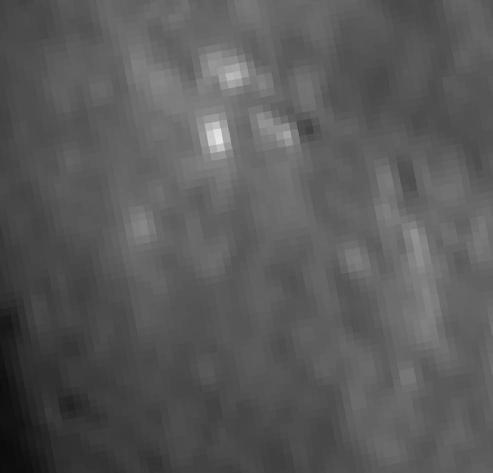
As before the lunar orbiter image reveals hardly any detail other than the bright crater at the top, and even that is only just discernible. That brighter crater is shown below left, with the LRO view below right.
Also as before the correspondence between the LRO image and that taken by the Hycon is excellent, as is that between the Hycon and the Chinese (below left) and Indian Chandrayaan-
More excellent agreement between the probes. Next is Chandrayaan-
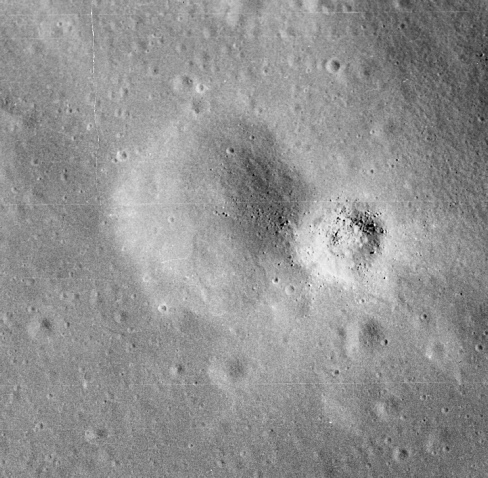
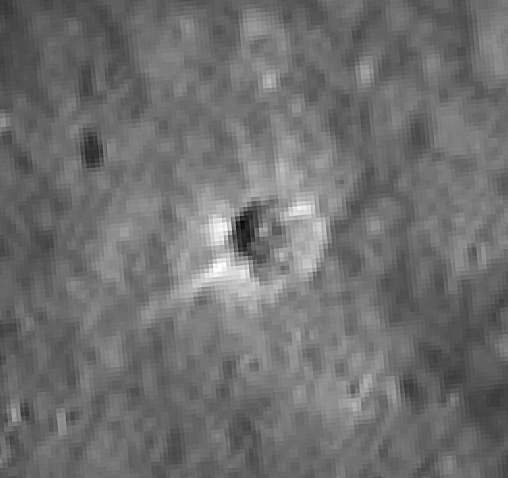
Now that we’ve moved away from the shadowing effects of the crater rim we can see more details in the lunar orbiter, but it still likes the fine details in the Hycon photograph. Just how detailed is shown in the images comparing it (below left) with the LRO (below right).
I know I’m repeating myself, but once again the detailed correspondence between the two is remarkable, we can even zoom right on the central mound of the crater:
From this we can see that it’s only once we get into the really close-
As before we have a Chinese view of the scene (below left), and Japanese (below right). They aren’t as detailed as the LRO view, but the broad details are still there , particularly the crenellation of the lower, brighter crater rim.
You can also make out the large boulder I describe above. Sadly we have now moved past the boundary pf India’s coverage of the eastern rim with their terrain mapping camera.
It isn’t even worth mentioning that the Lunar Orbiter view doesn’t pick up the boulder or its trail. The area is in shadow on the image and even if it wasn’t the resolution would still not be adequate.
We are left then with a feature not known about prior to Apollo 14’s high resolution photography but verified by three different lunar probes later on.
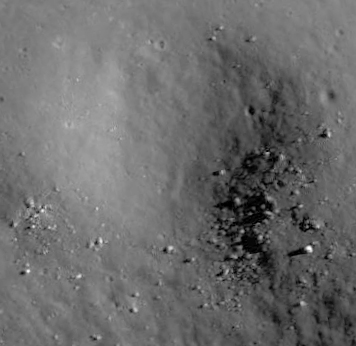
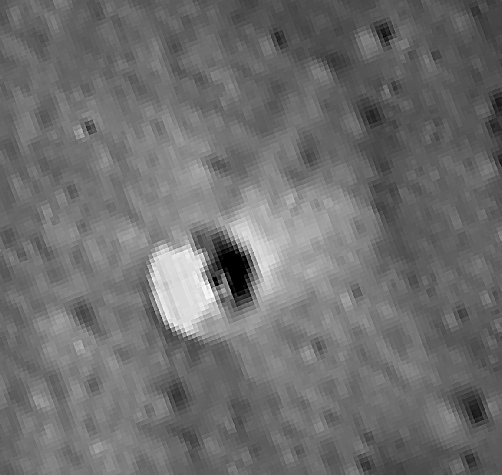
The next high resolution image along is AS14-
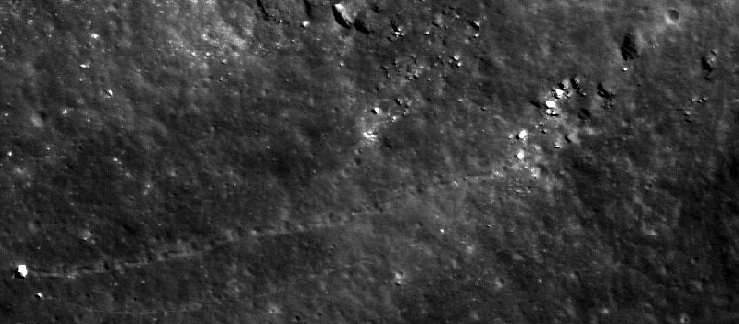
The same boulder is also visible in the LRO image, in which it’s also possible to identify that the smaller boulder below it also has a trail that isn’t picked out by the Hycon image.
While the second minor trail isn’t visible, it is evident that all of the other rocks and small craters are.
India’s view of the same area is not quite as clear, but the larger boulder trail can be made out. The smaller boulder trail can’t be seen, but the rock at the end of it is just discernible.
China’s is less sharp, but the boulder and trail can still be made out.
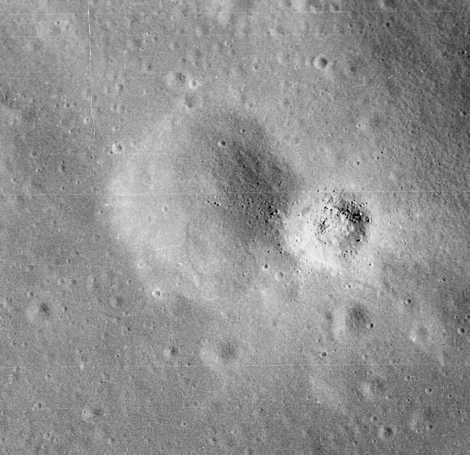
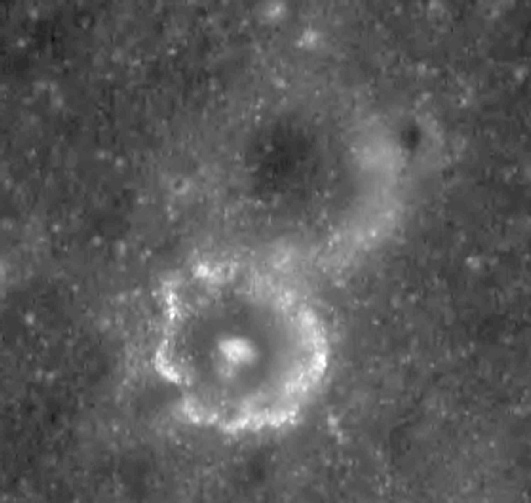
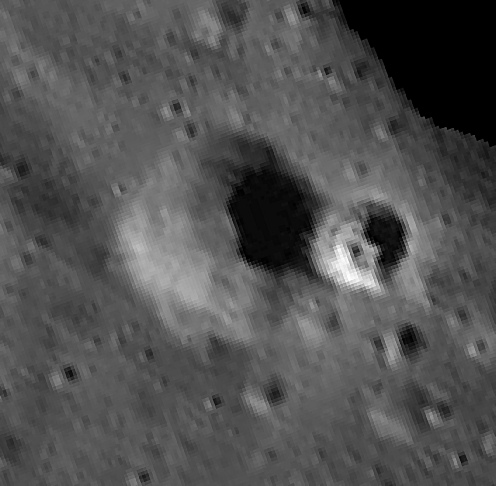
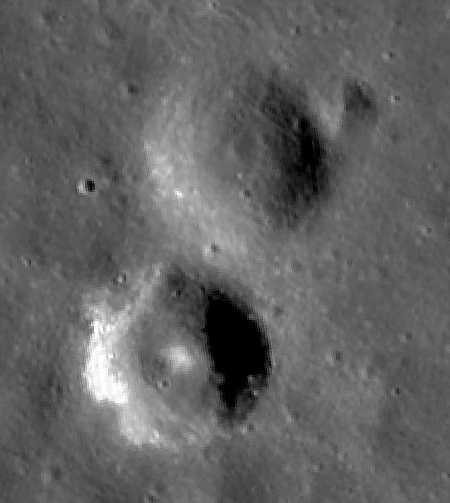
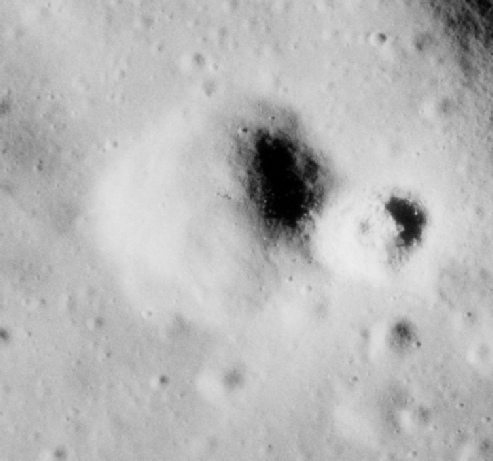
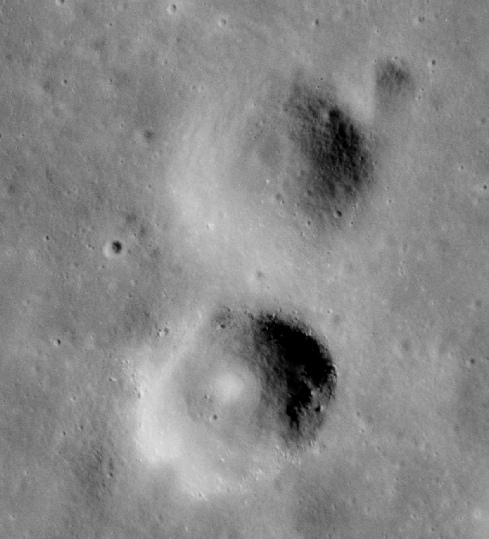
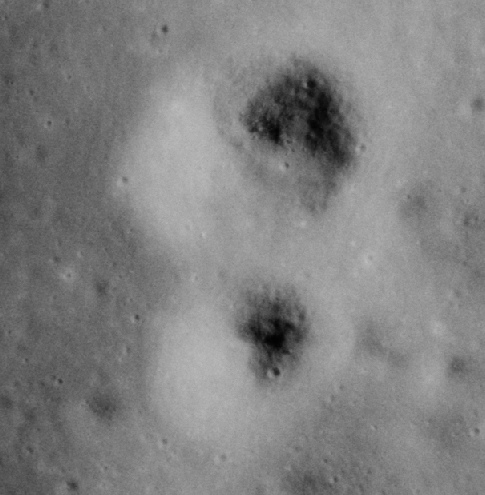
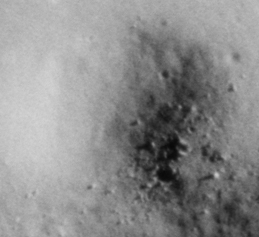
Next up is AS14-
For this image I’ve picked out another double crater, the ones shown in the middle and towards the top of the Hycon photograph and shown below left. Next to it is the LRO view of the same area.
It should be obvious that as with all the other images there is perfect correspondence between the three of them.
It also goes without saying that the lunar orbiter image contains nothing like the detail in any of the other photographs.
In case you can’t work it out, the different lighting conditions mean that the smaller craters peppering the area are showing up as bright spots.
Pat half way across the crater now, and the next high resolution scan is for AS14-

China’s image is not perfect, but close examination does reveal the craters and rocks present in the Hycon photo. India’s Chandrayaan-
It isn’t as high a resolution as the other probes, but there is still enough detail there to confirm what can be seen in the Hycon photograph, details not present in the Lunar Orbiter image.
It’s worth pointing out that this Kaguya image is an evening one, as the morning version is in the shade, so shadows are in different directions compared with the other probes.
South-
Japan’s view shows the final boulder, and careful squinting shows that some elements of the boulder trail are visible.
Yet again the correspondence is excellent, and the Hycon arguably continues to out-
The next two hard copy images actually overlap each other, so I’ve just picked one of them, AS14-
Finally we have China (below left) and Japan (below right).

The area I’ve chosen to look at more closely here is the small, shallow crater at the top of the cluster of craters in the top left. I specifically picked this one because it is barely identifiable in the Lunar Orbiter photograph, so any detail the Hycon can show is going to be more than was visible to pre-
After that we have the less clear Chinese (below left) and Japanese (below right) images.
The LRO and Hycon are perfect matches for each other, and there is hardly any feature not visible in both views. China and Japan are less obvious, but what does stand out are the brighter areas that match the locations of clusters or rocks in the bottom left and right corners. Even low resolution areas still allow confirmation of details in the Hycon, something that isn’t possible from the Lunar Orbiter photo.
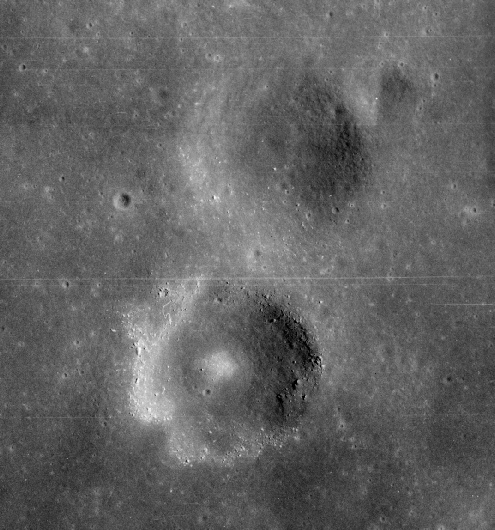
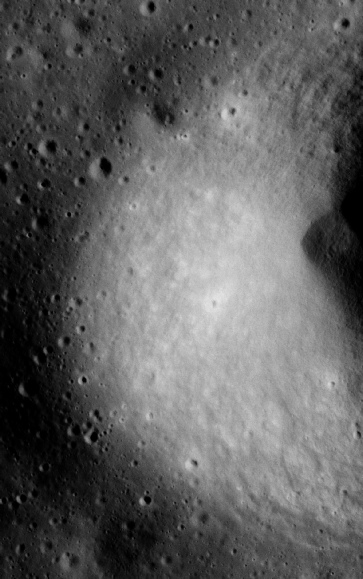
The final hard copy image from within Theophilus is AS14-
The obvious crater to look at is the one with a lot of debris just above centre, and it is zoomed in below left, with the LRO equivalent below right.
As with every other image there is perfect correspondence between the Hycon and LRO photographs, although it is evident that there are more visible objects in the LRO view. This is probably helped a lot by the shallower sun angle in the LRO version.
The lower resolution Chinese and Japanese views (below left and right respectively) show much less information but between the two of them they build a very good picture.
The Chinese probe picks out the brighter craters well and some of the lager rocks, whereas the Japanese probe’s low sun angle allows the central detail to be picked out more easily.
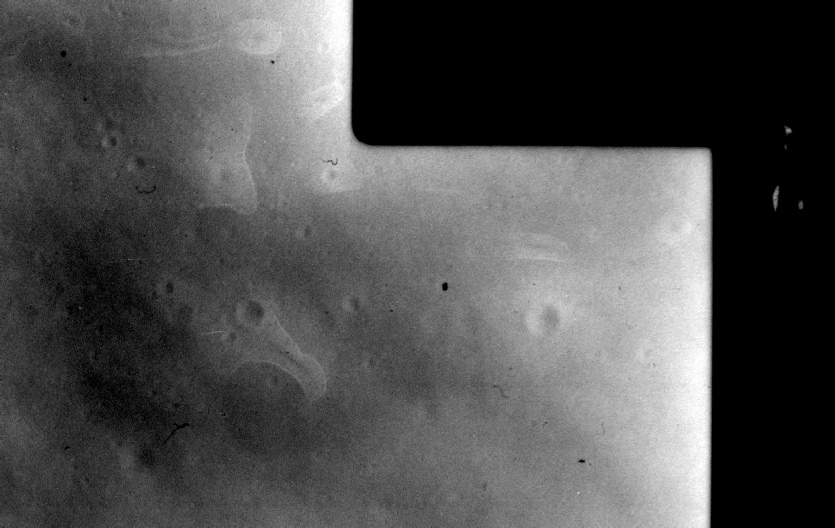
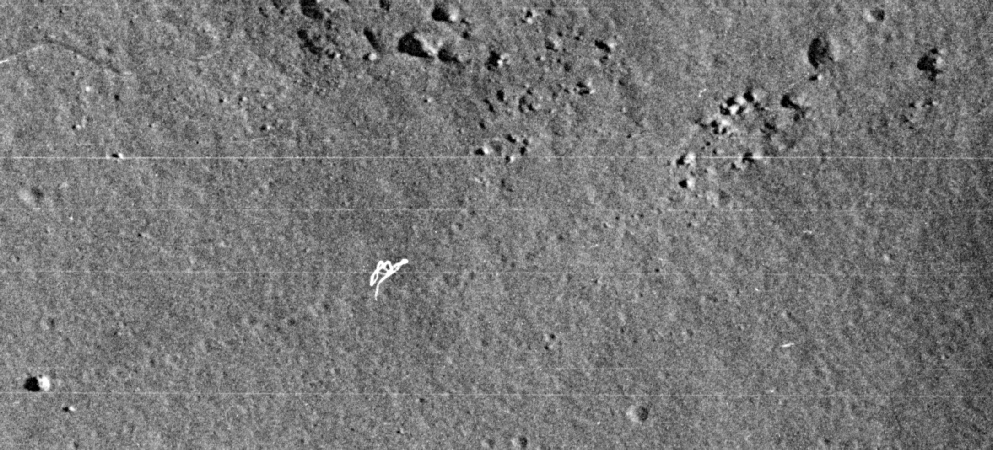
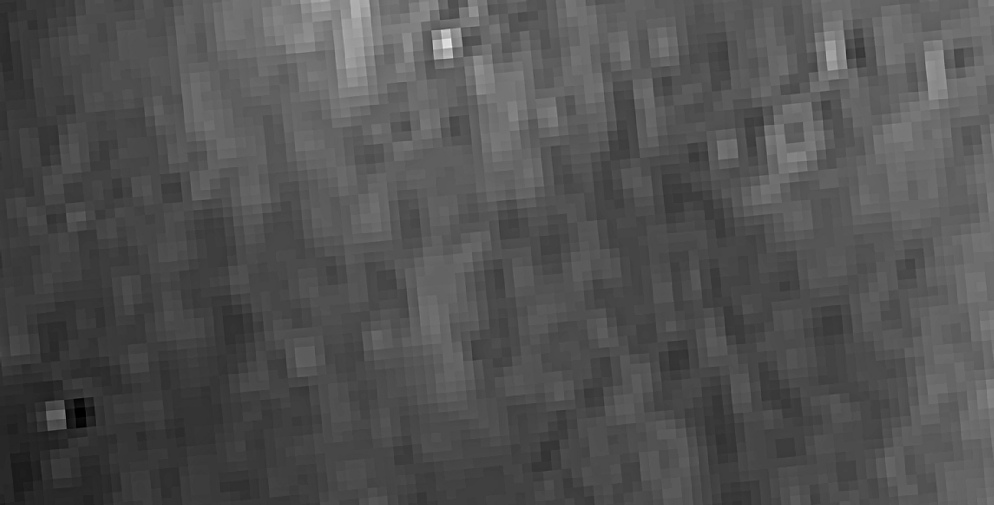
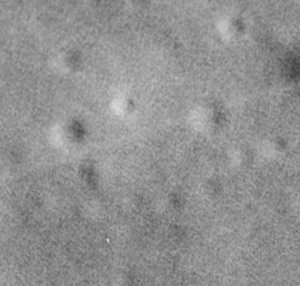
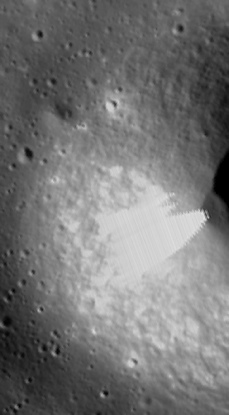
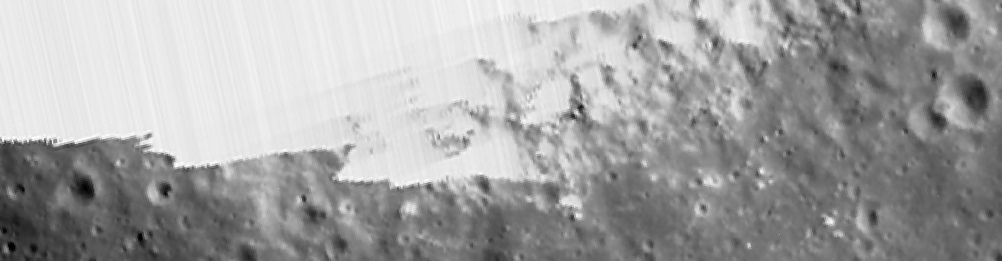
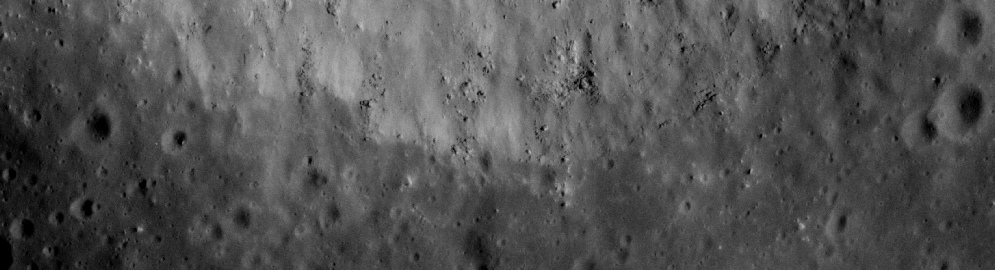
The next photo (AS14-
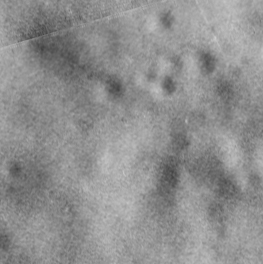
I should point out that the weird patterns on western edge of the photograph are an artefact of the scanning process and aren’t there on the lunar surface!
Choosing an area on which to focus for this was tricky, as while there are numerous craters in the photograph there is not much in the way of detail within those craters. In the end I opted for a small one in the top left corner as it appeared to have some sort of unevenness on the southern rim, as well as numerous small satellite craters. Here they are in the usual arrangement of Hycon and LRO.
That uneven ground turned out to be a line of small craters running across the rim, ending in a brighter crater at around 5 o’clock. All the other satellite craters can be found around the crater, confirming once again that Hycon took accurate photographs of the lunar surface showing details the Lunar Orbiter probe did not come anywhere close to showing.
China and Japan’s images are less helpful:
There is obviously nothing like the clarity of detail in either of these two photographs, but if you look at the Lunar Orbiter shot of the same crater (right) they still out perform it.
The larger of the satellite craters in the bottom left and the bright crater at the end of the line of craters on the rim can be made out in both, as can the larger satellite crater at the top. China’s image also shows the crater within the crater.
Even low resolution images show more detail than Lunar Orbiter views of the same area (right), and those images correspond with the details in the Hycon photograph.

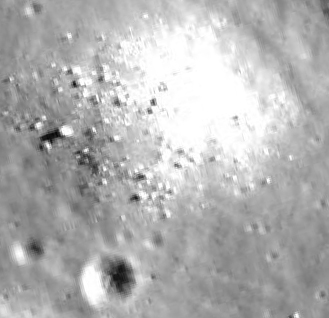
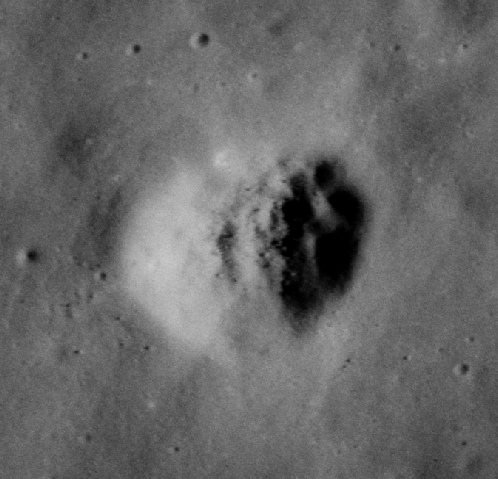
Next up is AS14-
The obvious feature to examine is the small, relatively bright crater below right of centre. The main reason for this is because it features some distinctive ray patterns, but it is also noticeable by its complete absence from the Lunar Orbiter photograph. Let’s see first how it compares with the LRO (below right).
The detail in the centre of the crater shows up well, despite the brightness of the LRO image, and the majority of the small craters show up in both. The main thing to notice, however is the exact match in the direction and length of the different rays spreading out from the impact.
Those rays also show up well in the Chinese and Japanese images (below left and right respectively.
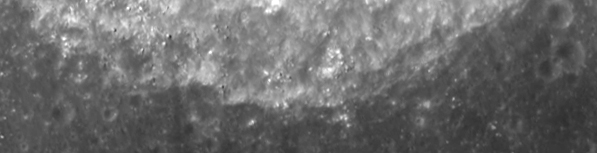
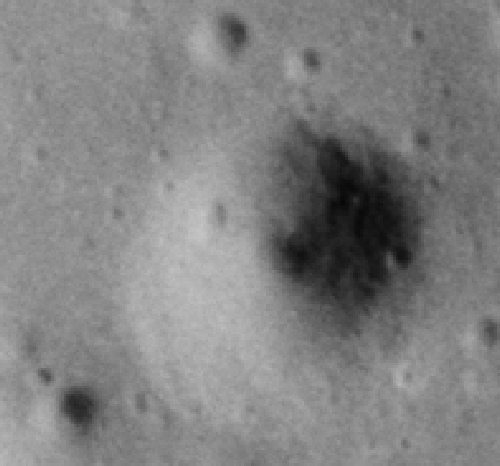
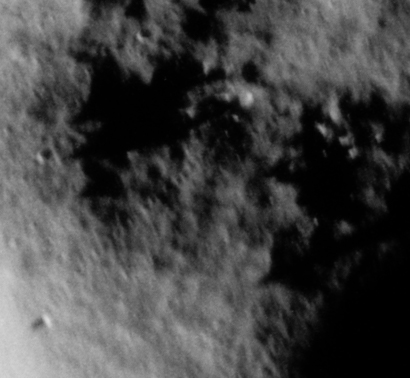
And finally, you’ll be relieved to see, we reach the last of the hard copy scans available to us, AS14-

It’s not the most exciting of images, with little in the way of distinguishing features -
Below left (with the contrast enhanced and sharpened) is the Hycon image, followed by the LRO, Japan and China. I should point out that the large ray feature in Japan;s image is a fault in the image, not an actual feature.
The debris patterns are indeed visible in all 4 images, though less so in the LRO photograph as it is more in shadow. The patterns are all in the same place and look the same. Also visible and showing exactly the same features are the many small craters inside and outside the larger crater.
None of these features I’ve looked at in these high resolution scans are visible in the Lunar Orbiter photographs. They are far too small to be seen from Earth. There is no way that anyone could possibly have known they existed until Apollo 14 photographed them, and yet there they are -
It would be nice to look at some of the interesting features shown in some of the other, lower quality images obtained by apollo16uvc, but frankly they couldn’t have picked a less interesting part of the moon. Had they been half a degree lower the orbit would have taken them over the central peak of Theophilus and perhaps part of Kant crater.
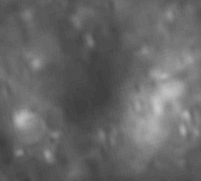
The most interesting parts are already covered by the photos above, but there are a couple of spots worth looking at, namely the crater in Theophilus’ top left, just inside the rim. The Hycon transect passes over the bottom part of this, revealing some of the detail. Here it is in AS14-
You can make out the crater rim and some of the smaller satellite craters, but not the finer details. How does it look in close up compared with modern probes? Below we have, in order, the Hycon, LRO, Indian, Chinese and Japanese images.

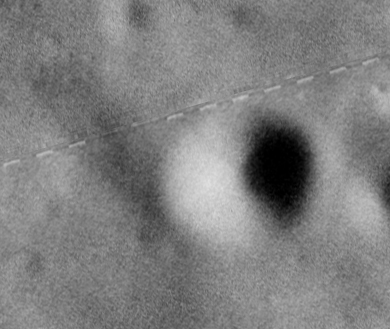
AS14-
Much more in shade than the Hycon image, but note the pattern of boulders below the centre crater, which are a perfect match Below is the boulder trail.
AS14-
AS14-
AS14-
AS14-
AS14-
In every example we have the detailed Panoramic Camera images matching what can be seen in the Hycon images, all of which are vindicated by the various international probe photographs we have at our disposal.
Moving on from the initial failure of the Hycon, there is still more to look at.
Despite the problems with the camera, Roosa continued to persevere with it. While he abandoned most of the targets of opportunity, on Rev 14 just after Antares touched down he said this to Houston:
“I did shoot the landing because I figured, even if it is working -
Did he manage it? Let’s see.
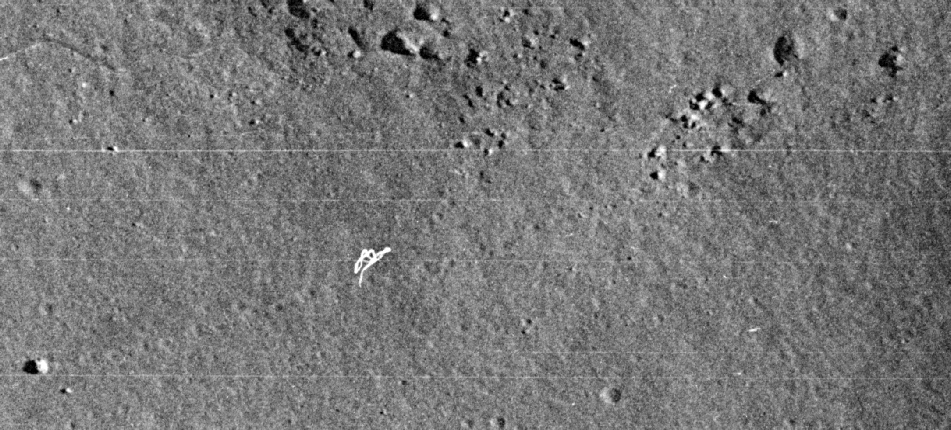
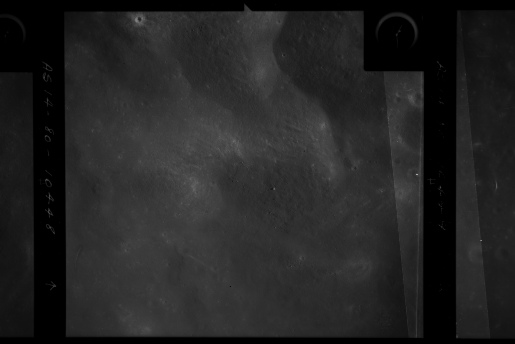
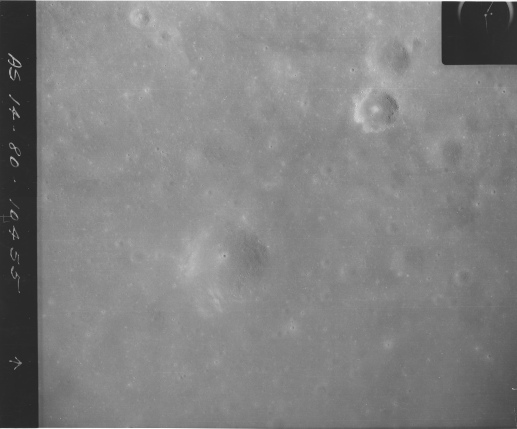
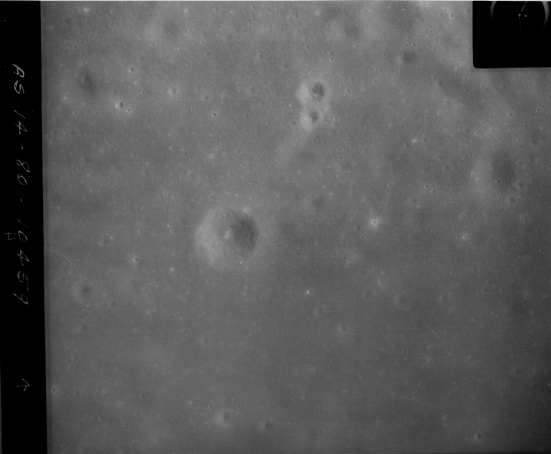
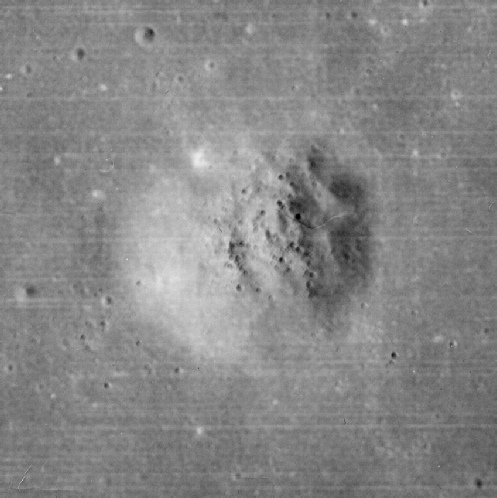
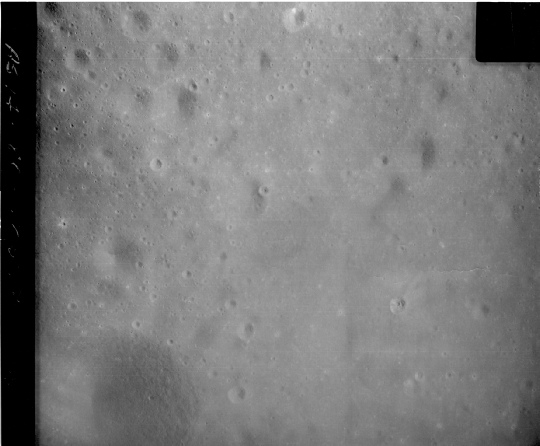
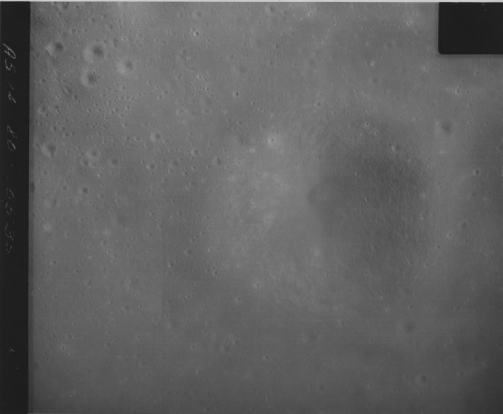
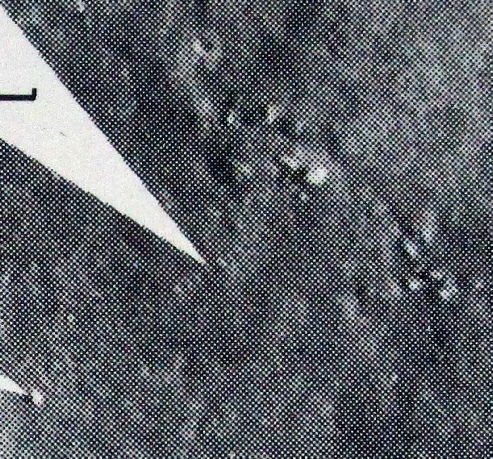
First off, let’s have a look at the photographs that came out as a result of his photography. This one, AS14-
AS14-
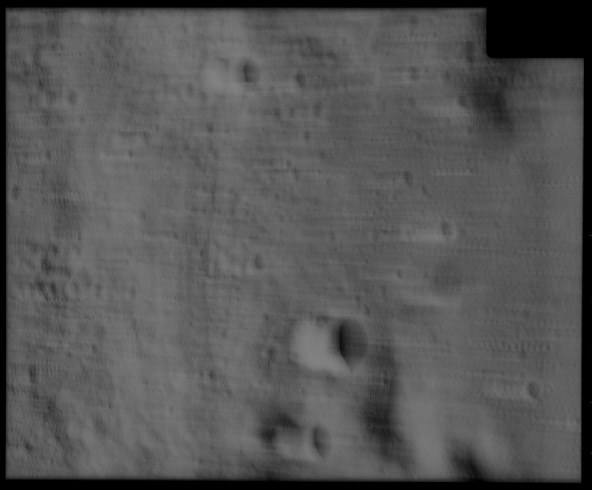
The image has evidently suffered from the problems he described, which also appeared to include the film not tracking correctly in the magazine, not photographing at all when it was asked to and trying to photograph when it as in standby mode! Each crater on view seems to have at least one other version of it in the image, sometimes several of them.
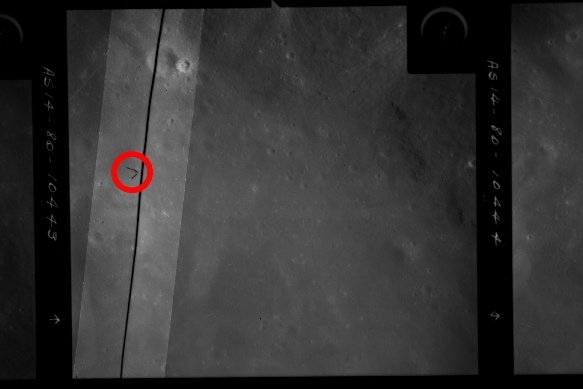
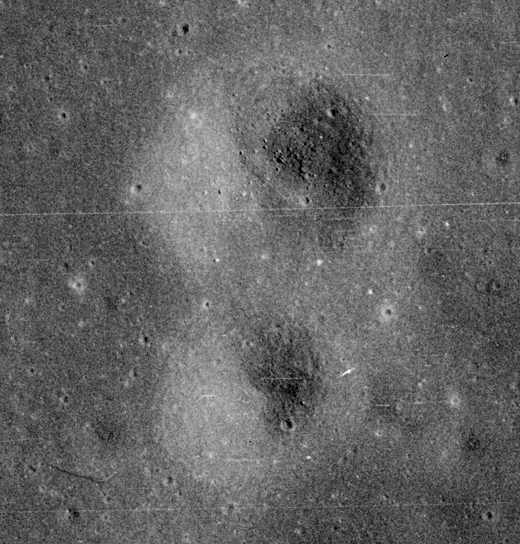
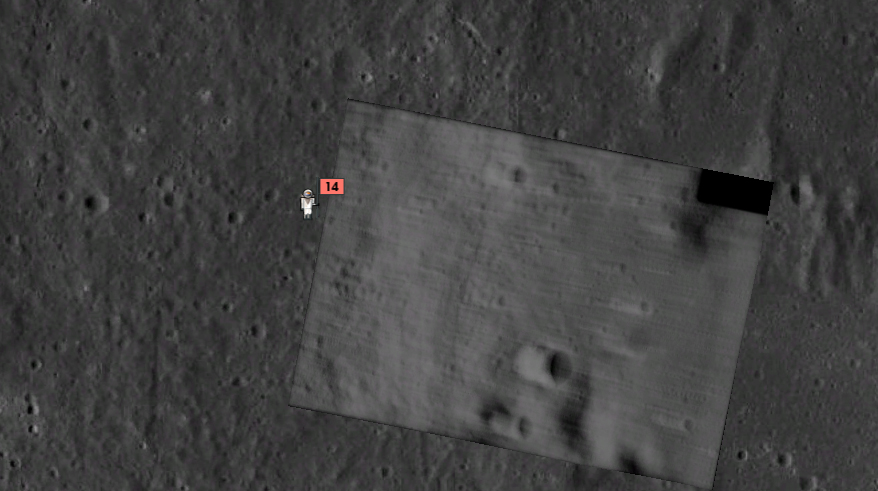
That said it is still possible to locate the image. Here it is shown in Google Moon, superimposed on an LRO layer.
And here are all the magazine V images.
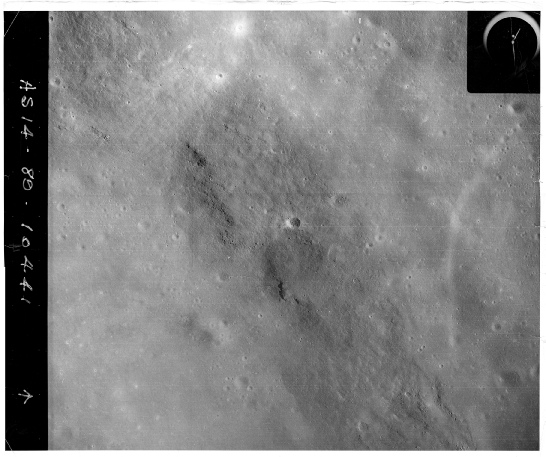
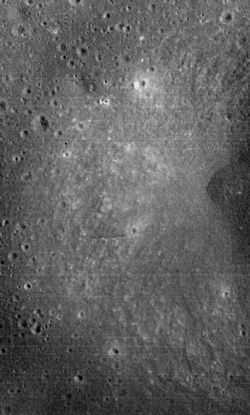
This image shows where Apollo 14 landed, and the red arrow identifies Cone Crater, near the landing site at Fra Mauro. The image below right is a close-

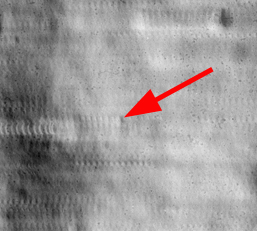
The now solo Roosa is now at a much greater altitude for his photography session. With each image covering an area around 27 km across the direction of travel (compared with around 5 km for magazine W), it is doubtful that it would have captured the landing in any great detail, but it is still a great shame that the camera did not work as intended. If we assume that the best photographs shown above were capable of resolving objects less than a metre across, a 5 fold increase in area covered might still just have allowed the lunar module to be picked out, and might even have captured the landing event itself.
That’s the end of this Hycon examination and what, you might ask, was the point of it? All those repetitive photos?
Well, the main point of all my pages is that we went to the moon. There is a small number of nonetheless very loud and very stupid people who insist we did not.
Those people need to answer this question: How is it possible that the Hycon camera set up in the CSM hatch window (the only way in and out besides going through the lunar module) and operated by a human in lunar orbit who reported on the problems that it had could take such incredibly detailed photographs without actually being there? Those details were not known about prior to the Apollo missions. You will not find any photographs anywhere that show the details contained in them that were taken before Apollo 14 got there, but you can find that probes from up to three countries besides the USA’s LRO all confirm the details in them.
You can come up with convoluted conspiracy crap that will desperately clutch at straws to try and explain it away, but there is no escaping the fact that the only way the Hycon camera could have come up with the photographs it did was to be on orbit around the moon.
The Japanese photograph again has errors in it, but what is visible is an exact match for the Hycon. All the other images show exactly the same details on the crater wall.
Another feature worth looking at is one identified in the Preliminary Science Report, AS14-
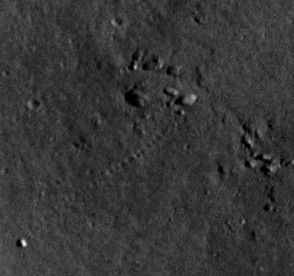
The PSR image there is actually a photograph I took of my own hard copy. Not an internet derived version. As is the custom, we should have a look and see how that stands up against the LRO (below left), India’s view (below right), China (bottom left) and Japan (bottom right) images.
Once again we have excellent correspondence between all the probes we have at our disposal and and the Hycon image, with the added bonus that we have a demonstrably original image featured in the PSR as proof that the images are not some sort of recent construct that some conspiracy nuts will claim. Even the low resolution Japanese view still shows the boulder and the trail leading back to its source can just be made out near it.
We’ll leave it there. Suffice to say that whichever image you pick from magazine W, the small details in it can always be found in probes sent by other countries, but not in images taken before Apollo went there.
It’s also worth looking at other images taken by Apollo, namely the Panoramic Camera carried by Apollo 16, which covered the area in detail. All of the detailed areas covered above are shown below from images taken from here, starting with A16-
AS14-
AS14-
AS14-
And finally the boulder trail recorded in AS14-

Unsurprisingly, it was still there when India sent its second probe.