Apollo 15
Apollo 15 was the longest mission so far in the programme, and as such would show the greatest degree of change in lighting conditions. It landed at 22:16:31, 30/07/71, and a couple of hour later (00:16 on 31/07/71) performed a SEVA or ‘Stand-
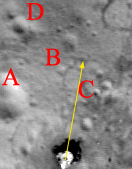
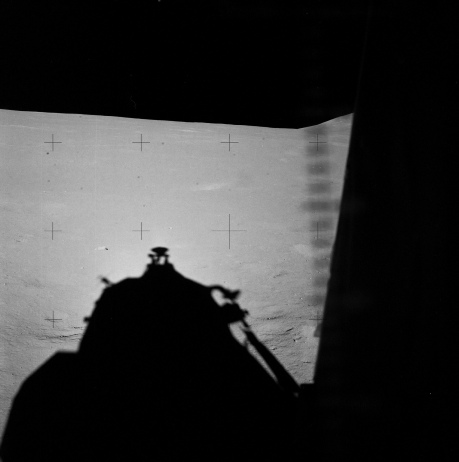
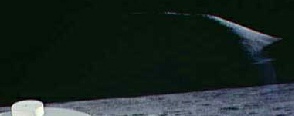
While they did this they took a series of photographs of their surroundings, and as luck would have it the LM shadow can be seen in a few of them at either end of the SEVA sequence. The one below is a crop and brightness enhanced view of AS15-
The distance from the centre of the LM to the centre of A is 28.3 metres, crater B 31.9 metres, and the distance to C is 27 metres. D is 42.6 metres away. The LM’s shadow length during the SEVA should be around 30 metres on level ground, and this is represented by the yellow arrow.
As can be seen from the photo below, it was far from level, and the margin of error is well within what is reasonable. We’ll return to the shadow visible in that image later.


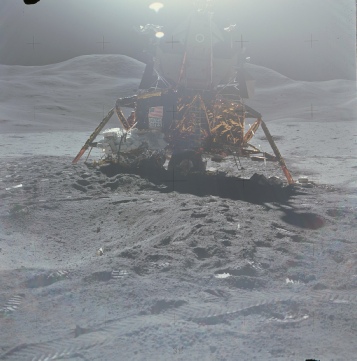
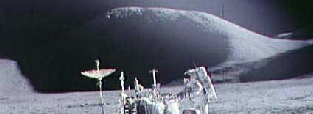
We have one final LM image on the ground to examine, and this one was taken after EVA-

The image above left shows a sharpened and brightness adjusted version of this image to show details of the surface features more. The crater in the previous panorama can also be seen in this image, given away by the small white rock in the centre. The astronaut footprints around the edge give a round indication as to its boundary. Above right is the LRO view superimposed with an 8 metre line which, as you can see, falls short of the crater in the LRO shot by about the same amount as it does in the Apollo image.
That, sadly, is it for the LM, at least in this form, but there are other indications of the passage of time based on the movement of shadows on the landscape around them.
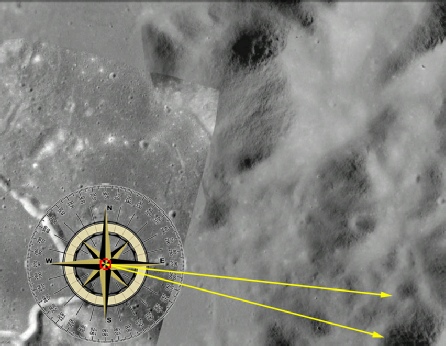
Specifically we can look at the way Mons Hadley changes over the course of the mission, as many photographs were taken of it. Before we do that, let’s set some context. The compass rose in the image below left is centred on the Apollo 15 landing site, and the two arrows point to the location of the sun in the sky at the start (the upper arrow) and end (the lower) of their stay. The illustration on the right shows the sun’s movement in the sky over the same period. While the landscape is lunar in Stellarium, and the location ins Apollo 15, the actual scenery is from Apollo 17.

Mons Hadley (north-
As it’s such a striking feature it’s no surprise that many photographs were taken during the course of the mission. A representative selection of these is shown below. From left to right together with the times recorded at the ALSJ (top): AS15-
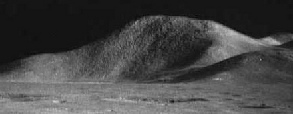
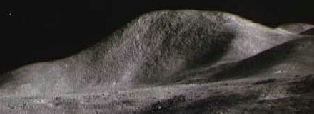

There is a very definite and obvious progressive lightening of the surface of Mons Hadley as the sun changes position throughout their time on the surface, and by the time the last image is taken it is almost entirely sunlit as the sun has moved to a much higher position. The way the hillside changes is entirely consistent with the movement of the sun southwards in the lunar sky and to a higher elevation as it does so.
You may have noticed I was very specific about referring to photos of the LM ‘on the ground’ -
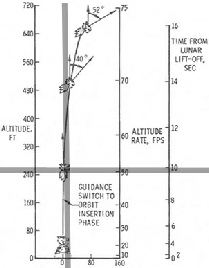
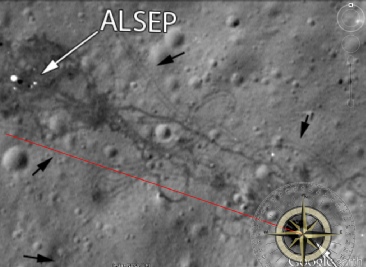
Here’s the sequence of events: at the the scheduled time the ascent module severs its connection with the descent module, the hypergolic propellant ignites and the module begins its ascent. Just 10 seconds later the ascent module shadow draws level with the ALSEP. We can measure this distance on Google Moon and it works out to be 105 m from the centre of the LM
NASA’s own diagrams give an idealised depiction of how high the LM should have ascended after 10 seconds, and we can see this together with a still from the video and the line as measured on Google Moon.
From our angle-
While we have an apparent discrepancy here of roughly 8.5 metres, give or take a few cm, we have a number of factors to consider. Firstly, I’m plotting on Google Moon, so it’s dependent on my accuracy and Google.
Secondly, we’re assuming that the timing of the 16mm footage is accurate, and that the frame rate has been translated properly into seconds of digital video. At an ascent speed of 50 feet per second it doesn’t take much of a discrepancy to account for the difference here.
Thirdly, we’re assuming that the LM took off perfectly vertically from level ground and we know that wasn’t exactly the case. Finally, we can see from the vertical grey line on the diagram that there ought to have been some downrange movement by the time we get to 10 seconds -
In other words there are more than enough potential sources of minor error in my back of the envelope calculations to account for the relatively small difference.
It’s also worth pointing out that the shadow follows a trajectory on that is consistent with the direction of the sun. Stellarium’s depiction of the angle from lunar north as 115 degrees is a few degrees different to that depicted above, but again relatively small errors would easily account for this.
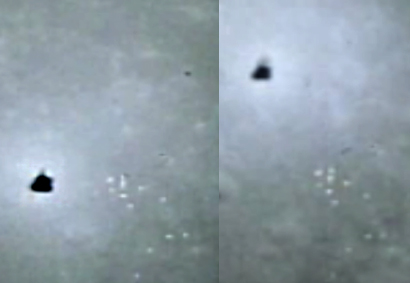
Conspiracy lovers like to claim that these videos were all done with ceiling lights. Its worth pointing out that if this was the case, an ascending lunar module would create a larger shadow on the ground as it got nearer the lights, not one that stays a consistent size, as shown here.
Fully lit, hardly a shadow to be seen.
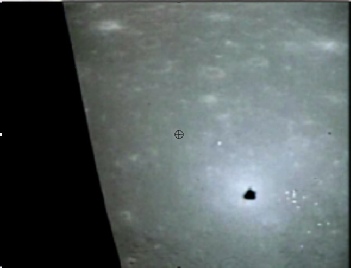
For a really final look we have AS16-
We can get some more useful information from another camera -
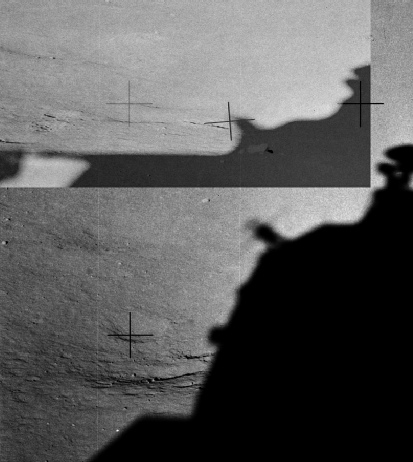
The exact time of this image (taken with the AFT camera) is given as 02:13:03 31/07/71, or orbit Rev 16, just after the completion of the SEVA. The obvious crater to the left of the shadow is the one labelled as ‘A’, and it’s clear from it that our estimate of where the shadow ends is not far off. We’ll return to other Panoramic camera views later.
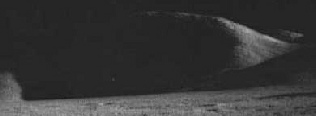
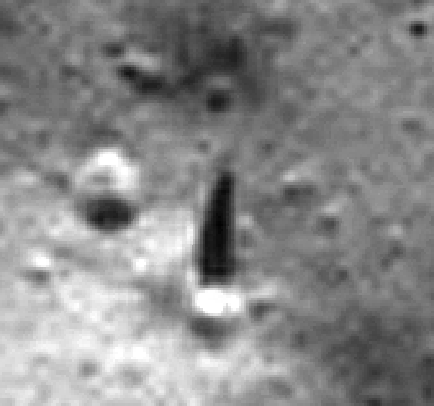
After the SEVA, but before the first EVA, a few more photographs were taken from inside the LM, with several of these showing the LM shadow. Below is one of the images (AS15-
The crater labelled ‘C’ previously is in the top left of the cropped image.
The first EVA started 12 hours after the end of the SEVA, with the time between occupied by a sleep period. No mention is made after the SEVA or before the EVA of additional photographs being taken, and most of the transcript after their wake-
This is somewhat less than helpful for our purposes, but assuming it was taken just before the EVA, the would be a minimum of 19.7 metres long. While the shadow has undoubtedly moved, it is arguably not that much closer. The transcript after they are woken suggests they were much too busy to take photos inside the cabin. The crew signed off the previous night at around 04:00 on the 31st, and a photo taken then would given a shadow length of around 27.5 metres, which looks to be consistent with the amount of change we can see.
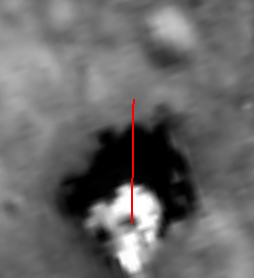
We can get an idea of shadow movement after the first EVA by looking at another Panoramic image from orbit. This time it is AS15-

Although the quality isn’t as good as the previous image, the LM shadow can be made out clearly enough, and it has obviously retreated to a point level with almost half way into crater ‘A’. This would give us an approximate length of around 14.5 metres. Using the time of the photograph, we would be expecting a shadow length pf around 16.4 metres. Again, for reasons outlined earlier, we are short of the theoretical length, but it has self-
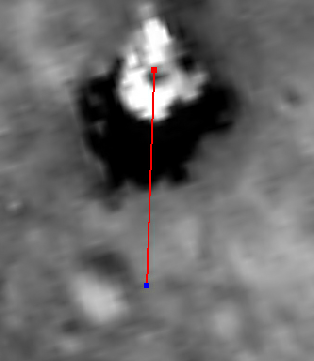
The next available LM shadow we have to look at is in the panorama of the LM we saw earlier. The transcripts at the ALSJ suggest a time for the photographs of around 17:05 on 01/08/71. This would give a sun angle of just over 31 degrees. Returning to a one of the photos comprising that panorama, we can see that the shadow extends to a point level with the centre of a small shallow crater. Below right is the view of the LRO also showing that shallow crater, together with a line that Google says should be 12 metres long. The shadow length of the LM with a 31 degree sun height is 11.65 metres, which again is very consistent with what we can see here.
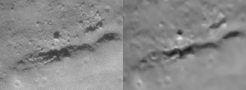
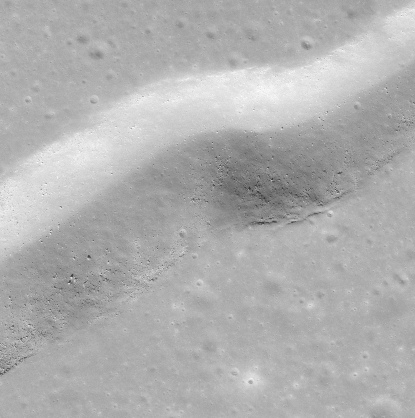
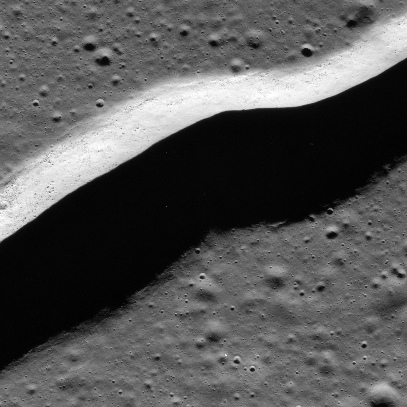
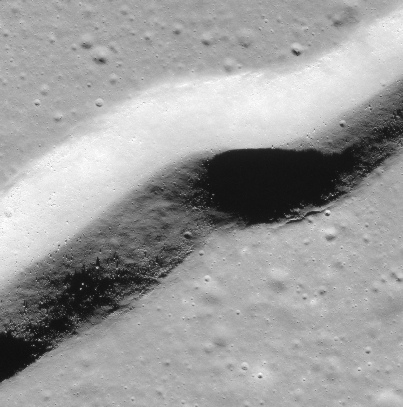
And seeing as we’re taking off, there’s time to take one more look at Hadley Rille itself, as seen from a composite of several 16mm frames.
There is a difference in resolution thanks the way they have been treated so it would be unwise to draw any definitive conclusions, but there is an undoubted match in the direction and length of shadows and both images are consistent with the time they were taken.
So all in all what do we have here? A photographic record that is entirely consistent with astronomical reality, as is the 16mm footage.
Why? Because we went to the moon.