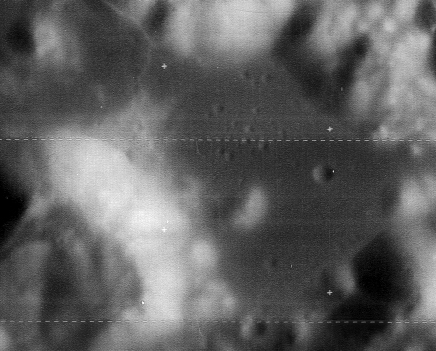
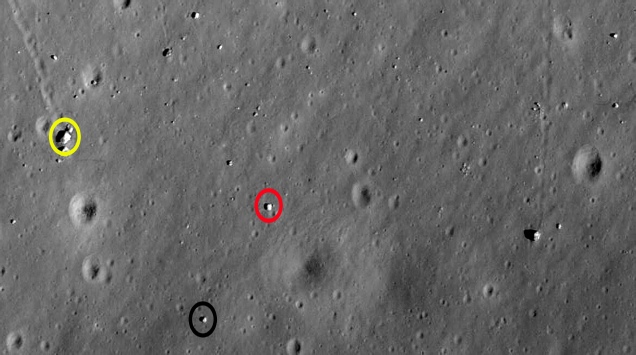
In some respects this doesn’t help us much. There are no inner crater details in the Apollo image to look at, but bear with me, I have my reasons.
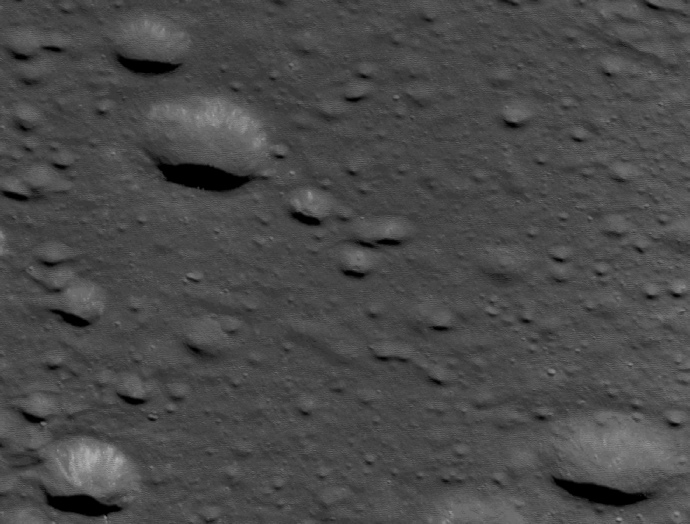
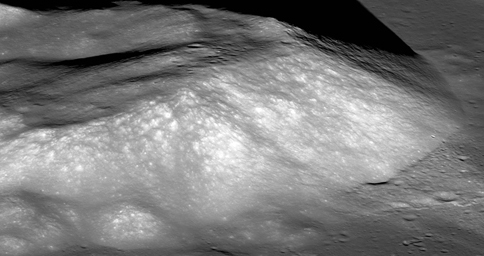
The LRO view is a screen shot taken from the LRO image browser linked at the top of the page. I’ve adjusted the contrast and sharpened slightly to bring out the details, but nothing has been added or taken away.
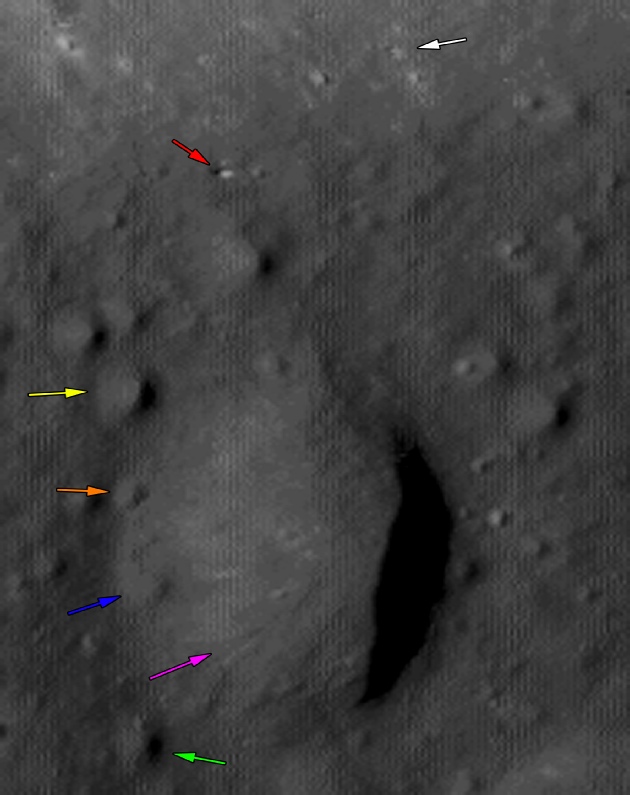
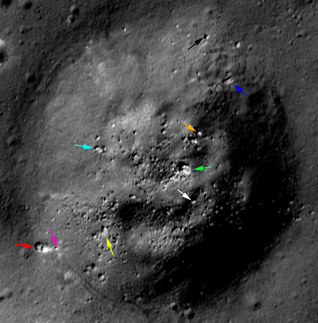
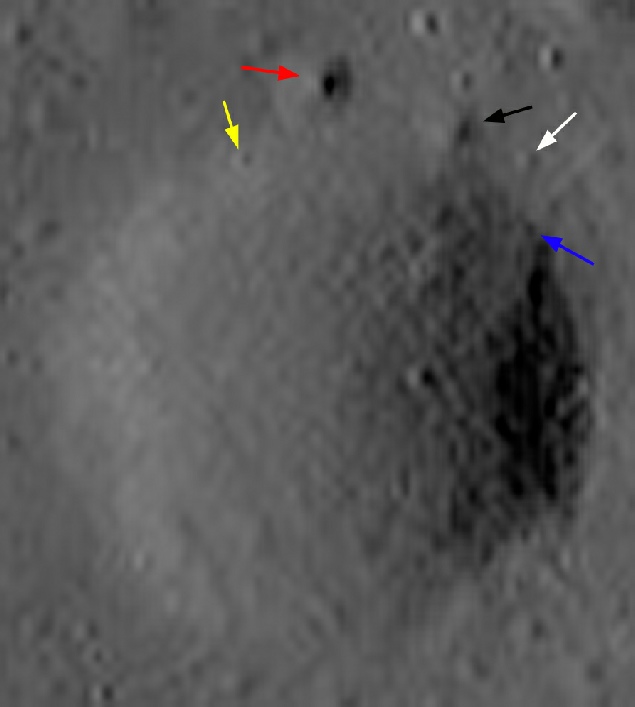
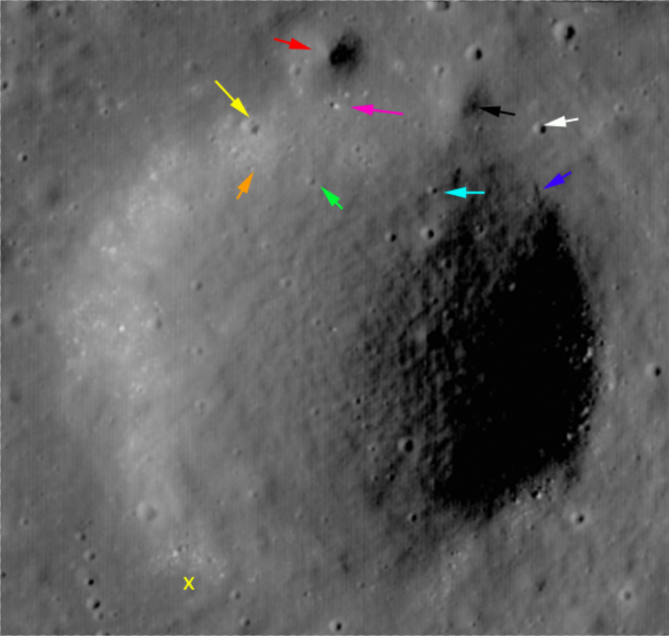
It is possible to make out the prominent boulders we identified earlier (blue arrow), and the boulder field in front of the photographer is pretty self-
On the opposite side of the crater you can make out the small crater and the rocks in front of it in the Apollo view (red and magenta arrows), as well as the shallower crater at 1 o’clock (black). The even smaller craters at 11 o’clock and their attendant boulders can also be made out (yellow & orange arrows).
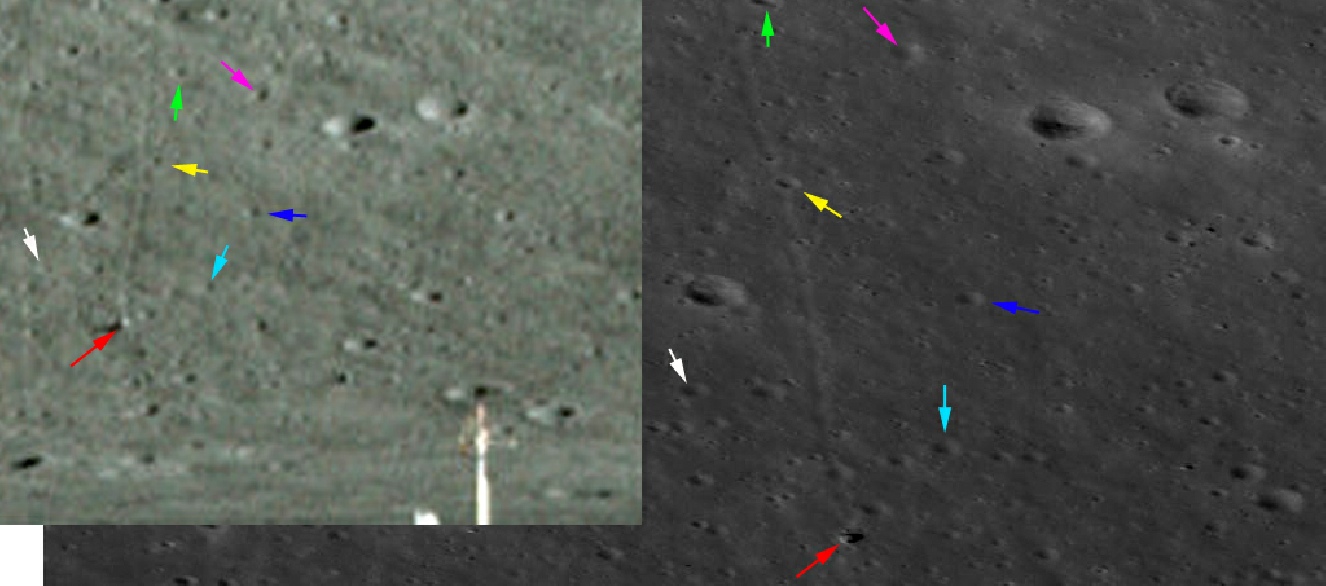
We can see some of these features in the slightly lower resolution Indian (below left) and Japanese (below right) images.
Zoom in on the Apollo photograph. Have a look. Does it match the view shown by Kaguya? The answer is yes, and the question for any doubters has to be ‘How could Apollo do that?’. No probes showed that view before Apollo, and LO4’s image is not detailed enough to reproduce that landscape, so how did Apollo 17 know what the view looked like?
See this part of my site for more on 3D views of Apollo landing sites!
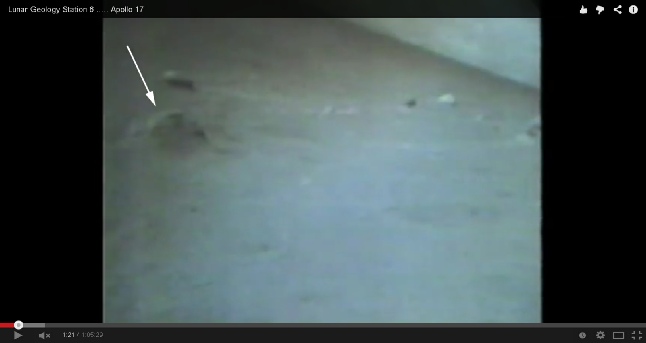
Also in the background is one of the most fascinating features of the lunar surface: boulder tracks. Trails left by boulders give clues to (obviously) where they came from, but also how fast they travelled. They might be ejecta from a large impact, or they could have been dislodged by a small one, they could have fallen as a result of a moonquake, or have just lost their original footing thanks to the constant degrading influence of thermal expansion and contraction. Whatever their cause, they are just downright cool, and it turns out the south Massif is criss-
The crew also draw attention to them, such as Jack Schmitt’s comment on landing:
“Hey, you can see the boulder tracks (on the North Massif)!”
In the interest of fairness, it is worth drawing attention to the terminology there. Schmitt doesn’t say “boulder tracks”, he says “the boulder tracks”. The implication there is that, while the current shots of the landing site we have don’t show them, they may have been visible in other copies, for example the Apollo 15 mapping camera shots. Other exchanges in the transcripts concerning site geology (linked to above) show mission control asking for more information about location of tracks, which is an indication that while they may have been aware of some, they weren’t aware of all of them -
We have another informative comment from Cernan later, where he discusses what became as Geophone rock:
“A boulder that's at least 3 meters (high) and maybe 5, and I wouldn't be a bit surprised if you can find it (in the overhead photography). It's on a line between us and the intersection of the South Massif and the (West) Family Mountain horizon. Just slightly left of that line or south of that line. And that boulder ought to show up on your best photography.”
In other words, they had to find a boulder 3m high in order to be sure it would show up on their orbital photographs (it does).
So, what tracks can we see?


The more you look at the north massif slope, the more of these trails you can see, and the images shown below compare them with the LRO.

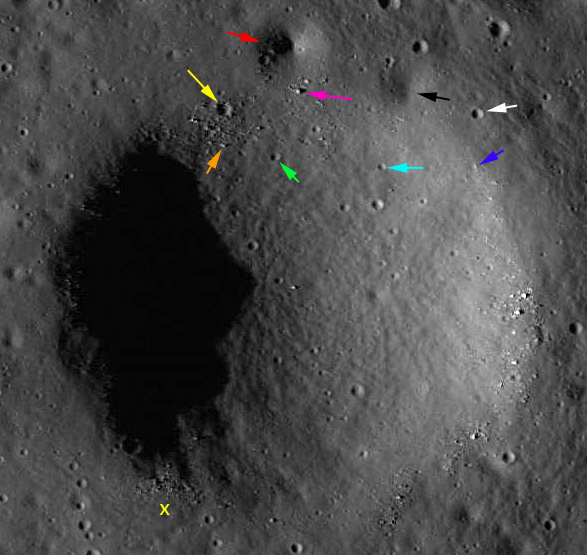
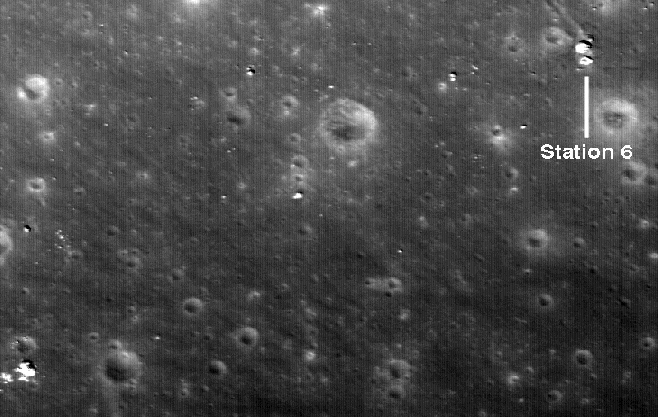
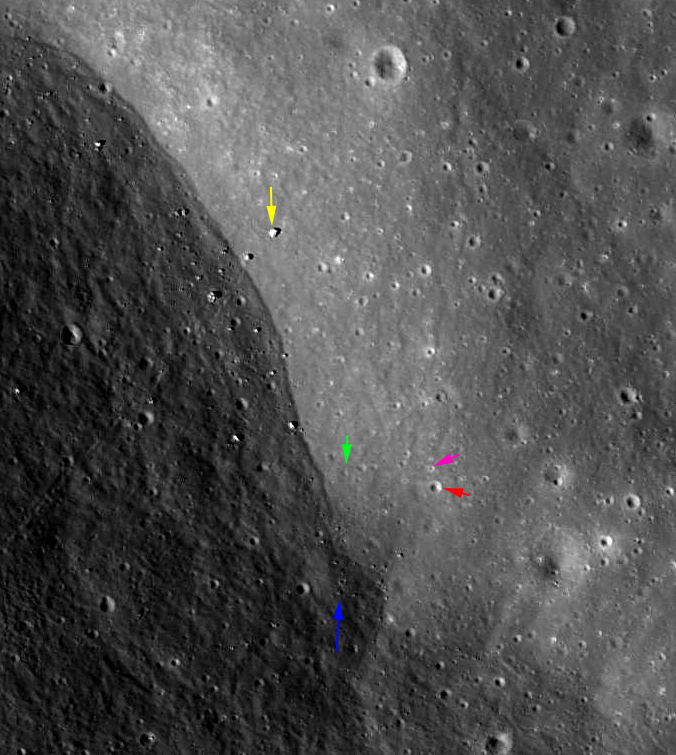
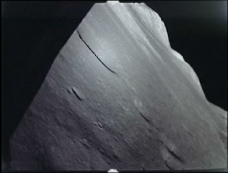
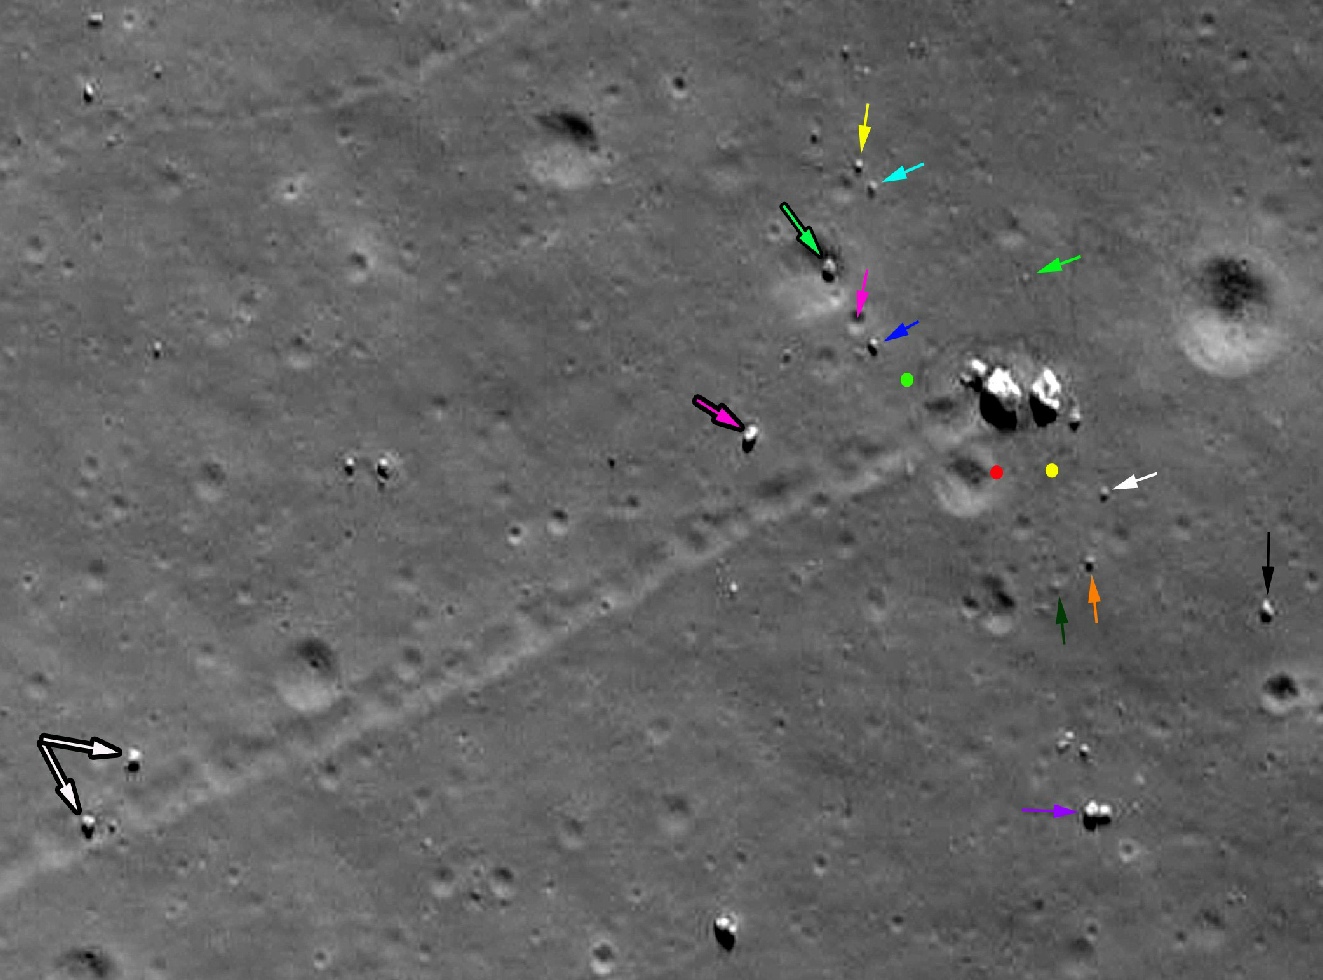
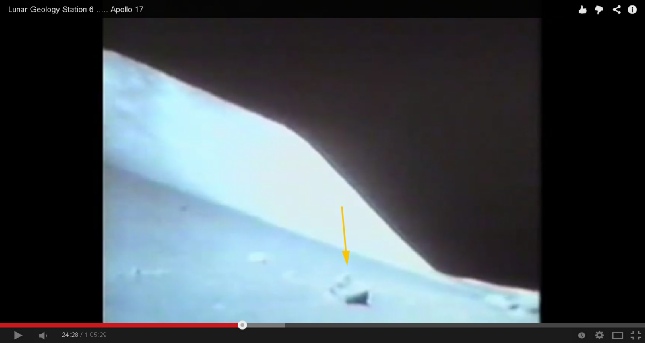
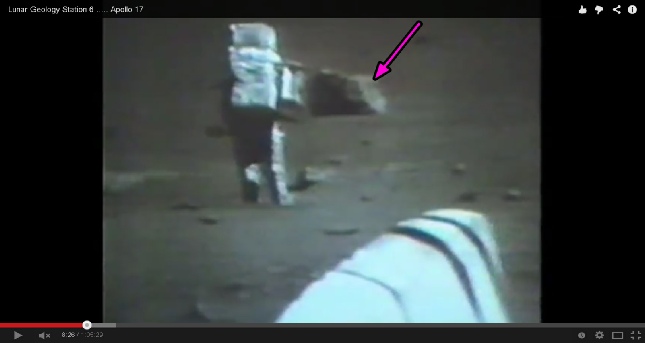
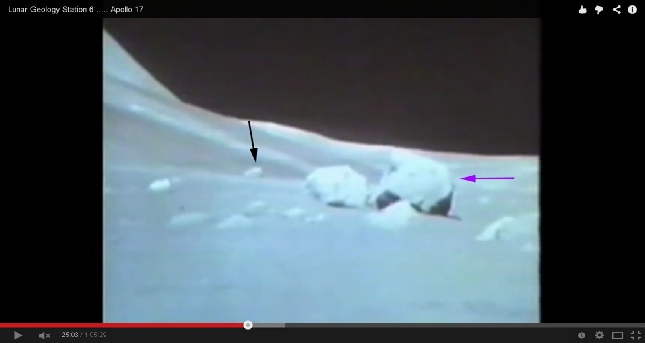
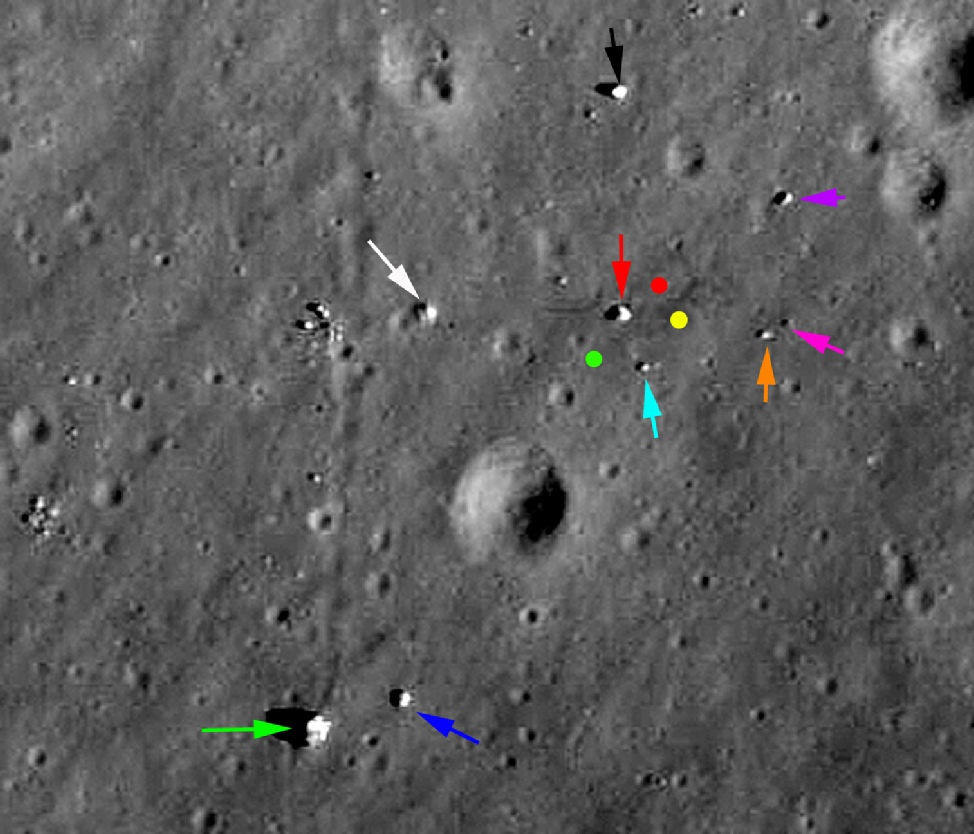
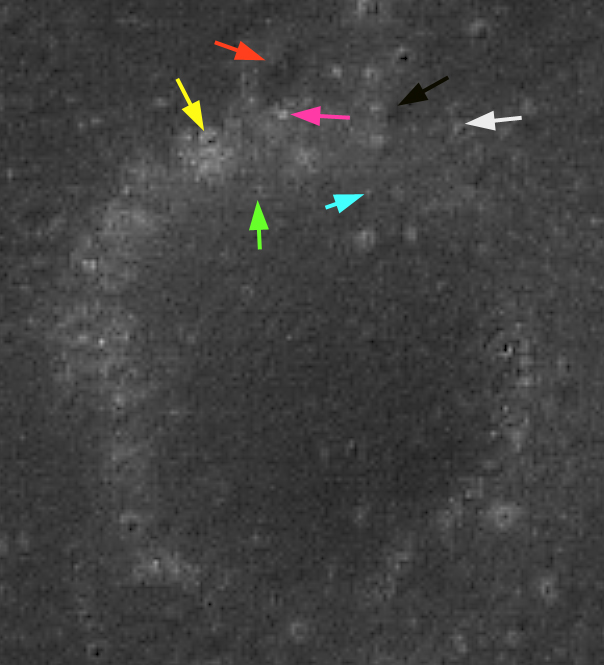
The middle one presented above is interesting, as it is the famous ‘Split rock’ at Station 6. Here’s another LRO view showing it in more detail. I’ve added the same coloured arrows to help identify things. The split rock is in the bottom right, and careful examination of the photograph reveals there are two shadows off it. The ‘Dark Boulder’ is the one identified in the National Geographic photograph.
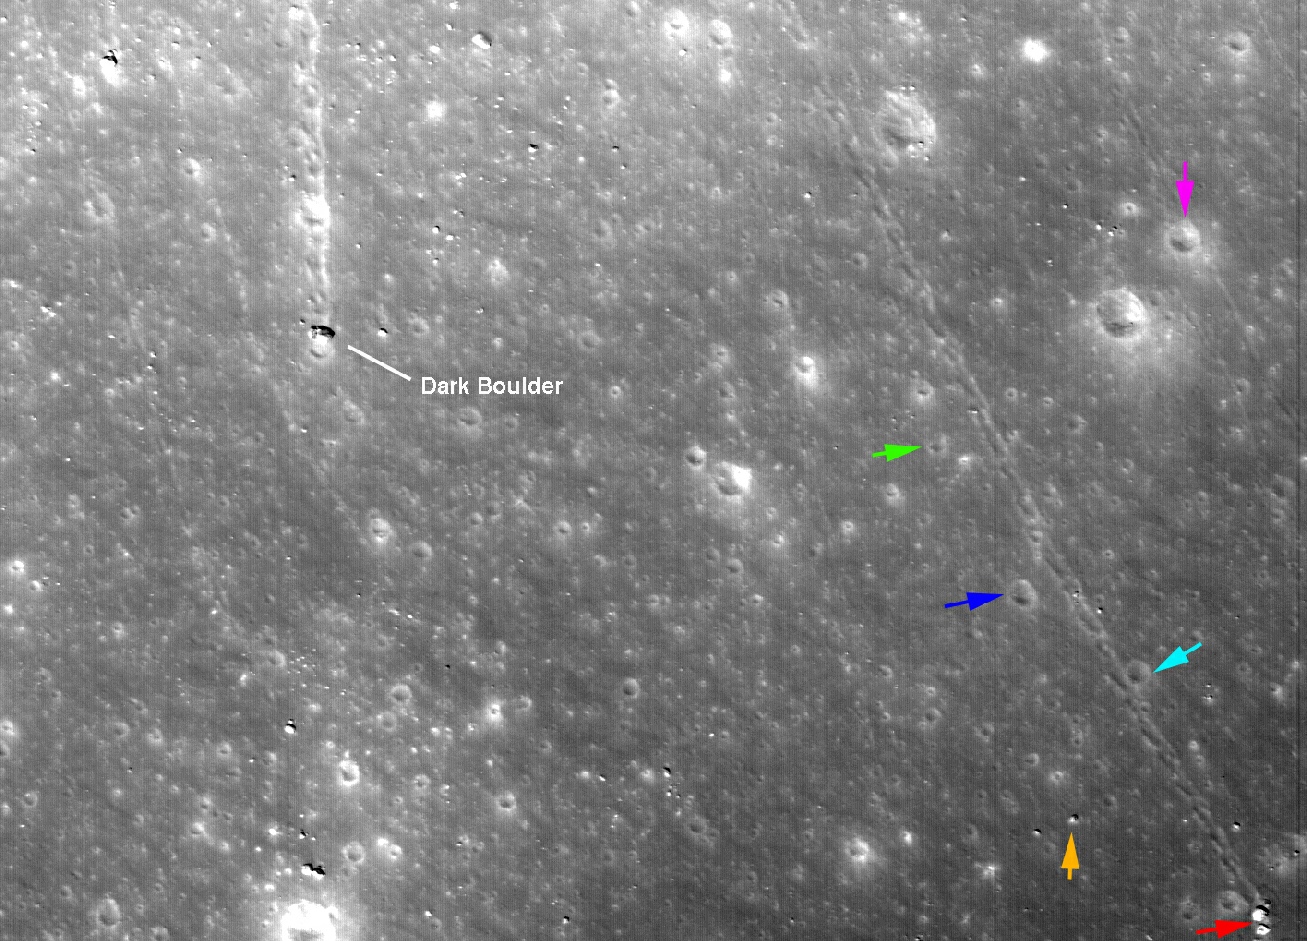
It’s clear from the Apollo images that the panoramas show many of the same features from a different angle, which is an excellent indication that they are in a large 3 dimensional space and not a small stage with a backdrop! The fact that the LRO shows all the features I’ve identified shows that they are in a large 3 dimensional space on the moon.
Split rock is also a convenient place for us to turn around and look in the other direction now, back towards the south massif. The photograph below is a crop of AS17-
To the right of the oblique view we have a vertical view of the Turning Rock and Split rock area (top), and a view from the LRV of the same area (bottom, AS17-
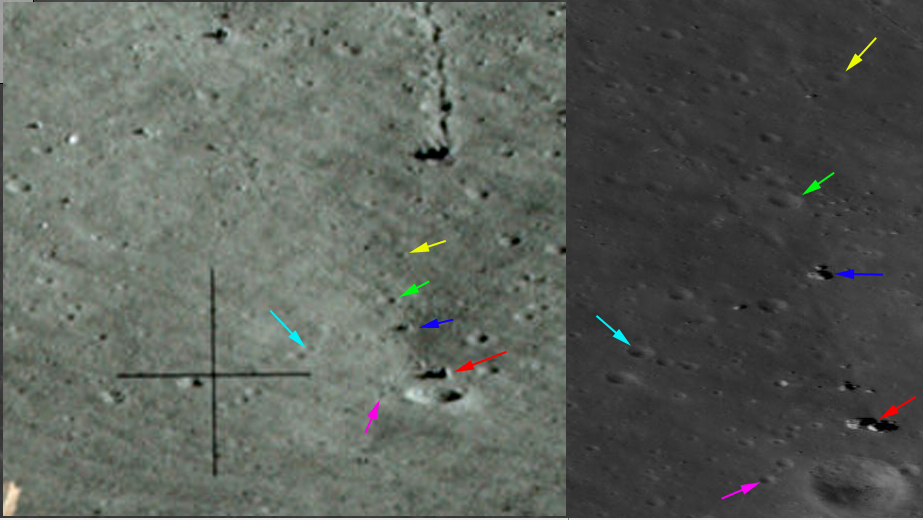
Returning to the Apollo view across Henry crater to south Massif, once you position yourself at the white arrow at split rock, it becomes clear that the other arrows are positioned appropriately.
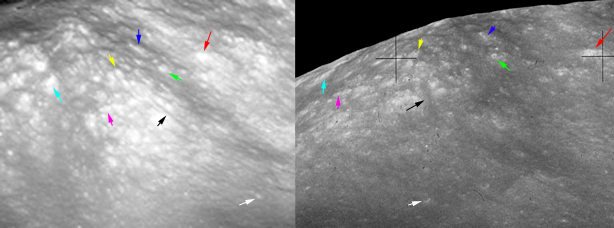
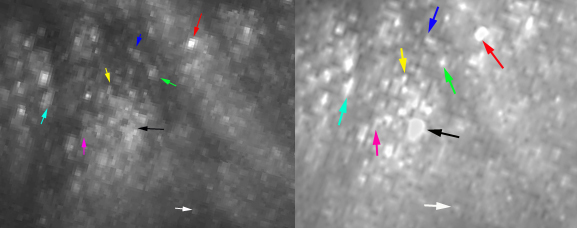
The light blue arrow on the view south looks indicates the location of the 4 corners of our imaginary square on the south massif, and seeing as we’re looking at it we may as well zoom in a little and see if the claim that the patterning on the slopes is an exact match is correct. In the image below, the view on the left is from the LRO oblique shot, the view on the right is the one from the ground based photograph taken at Split Rock. I’ve used coloured arrows again to pick out the more easily identifiable bright spots on both. Using those as a starting point allows us to conclude that every bright spot on the LRO oblique shot is matched by the Apollo photograph on the ground.
Obviously some delusional idiot will claim that these aren’t independent sources, so can we repeat the exercise with the Chang-
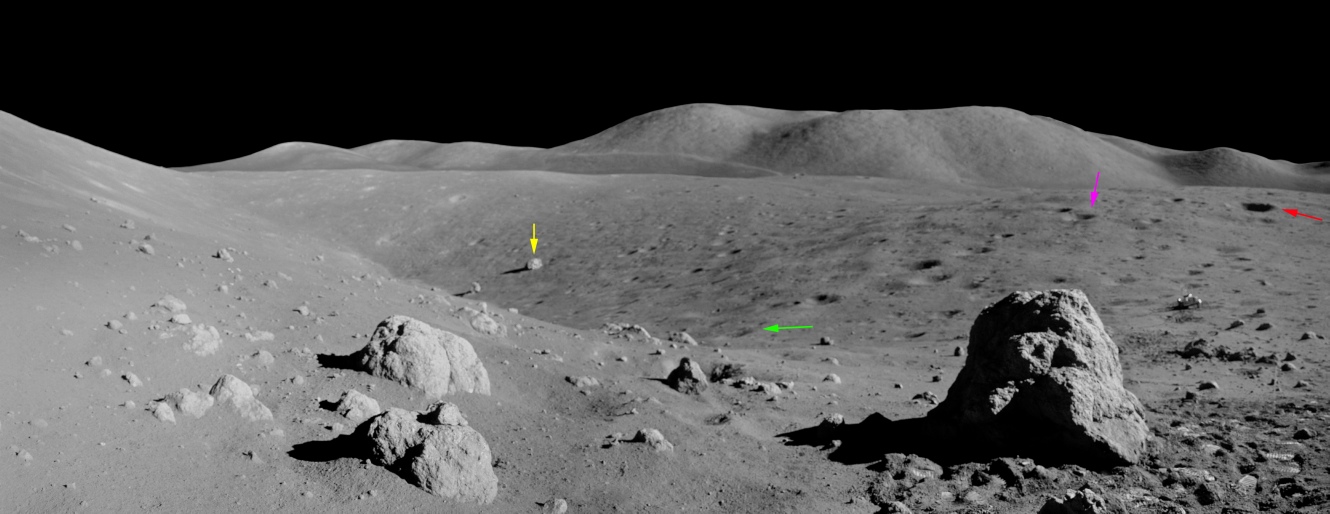
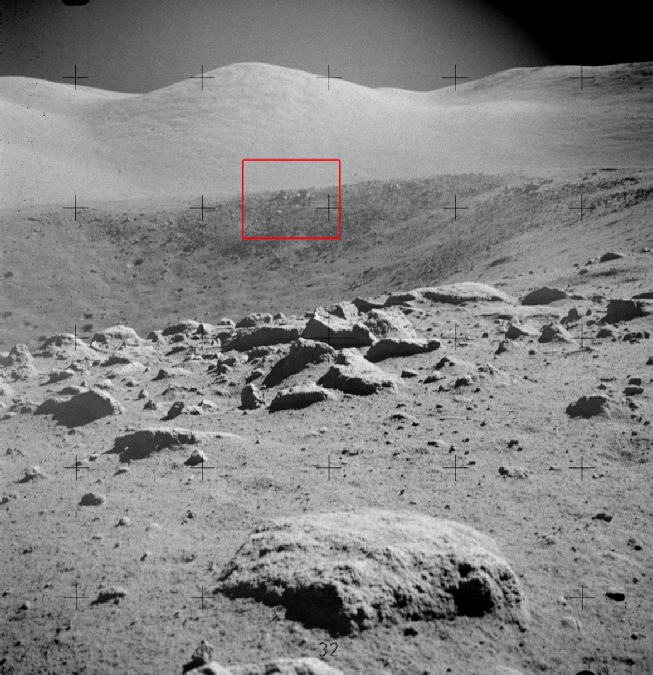
The easiest landmarks to find here are the two rocks on the valley side of the image, one of which is close the massif base. The largest of these is identified by the yellow arrow.
Once you have those in your sights, it is a pretty easy job to navigate your way around the rest of the boulders and craters visible in the 2 images.
The fun part is locating the boulders in the foreground. Directly above the largest boulder in the Apollo image is a line of craters running towards the base of the crater (maroon arrow to green arrow), with a couple of craters off to either side. Just off to the right of the uppermost of these is a larger one (red arrow).
By triangulating between these craters, I believe the blue arrow picks out the large boulder in the LRO image.
Once again, here are absolutely no photographs of this area, either taken before the Apollo missions, or even Hasselblad images from orbit by Apollo missions, that show these rocks and craters in this level of detail. Apollo 15’s Panoramic Camera does get very close, as shown below left, but that was taken by Apollo!
Nice of Japan to confirm that those rocks exist though, as shown below right.
Only Apollo astronauts could have taken pictures of those rocks, on the lunar surface.
We have, by now, explored most of the Apollo 17 landing area and hopefully have demonstrated to all but the most ardent of anti-
The photograph below shows the view from the LM after the last EVA, and below that is the view from the LRO.
The perspective from the LM means that it is difficult to make out much more than a third of the markings visible from the LRO, it is still possible to make exact matches with what can be seen.
While the crew were preparing to leave the surface, the orbiting CSM was continuing to take photographs with the Panoramic and Metric cameras, and in orbit 49 it got a very good view of the landing site in image AS17-

A few seconds later we have a view of the tracks made of the opposite side of the LM, and this is shown below with the corresponding LRO view. The outline arrow colours match those visible in the previous view
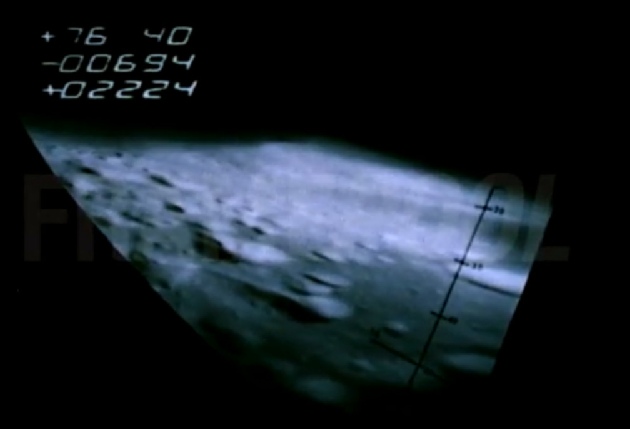
Again, what more is there to say? A video of a LM take off that shows tracks on the ground that were photographed 40 years later and found to be an exact match? Not only that, but you can go back to the start of this section and look at the craters that are visible -
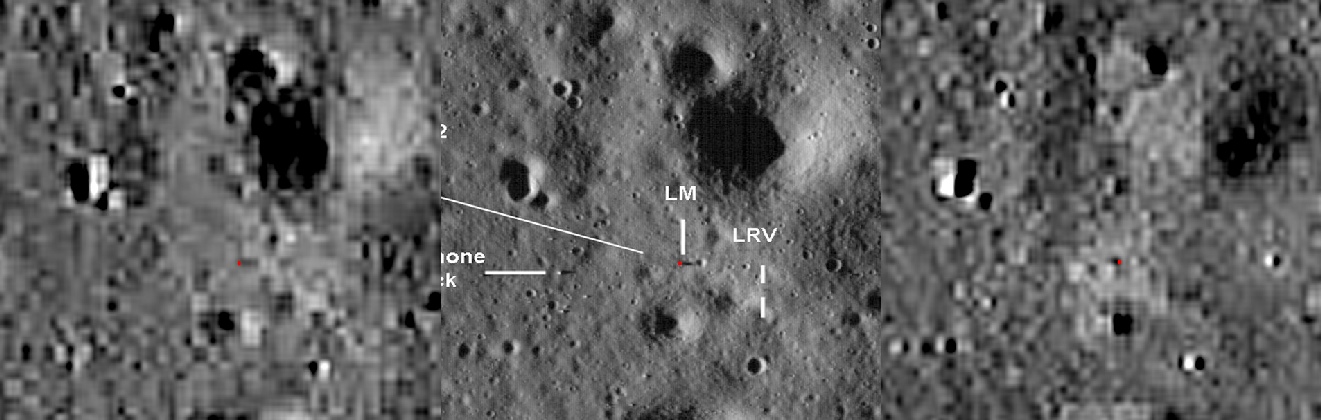
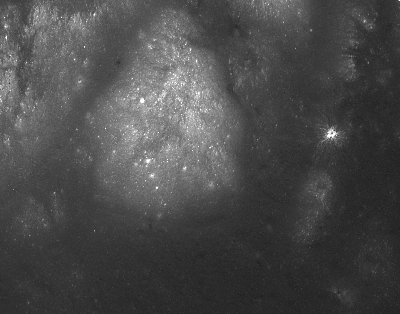
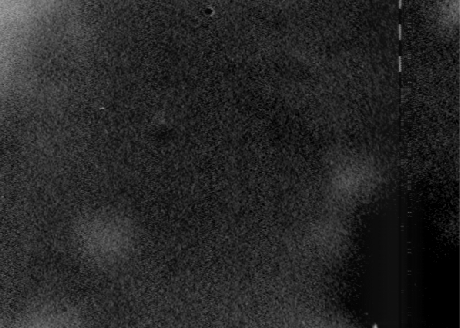
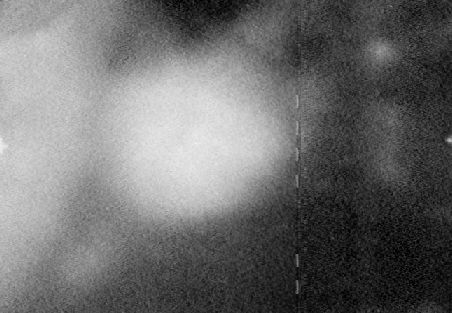
One interesting feature emerges on the ascent video, and it amounts to a small white blob. Below is close up of the view from the LRO (centre), the descent view (left) and the ascent view (right). The 16mm views have been stretched and rotated to match the LRO perspective.
2 minutes
14 seconds
The above illustrates the increasingly wide view of the valley floor as the ascent module rises, and also that what you can see in the footage is exactly what can be seen in the LRO view. What is visible shows much more detail than was available in LO4 photographs.
We can continue the ascent using data from India’s Chandrayaan-
We pick up the footage as it passes s small hill at the end of the valley, with the 16mm view shown below left, Chandrayaan-
As with Apollo 15, we can look at what the Panoramic Camera in the orbiting CSM took of the landing site, and image AS17-
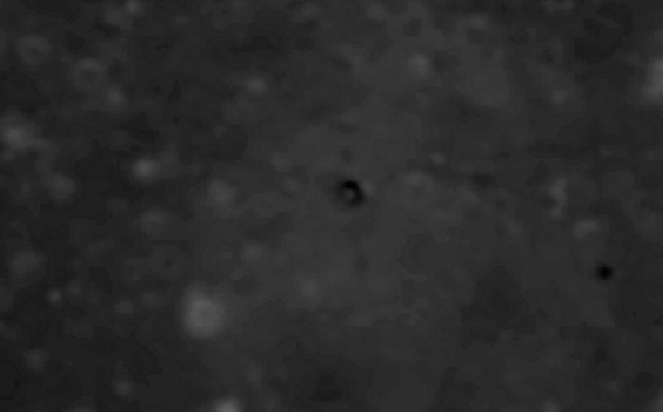
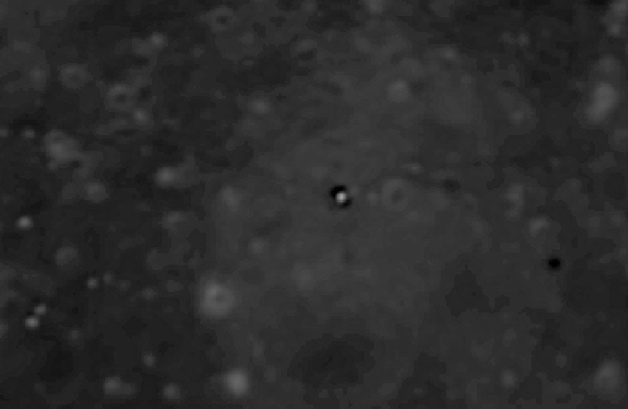
For our next crater we can return to Camelot, and a very nice panorama of the area available here. The LRO view is shown below left, Danuri below right.
Camelot crater was also filmed while the astronaut were at station 5, and a still from that footage is shown left, again with the boulders identified.
As with other examples there is a superficial resemblance, but the detail is only good when viewed from high -
Here’s a shot of that model, rotated from a video here, together with a view of that closer surface.
It’s pretty easy to identify all of the craters in the image, from Rudolph in the top right, and following a line diagonally to the bottom left. It’s not even worth comparing the orbiter image, and the nearest equivalent with any detail before this mission is the Apollo 15 mapping camera.
It’s just as easy to pick out the small craters as the LM stabilises to make it’s final descent -
Looking at the Lunar Orbiter view, this is hardly playing fair -
What is absolutely certain is that there is a crater by crater match between the LRO oblique view and the Apollo landing approach video still.
A few moments later in the landing approach, we start to get an interesting feature on the rim of Camelot crater. During continued and tedious discussions with anti-
Zooming in on the oblique LRO view of Camelot (below left), we can see that there are a couple of prominent boulders casting shadows. There is a similar view of Camelot in the landing video (below centre).
Danuri (right) also picks out the boulders on the rim in both it’s views, along with many other small features.
The twin peaks are quiet obvious in all views of the crater, including their shadows and their position on the crater rim. It is also possible to pick out the crater rim’s angular changes in direction in the approach still.
Chang’e-
Danuri’s view (below right) also validates the Apollo vantage point.
There is, unsurprisingly, complete agreement between the LRO and the Apollo views, particularly in terms of the patterns in the massif slope -
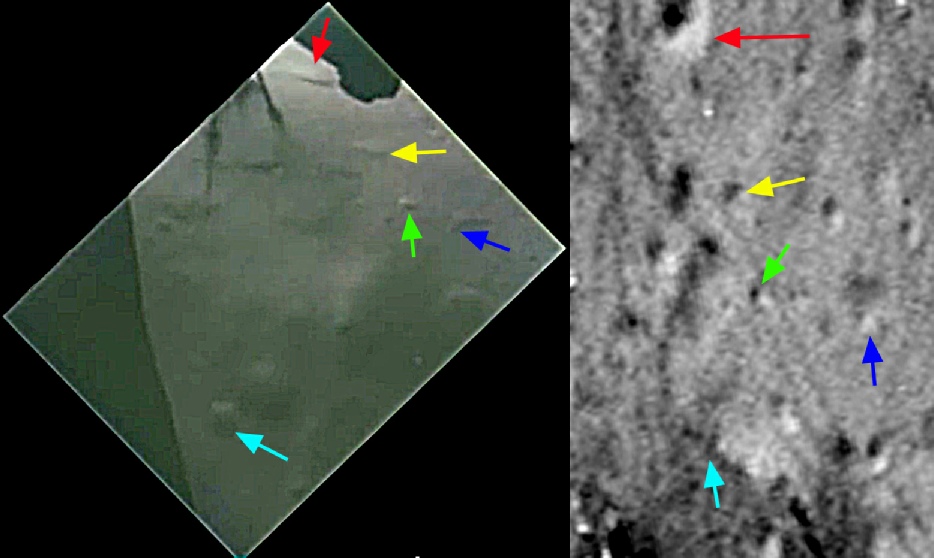
We can even, at this point, bring in another source of information: China. China’s Chang-
I took a series of screen dumps of the pages around Taurus-
The mottling on the massifs is very clear, as are many of the features on the valley floor -
One interesting feature that stands out are 4 bright spots on the south massif that form the corners of a square. You can see this feature in the LRO, Apollo and Chang-
We can even bring in the Japanese (below, right), whose Kaguya probe provides a similar view of the Taurus-

It should be fairly clear that we have 4 separate, non-
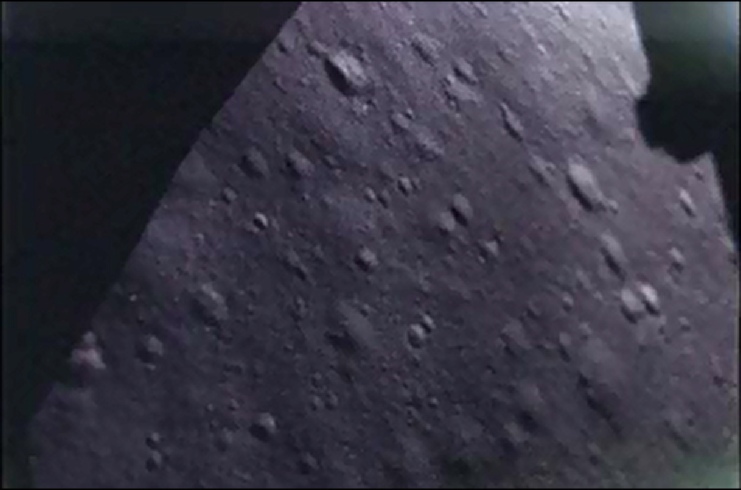
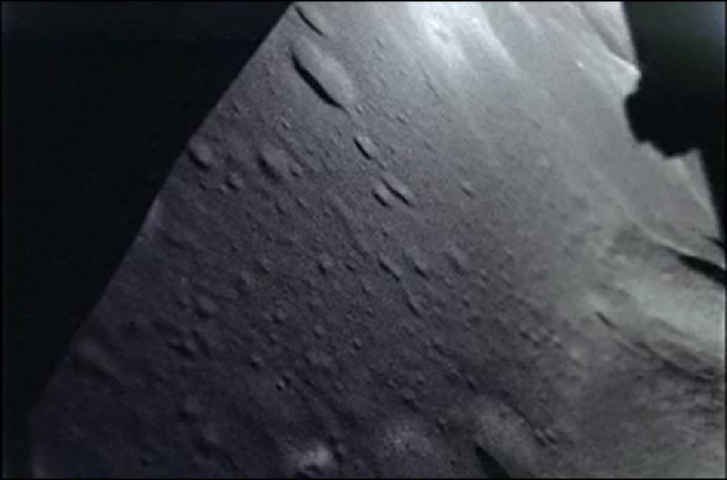
Now that we’ve had a quick first look at the view from altitude, now we can start to look at the ground, and as with other missions it makes sense to do that from the mission start: the landing approach. Video covering the landing approach is widely available on Youtube, but the best quality versions on the internet are at archive.org.

The above does mean, however, that unless someone can prove otherwise the best images of the Apollo 17 landing site were taken by Apollo missions.
As far as modern images of the site are concerned, the LRO has a number of high resolution images of both the landing site itself and the areas photographed during the mission. You can find several LRO images at the ALSJ here, and the best ones will be chosen for comparison in this section. A nice oblique LRO view can be found here.
So far so good, lots of different images of the Taurus-
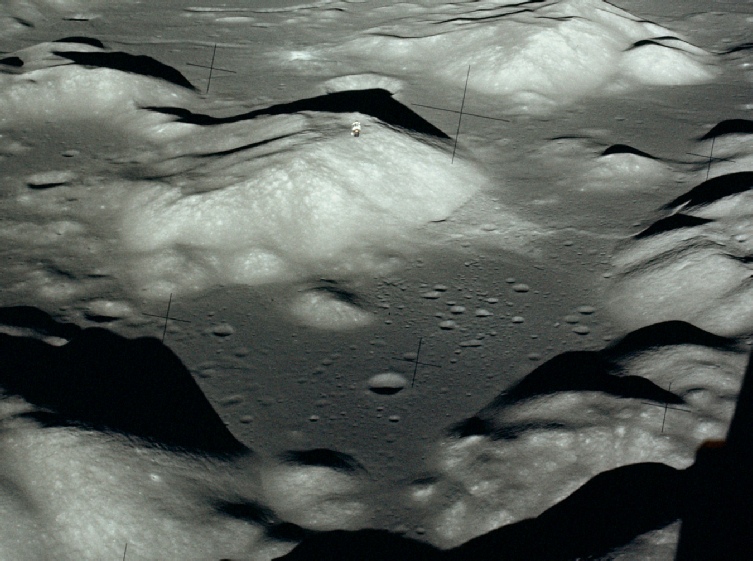
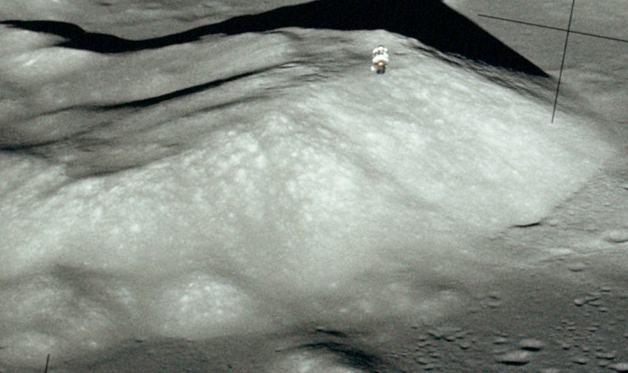
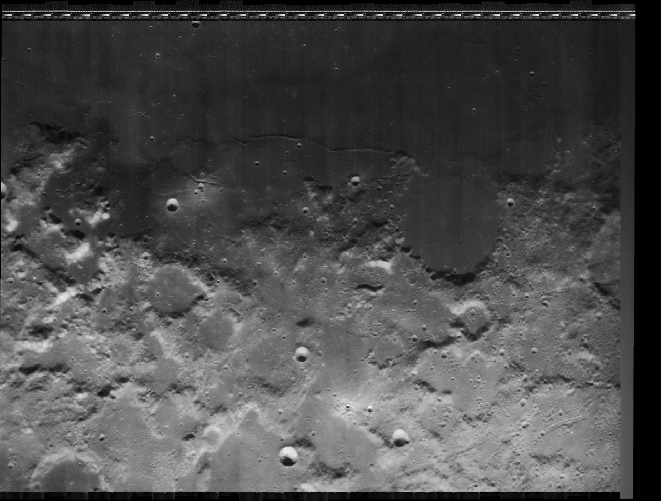
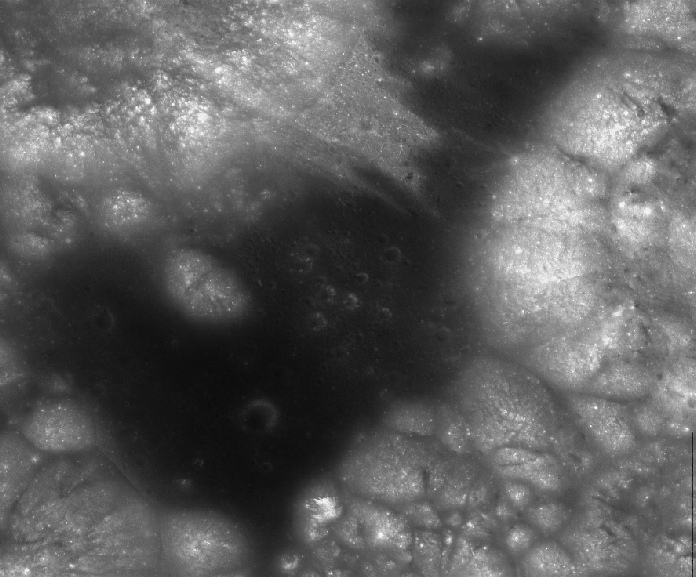
What we can do to start with is to look at the same view of the valley as seen from Apollo 17, and there is one spectacular shot taken from the LM, with the CSM in the distance, AS17-
Well that’s a beautiful thing is it not? Surely one of the most amazing photographs ever taken. Although it is a broad scale view it is significant because it provides a perspective that was not available prior to the Apollo missions: an oblique view. All other shots were taken from directly above, and yet it is an exact and precise match for the LRO oblique shot taken 40 years later.
It is also noticeable that the fine detail on the slopes and valley floor that is absent from the other views -
There is obviously not much fine detail to be seen in this view, and some of the maps produced with the help of Apollo mapping camera data give more information, such as the two shown below taken from the ALSJ website. The bottom one is almost certainly produced from Apollo 17’s own mapping camera (see here) and the map definitely is based on Apollo data, as it says so on the map!
sm2.jpg)

We should also include an Apollo 15 Mapping camera view of the site AS15-
Apollo 17
Like Apollo 16, Apollo 17 presents the problem in that many of the published photomaps used in the mission (and which must therefore have been produced before it) were created using images taken by the mapping camera in preceding missions. The available LO images (at least the ones I have been able to find) do not cover the Taurus-
Taurus-
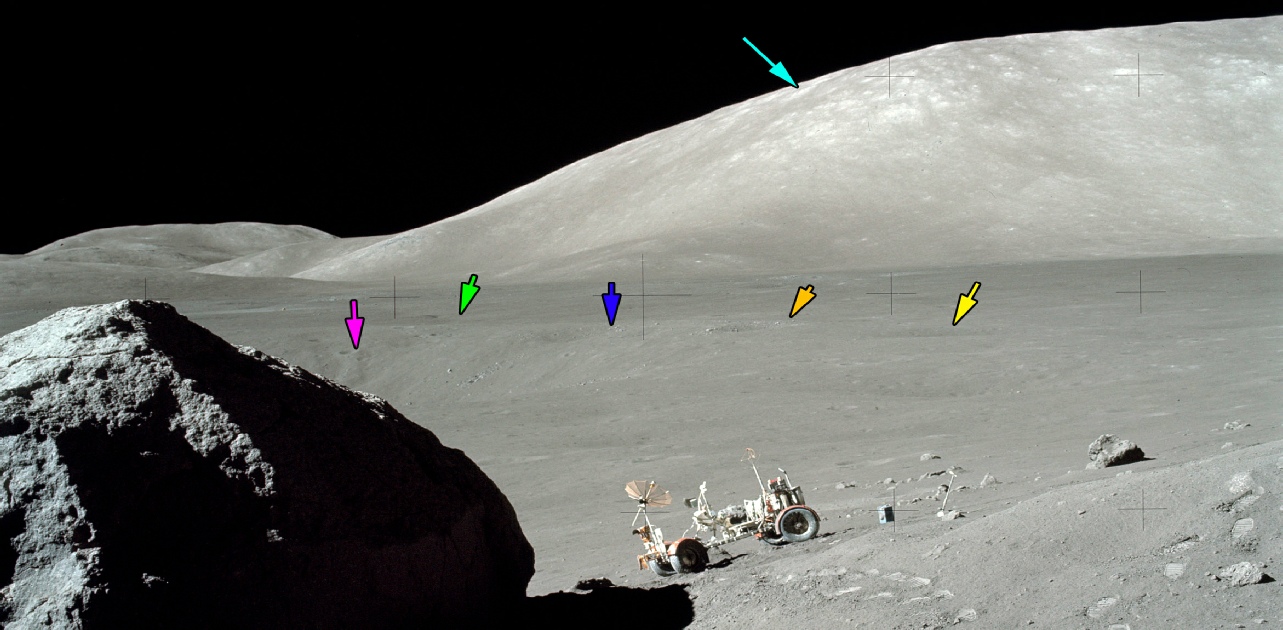
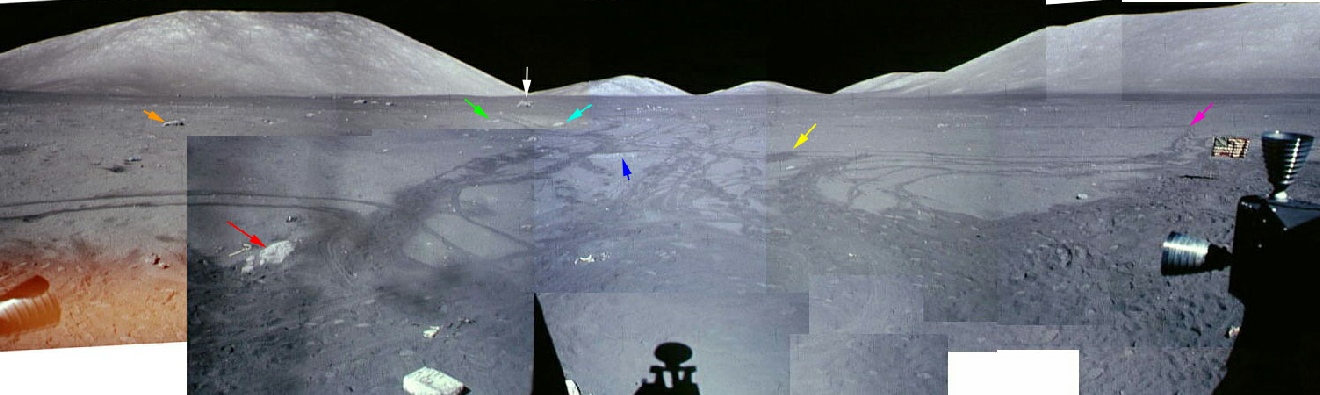
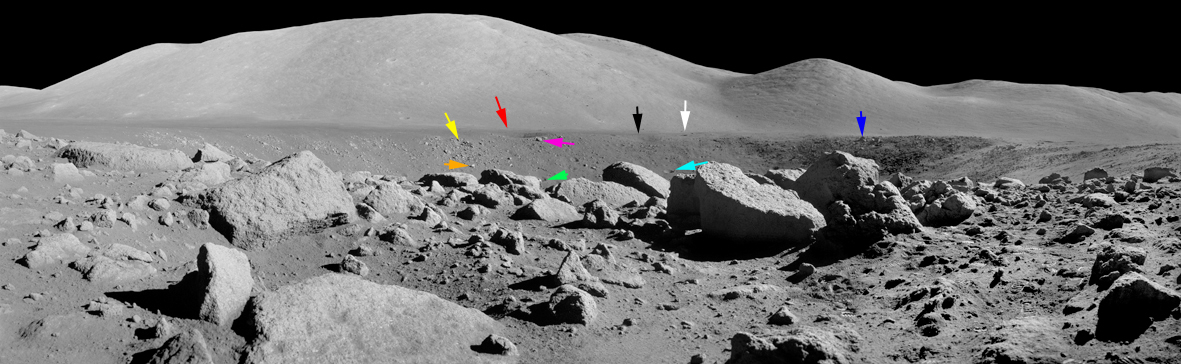
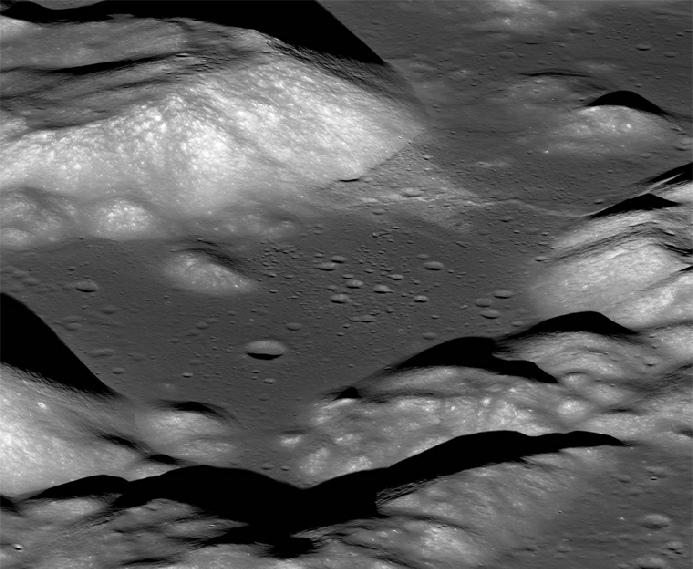
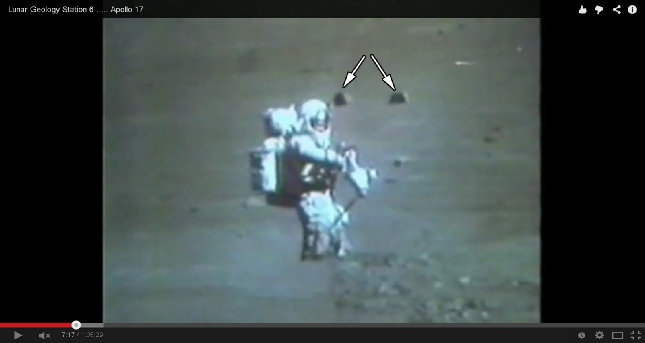
Station 6 is the location of two excellent and very famous panoramas, one taken by Gene Cernan, the other by Jack Schmitt. They were published in the original Preliminary Science Report (an actual copy of which I own), but high quality modern versions are available here and here. A detailed view of station 6 from the LRO can be found here, which also shows the locations form which the photographs were taken.
I’ve taken a close up of the LRO and added green dot for Gene’s location, red for Jack’s, and yellow for the location of the Lunar rover.
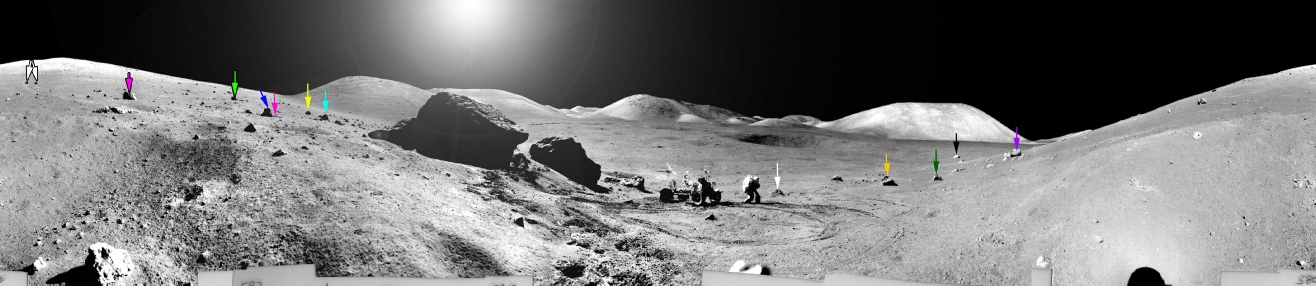

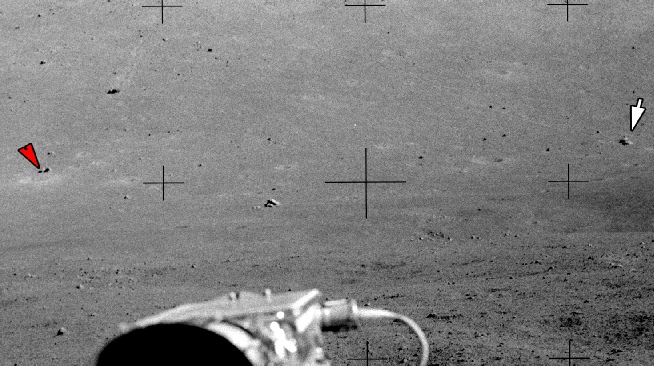
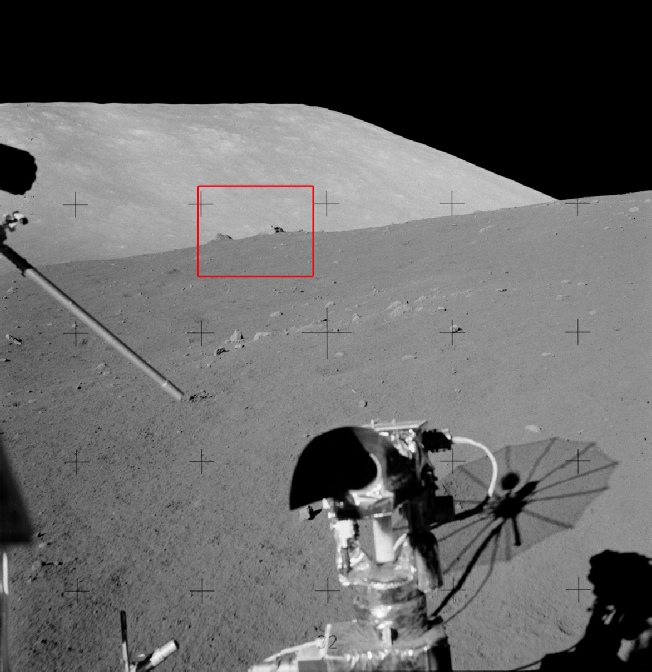
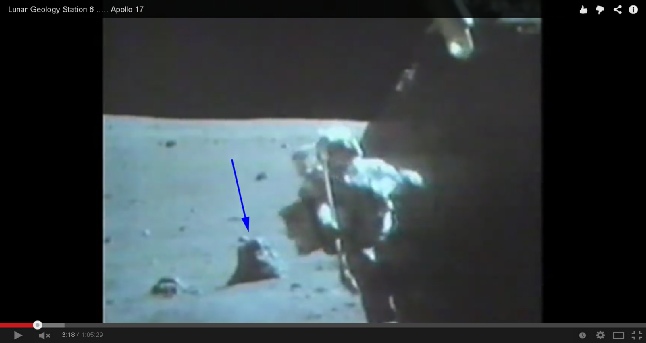
We also have corroborating evidence from the TV transmission of EVA 2 sent from the LRV camera. This video shows many of the rocks identified above, and Schmitt can be seen actually taking his panorama at around 7:30, with the twin rocks picked out by the black edged white arrows in the background.
Moving on from Station 6 we head across the massif base to Station 7, and we again have a great panorama of the area done by Gene, available here. We also have the same LRO view used previously, and again I’ve identified the LRV location with a yellow circle and Gene’s with a red. Jack also took a panorama, available here, but it adds little so I haven’t used it. His location is identified with a green circle.

As before, we have a youtube video, available here, and again some of the rocks can be seen in the live TV transmission.
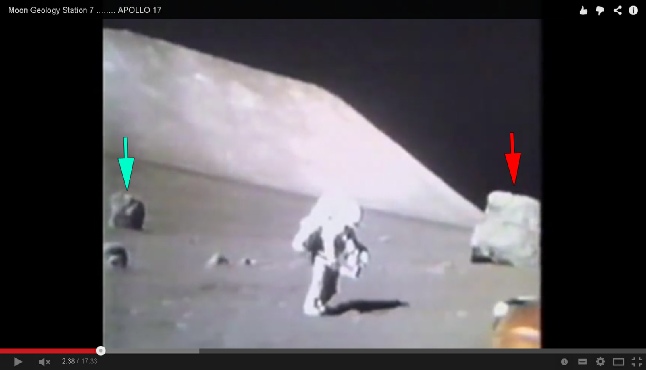
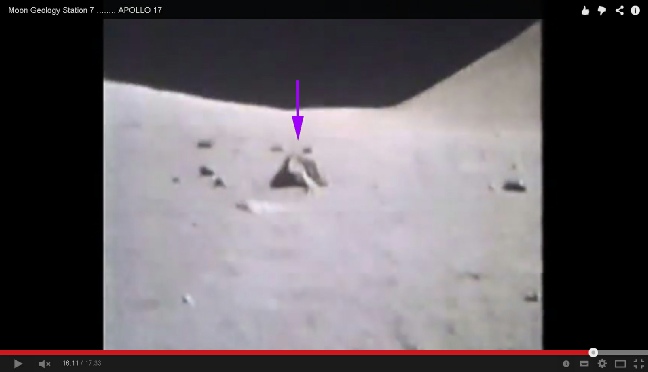
Observant readers will have spotted 3 coloured circles on the panorama on the left side. These are three features that can also be seen on from Station 6. The yellow circle is the top of split rock, while the red and black rocks are as identified below (the green arrow is from the first look at station 6 and is not used here).
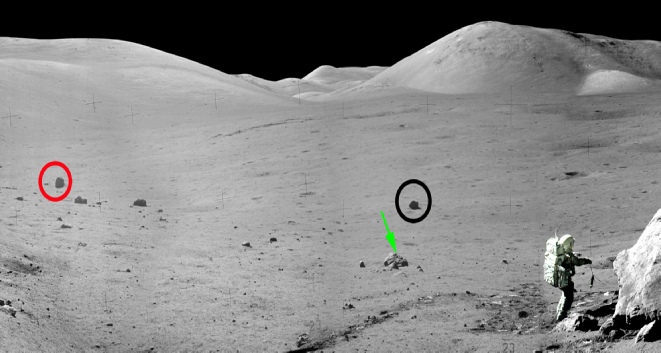
So, not only are small features visible, we can use them to show that the space involved is much larger than those claiming it was all a film set will accept.
Having spent so much time over at the north massif, it’s only fair to head south and see what we can find there.
During the first EVA, the astronauts headed over the a crater called Nansen, a trough at the base of the southern massif. There’s a nice panorama of the crater here, and it is shown below. Searching the LROC image database provided eventually provided a vertical view where Nansen wasn’t in the shade, and that is also shown below left, along with (below right) a Chandrayaan view.
Just for fun I added another one after main part of this page was written -
In this case the view is re-
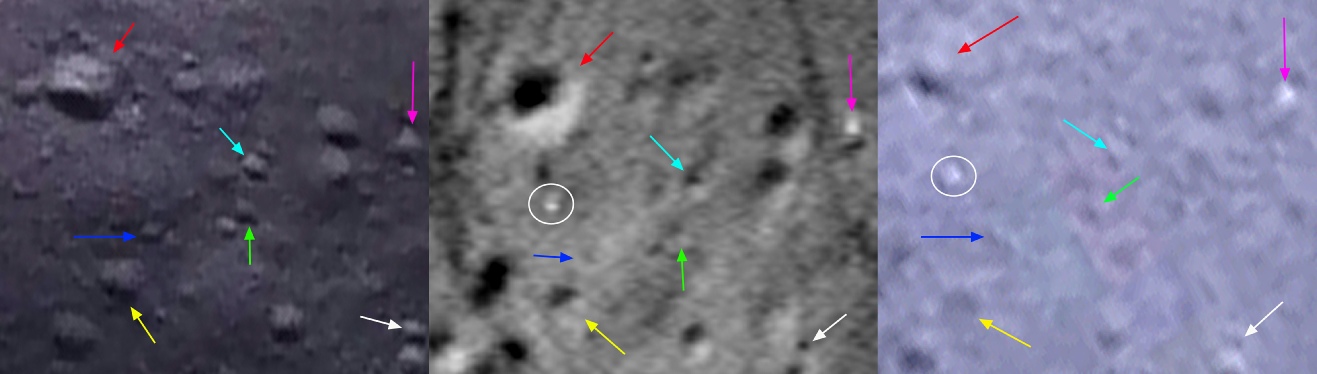
The area in question is in the white circle, and while it can be identified in the later views, it is not visible on the descent footage, nor is there any sign of it in the post-
A close examination of the footage shows that it appears to ‘twinkle’, as if moving and catching the light. Experience of the Apollo 15 ascent footage shows that a piece of Kapton foil is a likely explanation, but it is odd that it is not still moving horizontally away from the LM.
A view of the TV footage isn’t entirely helpful as the angle of the LRV means that the descent module obscures the view that we need to see, so for now it will have to remain a mystery.
The LM ascent module’s path out of Taurus-
The following views show screenshots taken from the LM ascent, together with the craters you can see in them, and the size of that screenshot on the oblique LRO image of the valley floor. They were prepared to rebut an argument with an anti-
India also has a view of the valley (below left), thanks to Chandrayaan’s Terrain Mapping Camera, taken on orbit 713 of its mission, and a partial covering of the valley floor by Korea’s Danuri probe (two photos from the ‘A and B’ cameras of the Lunar Terrain Imager instrument, below right)) taken in March 2023,

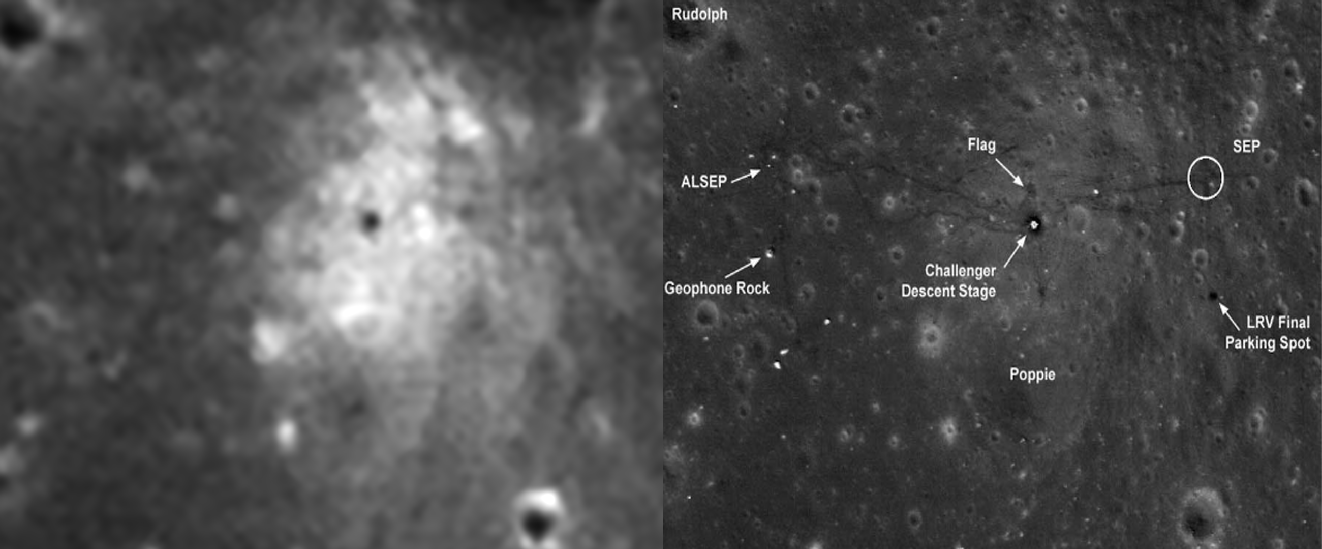
The precise time for the photograph is recorded as being at 18:57:50 on the 14th, just as the crew were beginning to dispose of their equipment prior to launching back to orbit.
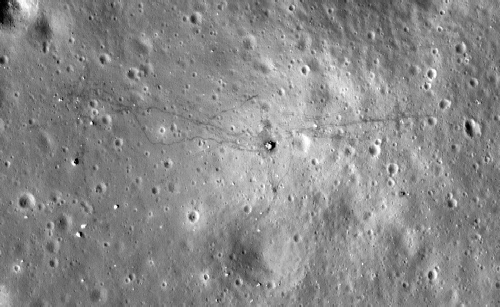
If we zoom in to the precise area of the LM and adjust the image to increase detail we can see the view right.
All of the paths to the ALSEP, SEP, Station 1, and even the final parking spot for the LRV can all be made out.
We can get a clearer view of these features thanks to the footage shot as the LM ascent module departs from the surface, and the screenshot below shows the same tracks as are visible in the LRO view above.
I’ve added the same coloured arrows where the equivalent points from the image above are visible. It’s worth pointing out that this view was published in the Preliminary Science Report for Apollo 17, and was thus public knowledge for decades before the LRO images.
There are obviously no tracks or disturbances of any kind in this image, in marked contrast to the modern post-
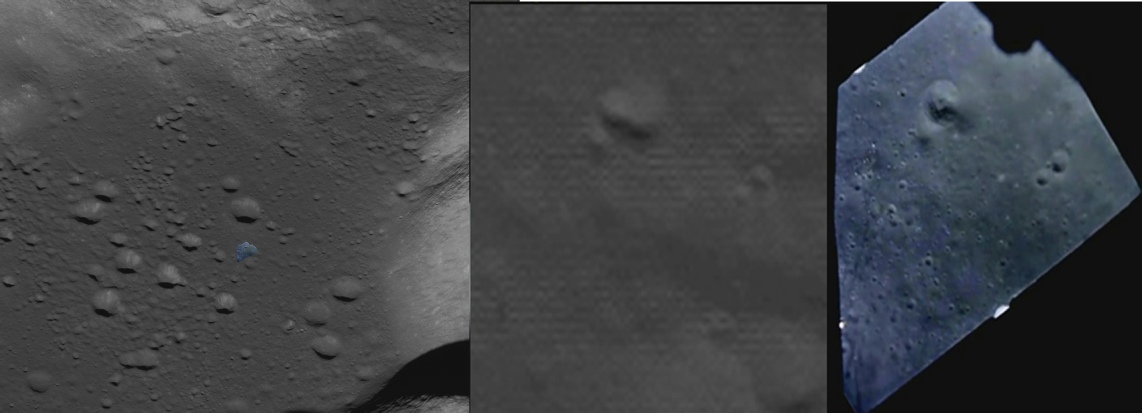
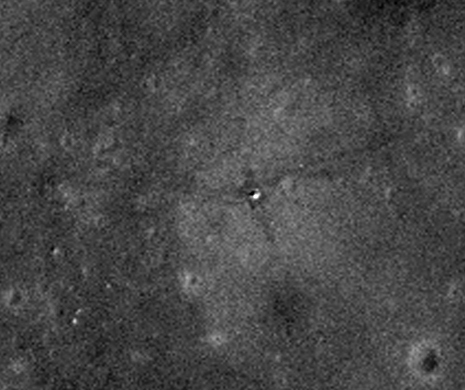
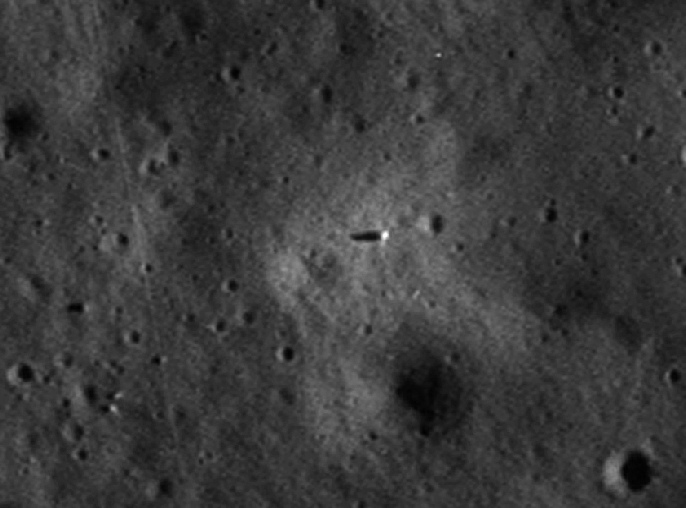
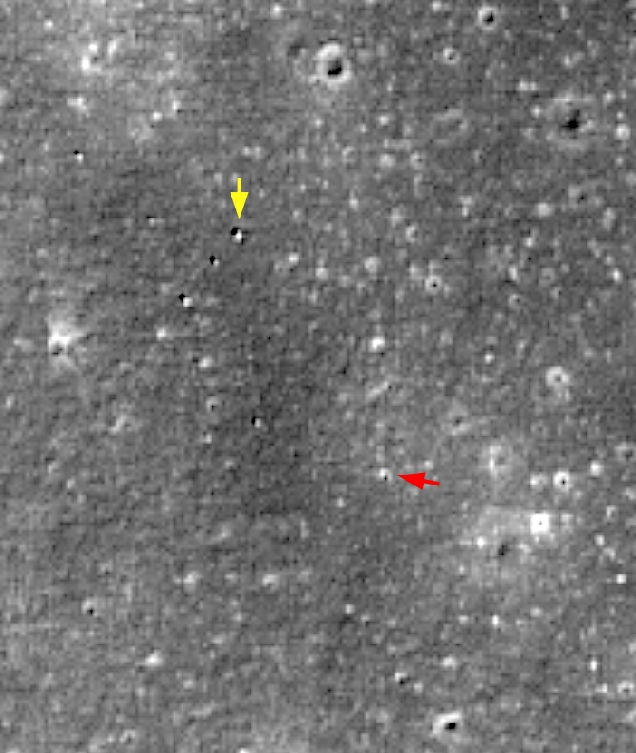
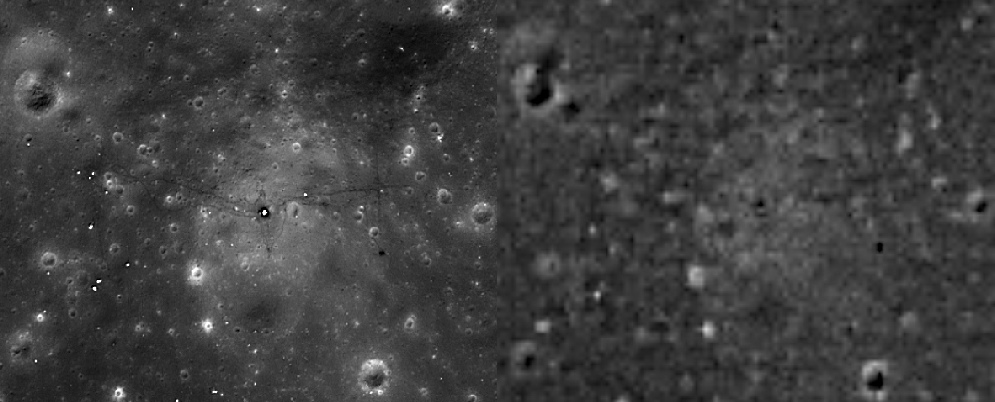
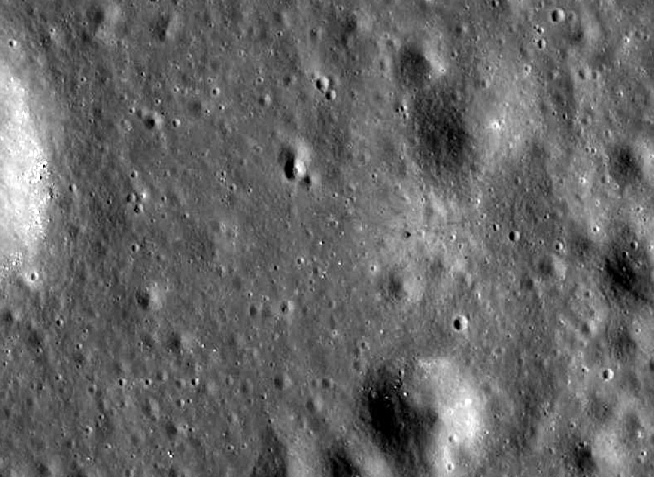
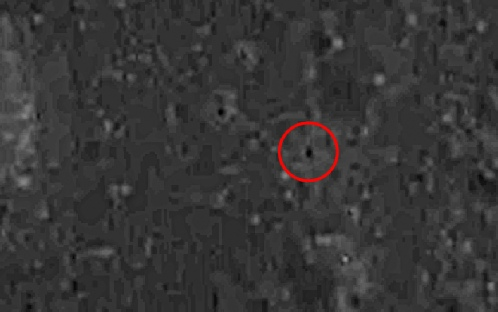
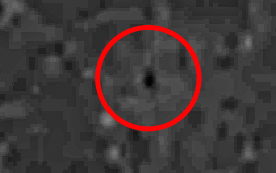
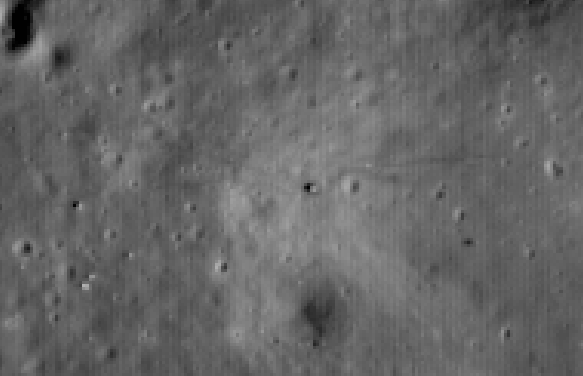
Below centre is an LRO view of the the LM. To the left of that is a Kaguya view taken with the same lighting angle as the LRO, and to the right Kaguya’s view with the light coming from the opposite direction. I’ve marked the LM with a small red dot to help identify what we’re looking at
What we see in the left image is a grey smear that, assuming it is a shadow, must be from something standing proud of the surface. On the right, that is replaced by a smear going in the opposite direction. There is nothing on the LRO image apart from the LM’s shadow that can account for that smear.


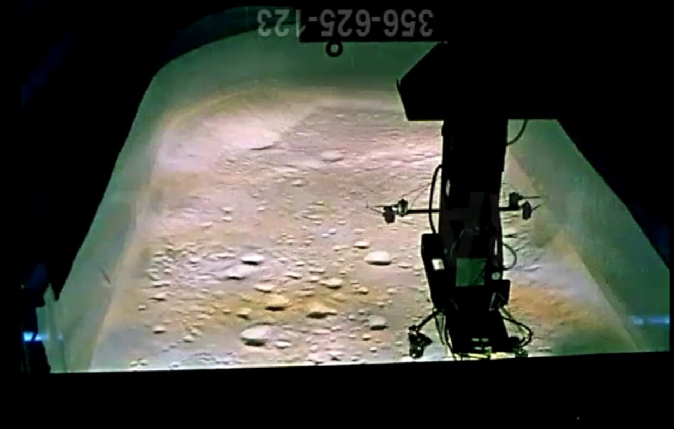
As with the simulators used and documented on this site for Apollos 12 and 15, there is footage available of Apollo 17’s mission, and we can compare the view shown in it with that of the LRO. The available view is from altitude, hence its inclusion at this point.
Good enough to practise a landing with, not good enough to show every small detail captured by the actual landing camera.
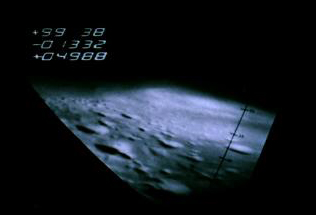
We’ll return to Camelot later, but for the moment let’s carry on with the landing approach. Shortly before the LM begins to make it’s final landing manoeuvres, we have a great shot of the area surrounding the landing site, complete with the LM shadow, which in the video can be seen moving from the edge of Camelot crater and getting larger as the LM descends.
By this altitude the oblique view does not show enough detail to identify any craters other than the larger one in the centre left of the video still (the crater is named ‘Rudolph’), so we will instead switch to one of the vertical views available at the ALSJ. There’s also just enough detail in Danuri’s view, so why not use it as well!


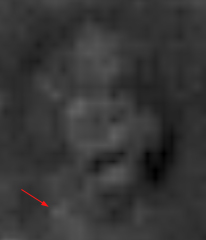
I’ll be the first to admit that it is by no means the clearest photograph of the lunar surface, but it is one hell of a coincidence that Japan has imaged something casting a shadow in exactly the same place as a lunar module is recorded as landing. Feel free to prove it is something else.
We be slightly more certain with Chandrayaan-
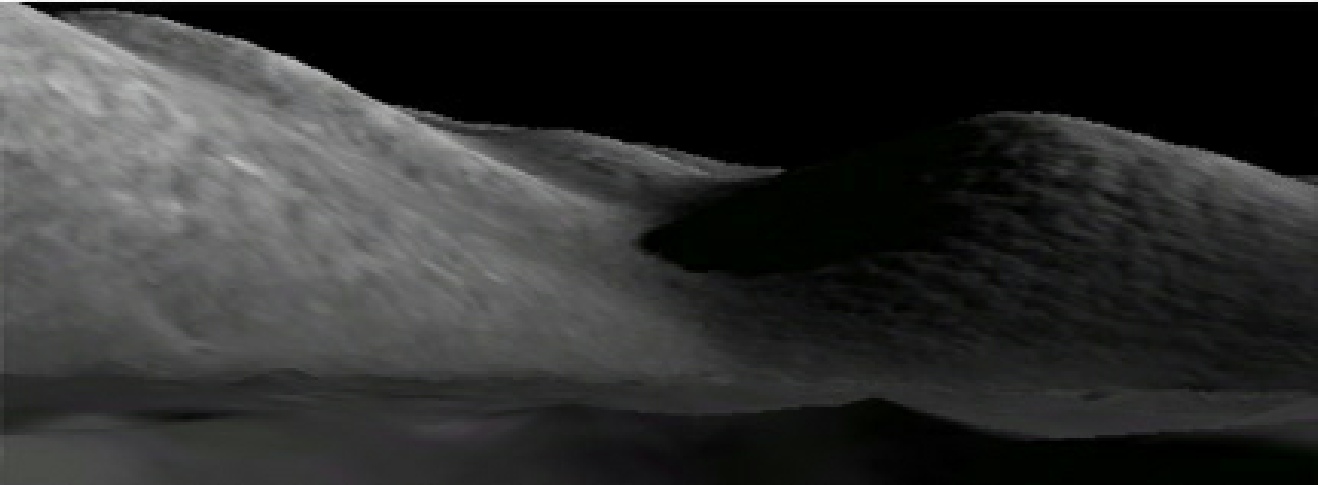
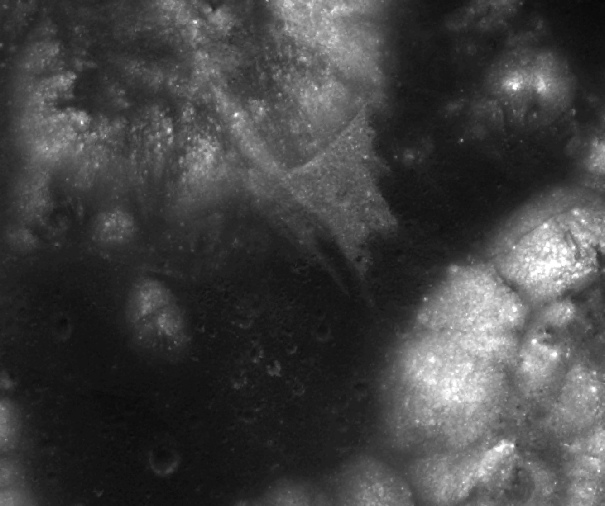
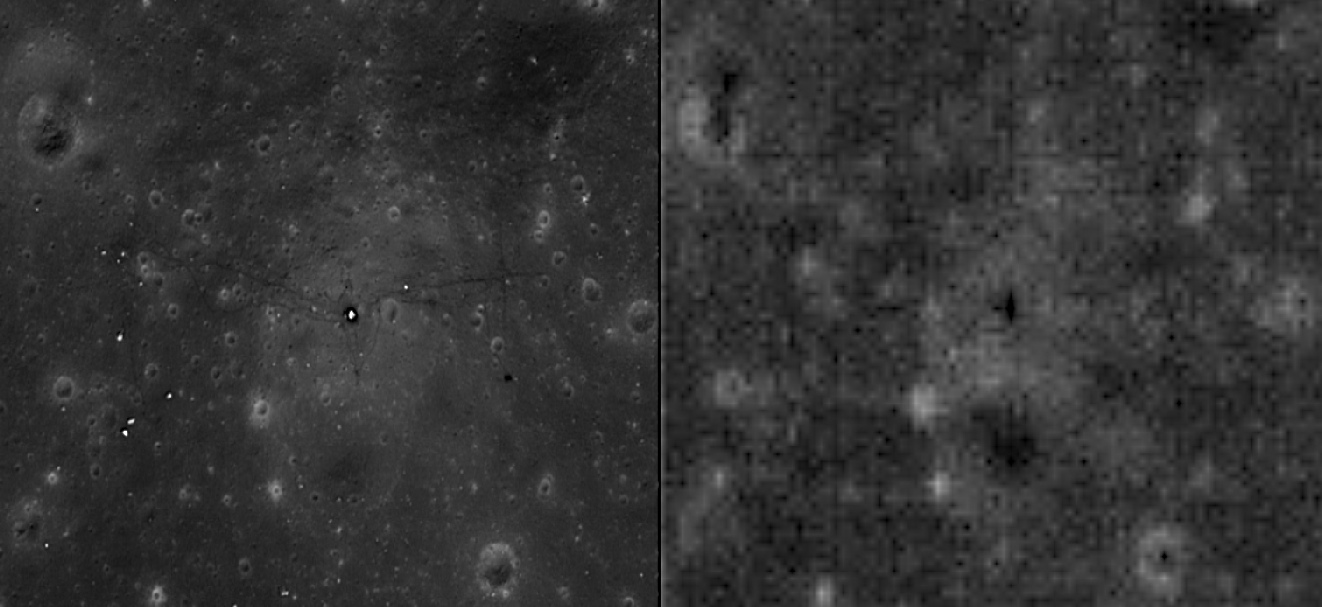
The main reason for returning to Camelot is what’s in the background. The slopes at the end of the north massif have been imaged by Kaguya’s stereo cameras, which means they can (like the Apollo 15 view we used before) produce an image of the view across Camelot.

Both images are centred on the LM, and the dark area at about 4 o’clock is the last parking spot of the LRV. Also discernible in Chandrayaan-
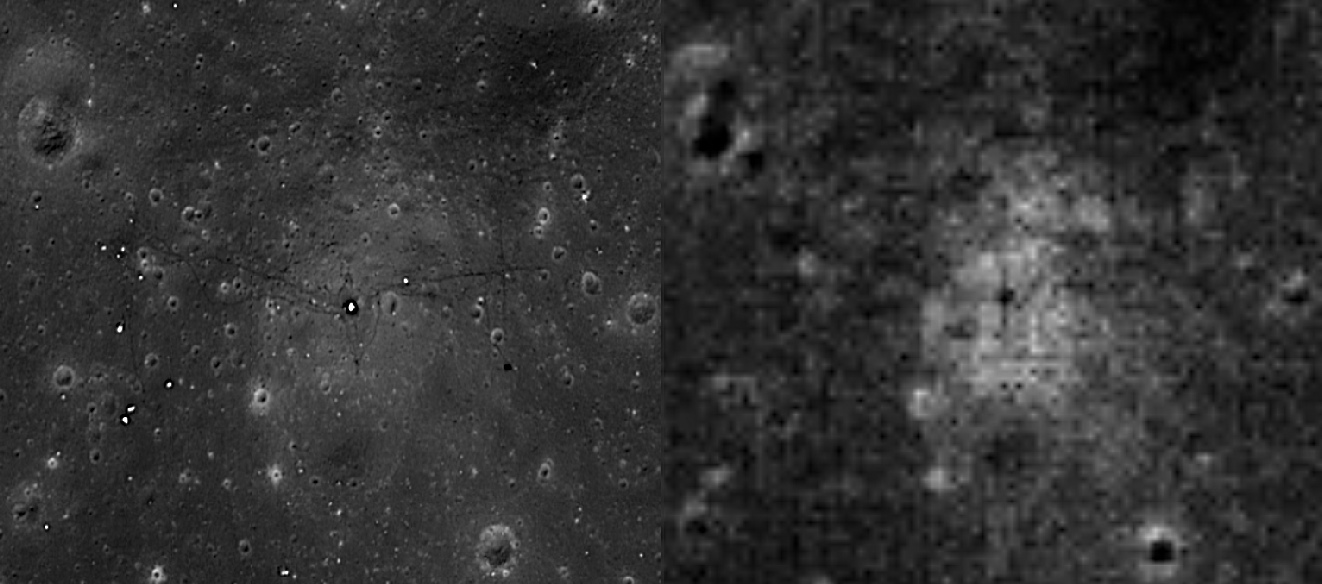
The Chandrayaan image shown above is one taken looking vertically down (the ‘nadir’) camera, but there are two others taken ‘fore’ and ‘aft’. We can look at those as well to see if they also show the same features. Here’s the fore image:
The LRV is less obvious, but a dark dot can be seen in the same location. The disturbed ground around the LM is very clear, and paths leading towards the ALSEP and SEP are just discernible.
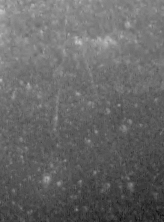
Now for the aft view:
Conclusion
So, what have we learned in this examination of the Apollo mission images?
Well, we can safely conclude that the anti-
The Lunar Orbiter probes did indeed produce fantastically detailed images, and the restored versions of these being produced by the LOIRP are marvellous to behold. In terms of surface detail, however, they pale into insignificance next to the LRO, and it is the LRO images that show conclusively that Apollo photographs and video show features on the lunar surface.
Even photographs taken in orbit during Apollo missions contain more detail than many LO photographs, and in turn these are no match for LRO images in terms of detail.
One argument that also gets trotted out with nauseating regularity is that LRO views showing Apollo hardware are obviously Photoshopped, and that the Apollo equipment has been added.
What the analysis of the photographs in this section shows is that they would also have had to add every rock and crater shown in the Apollo images to the LRO ones. No matter where you look in the Apollo record you can find what it shows in images taken by a probe 40 years later.
The questions every anti-
If they can do that without resorting to magic, or mentioning secret probes that no-
We went to the moon. It is Humanity’s finest achievement. Humanity’s least valuable members seek to disprove that fact.
India’s Chandrayaan-
It should, as usual, be pretty obvious that the 16mm footage is picking up details not visible at all in the LO photograph, but easily discernible in the Chandrayaan view.
The same is true as it moves across the next gap between hills.

And again as it meets the next range.
 Lunokhod 2

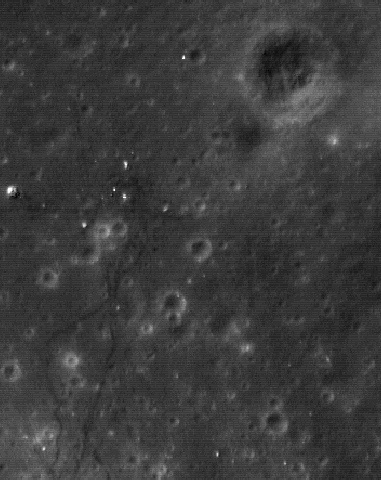
There are also valuable details to be had in the LRO images viewable here, here and here, which require you to navigate around yourself. A high resolution (66Mb) oblique view of the site (M192793697LR) is also available here (Google Docs link). I have taken sections of the images for use here. It is shown left, together with a Hubble view of the area.
The first shot to look at is just after a change in viewing angle so that the 16mm camera begins to look more downwards than along the valley, it’s shown on the right with the same area of the best quality pre-


So, right down to the last few seconds we can still make out the crater details and we can find those details in LRO images. And nowhere else.
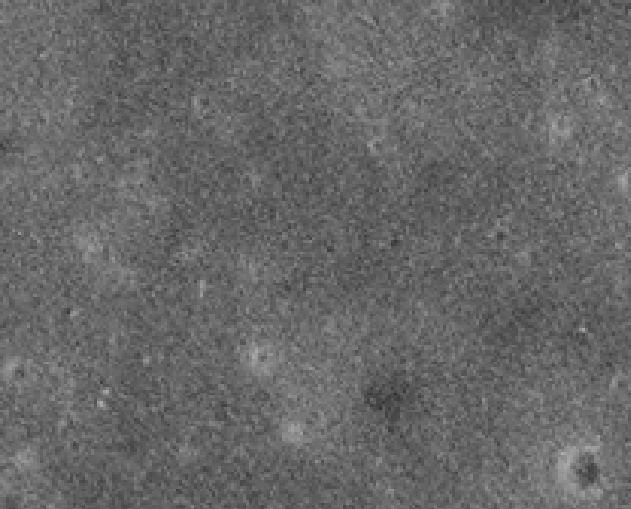
In this view the only really prominent feature is the disturbed ground around the LM and the path towards the ALSEP. What is interesting is the very obvious albedo difference around the LM, which could just be one of those things, or might be a result of the influence of the descent engine on the lunar surface.
Again it’s the Terrain Mapping Camera, which is relatively low resolution, but we can still clearly see the darkened area around the LM created by astronaut boots over their stay. There are also hints of the trails leading off to the east and west, but they aren’t as clear as the first Chandrayaan mission’s view.
Despite that, we have, yet again, a lunar probe confirming human activity at an Apollo landing site. We also have the second of India’s probes taking a view of the area. Here’s their view, compared with the LRO:
China’s probes also manage to capture views of activity around the landing area Here’s a view of the site, with Camelot crater just at the left hand edge.
And here’s one closer still.
Yet again China provides corroboration of human activity around the lunar module, and yet again a country with no reason to support anything the US has ever done proves that they landed on the moon, just like every sane person knows they did.
Korea’s Danuri also reveals a human presence in both their views (so far) of Taurus-
It really doesn’t matter who takes the photo, there’s a human presence there.
I could spend hours and many photographs exploring every image taken thanks to the excellent coverage of the area, and in some respects I have already done that on internet forums.
What I will do is cover a couple of the key craters -
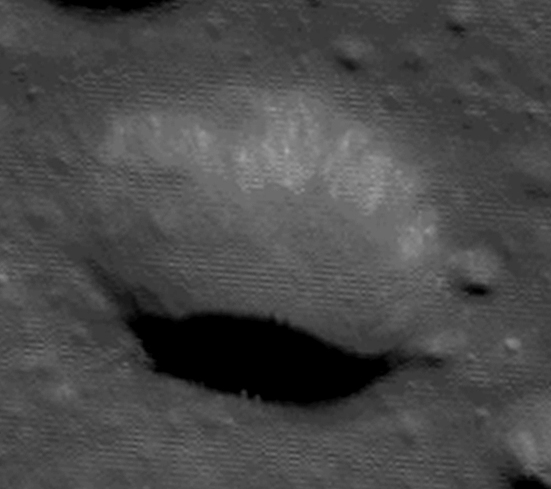
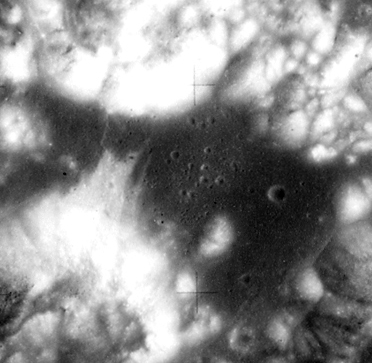
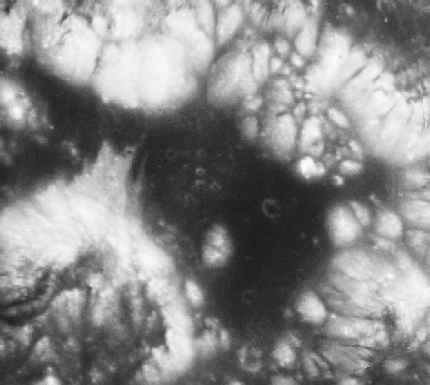
Let’s look at Shorty first.
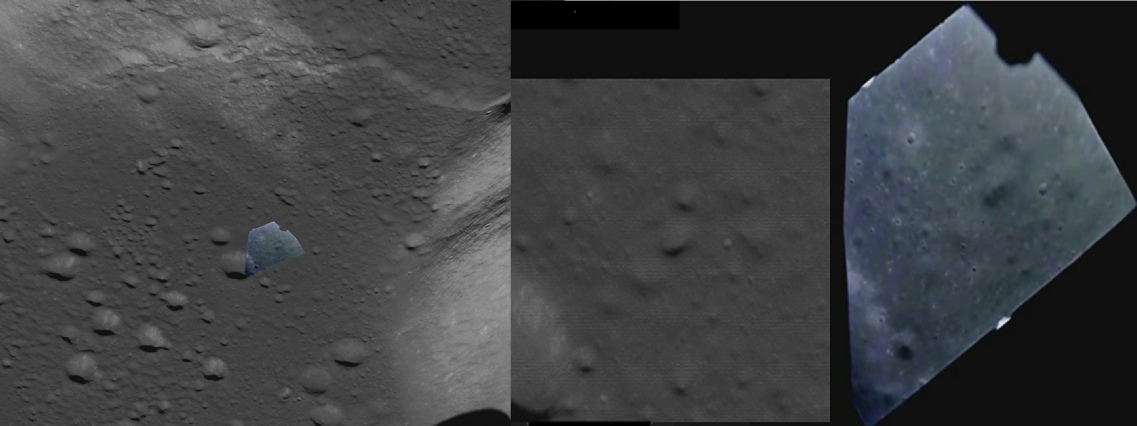
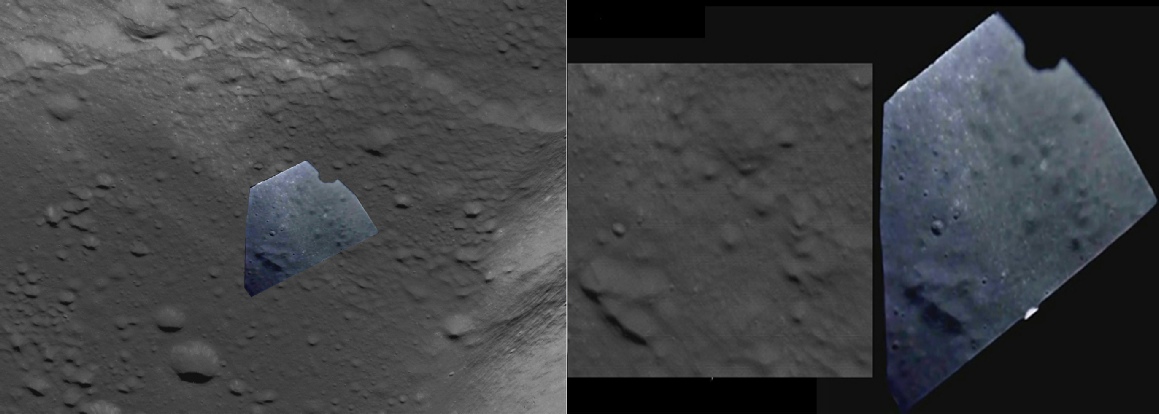
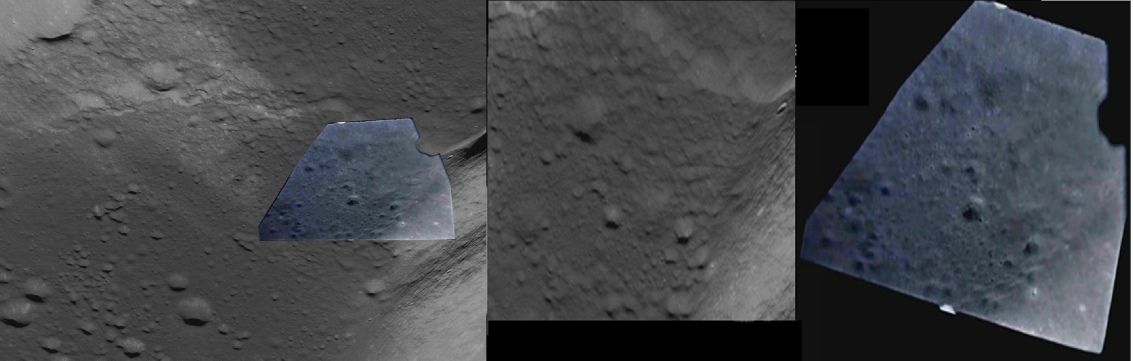
Shorty is a 110 m wide, 14m deep crater visited as part of EVA 2, and is significant because it was believed to a volcanic vent, something initially believed to have been confirmed by the presence of orange soil (it turned out to be titanium rich glassy beads). A detailed panorama was taken of the crater, shown below with a high resolution LRO view (below left). Chandrayaan’s view is shown below centre, and Danuri below right
All three lunar satellite views have been rotated to match the Apollo panorama, and if there are any rocks in the wrong place, or missing, then I’d love to hear about it. Chandrayaan’s lower resolution means it can’t pick out much more than the large rock picked out by the red arrow, but the features inside the crater can be made out. Likewise Danuri’s view, which can make out the broad structures but not the smaller rocks.
The debris mounds are all in the correct place, and in the correct proportions, and the boulders are correctly positioned in the crater floor and on the slopes. The only differences can easily be accounted for by the panorama’s stitching.
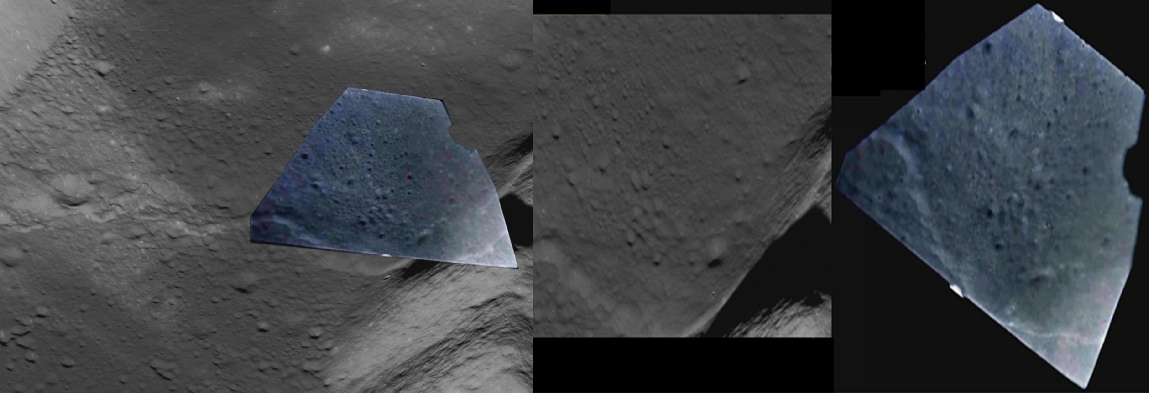
The rocks around the crater can also be picked out -
1 minute 46 seconds
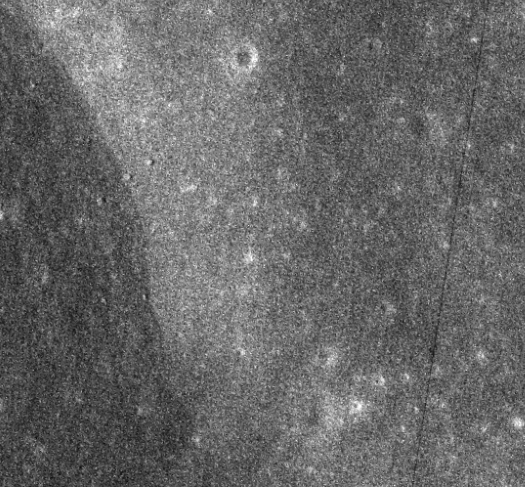
Even Danuri’s Shadowcam (below left), designed to look at permanently dark areas but here looking at the view under Earthshine, can pick out the larger rocks. Their LUTI imager (below right), is much clearer, and again confirms the Apollo imagery as 100% accurate
and again in June 2023.


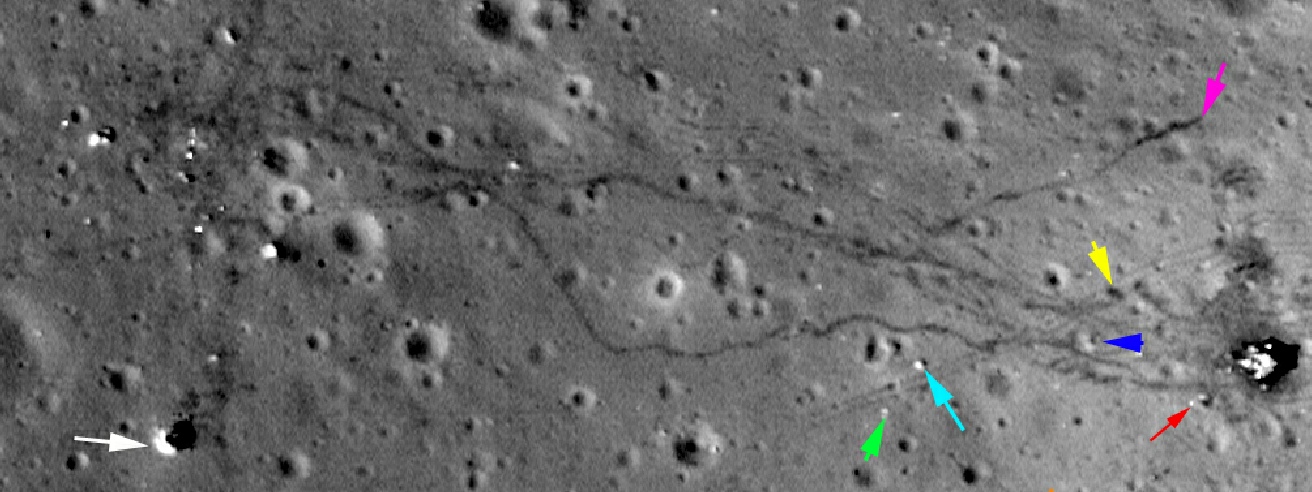
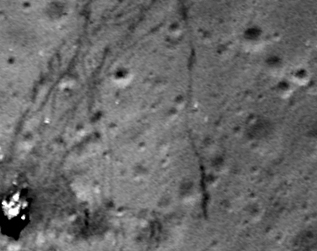
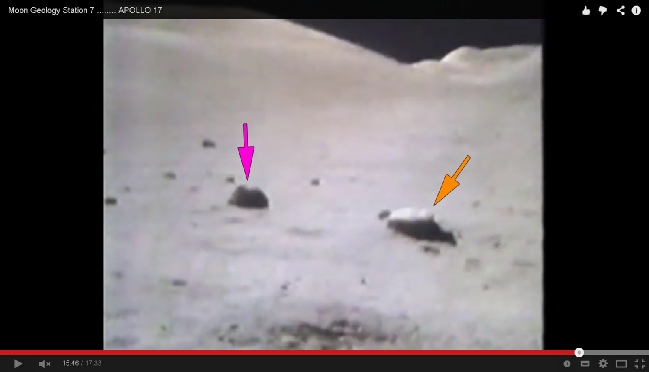
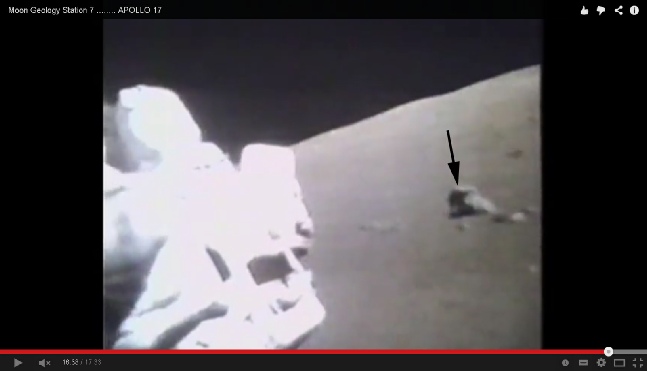
Camelot crater was visited by the crew on the ground, so it ought to be possible, you would think, to spot those boulders on photographs taken by the Astronauts on the surface. Unsurprisingly, this is exactly what you can see. Below left is AS17-


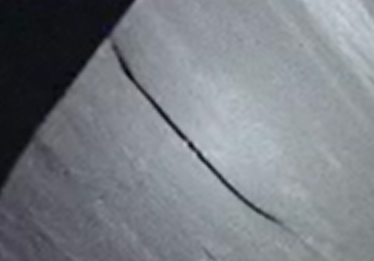
The most obvious one is this one, as shown in this National Geographic magazine from September 1973 (below), which is cropped from this photograph.
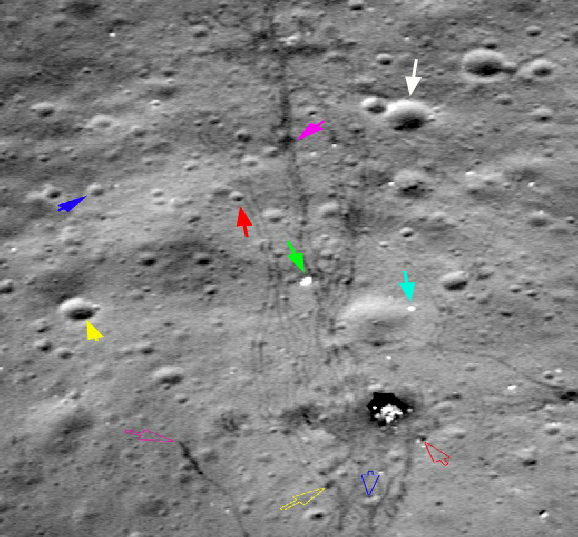
The trail is centre left of the image, and its appearance in National Geographic is absolute proof that it was not somehow added to Apollo images once they were found in LRO images. They were known about and it was a well documented feature during and after the mission.
A closer view of this particular trail is shown below, together with the LRO view of the same feature. It should be self-
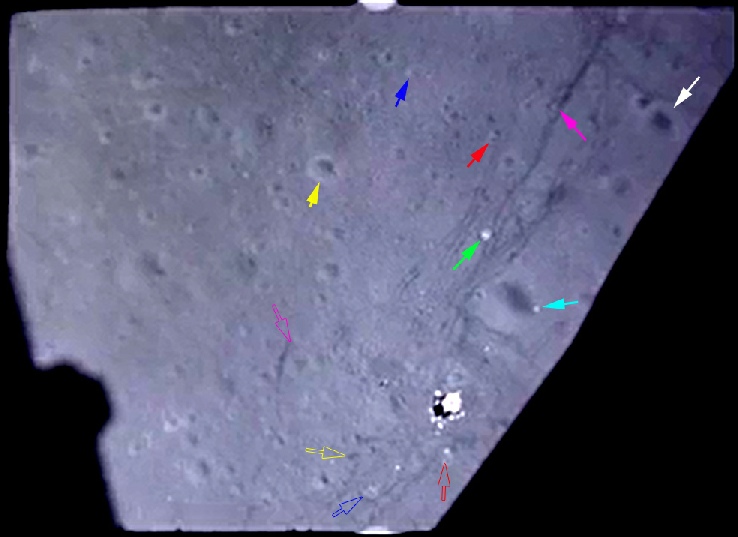
Next to National Geographic’s page is roughly the same area imaged by Danuri (top left) Kaguya (top right), Chandrayaan (bottom left), and Chang’e-

1 minute
2 minutes
4 seconds
2 minutes
23 seconds
And as with the other missions, we can go to the source files and prove that China did publish images of Apollo istes -
CE2_BMYK_CCD-
CE2_BMYK_CCD-
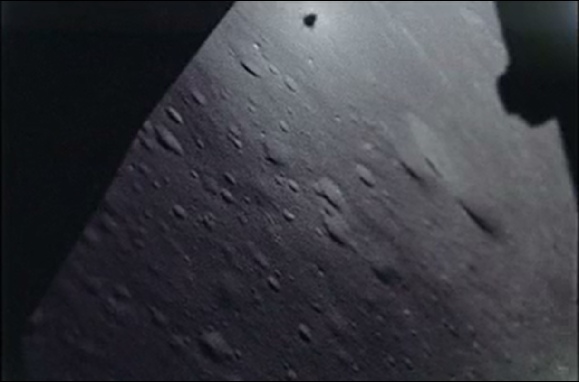
cover Apollo 17, but there ‘s a malfunction from the rear facing camera, meaning the only usable one (in terms of seeing details of Apollo 17) is the forward camera.
Here it is:

And here’s the processed result -
Prove me wrong.

It took another couple of images in August 2024: